Skip table of contents

Bulk Operations


Bulk Edit

Bulk Edit

You can bulk change items in most lists in Daktela (e.g. CRM, Tickets, Knowledge Base, Campaign Records, Reports, etc.)

  • Select the items you want to edit by checking the select boxes at the beginning of the line.

  • Click the change button to open the Bulk edit dialog.

  • Set up your change: from the drop down list, select Empty, or Change to and enter the value you want to change to in the field next to the drop down list.

  • Click Change in the bottom right hand corner.

  • Wait for the edit process to end. Once it is done, click Load new data at the top of the list.


Merge

Merge

You can merge list items in CRM Contacts and Accounts and in Tickets.

  • Select the items you want to merge by checking the select boxes at the beginning of the line.

  • Click the Merge button to open the Merge dialog.

  • Select the information you want to keep in the merged item.

    • In lines with radio buttons, you can only choose one option per line. The information you don't chose will be lost!

    • In lines with checkboxes, you can choose as many as you like.

    • Click Custom adjustments to open options for custom edit of tickets informations. 

  • Click Merge in the bottom right corner.


Bulk Delete

Bulk Delete

You can bulk delete items in most lists in Daktela (e.g. CRM, Tickets, Knowledge Base, Campaign Records, Reports etc.)

  • Select the items you want to delete by checking the select boxes at the beginning of the line.

  • Click the Delete button to open the Delete dialog.

  • Confirm by clicking Delete.

  • Wait for the delete process to end. Once it is done, click Load new data at the top of the list.

Bulk anonymise

From version 6.21, you can bulk anonymise in CRM Contacts, Tickets, Listings → Interactions and Listings → Activities.

In CRM Contacts and Tickets, select the list items you want to anonymise and click GDPR Erasure/Delete Tickets and Anonymise Activities.

In Listings, filter out the interactions or activities you want to anonymise and click Anonymise at the top of the list.

The anonymised data will be deleted from your domain, but their name will remain in the domain's database.


Export

Export

You can export items from most lists in Daktela.

  • Click the Export button at the top of the list. The Export dialog will open.

  • On the left hand side, you will see a list of all fields available to export – these will be the columns in your export file.

    • Set up the column order by entering column numbers next to the fields you want to export. Only fields with numbers will be exported. To export all fields in default order, don't enter any numbers.

    • Click the Arrow button to show more fields. The extended fields will only be exported if you give them a number to set up the column order.

    • If you have any custom fields, you can select which ones to export at the bottom of the list.

  • On the right hand side, set up your general export settings:

    • Enter a custom file name in File name field.

    • Export unique name: turn on to also export unique names.

    • Autodownload: turn on to automatically download the export file after you click Export.

    • Format output: turn on to export fields with formatting – e.g. times: 72 → 00:01:12, direction: in → Incoming etc.

    • Export type: select XLSX or CSV.

    • Separator for custom fields with multiple values: enter the separator that will be used if your custom fields contain multiple values.

  • When you have set up your column order and general export settings, you can Save your export scheme settings for later use, then click the Export button at the bottom of the dialog to download your ouput file.

Export Schemes

Export Schemes

If you often export with the same settings, save them in a scheme and save time by loading them next time you need to export data.

  • Set up your export settings by following the instructions above.

  • Before you click Export in the last step, click the Save as button at the top of the dialog.

  • Enter a scheme title and click Save.

  • Next time you need to export, you can do so:

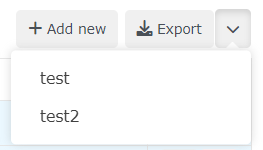
    • directly from the list of items by selecting your saved scheme from the drop down list on the Export button:

    • from the Export dialog by selecting your scheme and clicking Export.


Import

Import

Click the Import button in the top right corner of the page. The Import dialog will open.

Step 1

  • Download a template in .xlsx or .csv format. If you prefer, you can use your own file – you will have to manually pair your columns if they are in different order.

  • Fill out the import file or copy and paste data into it.

  • Select the file or drag and drop it into the Import dialog. Click Next.

Step 2

Set up your import settings.

  • Use first line: select yes if your columns don't have titles and you would like to include the first line in the import.

  • Import unique name: select yes if your upload file has a column with a Unique name. If you are using the template, it does not contain a Unique name column.

  • Check duplicates: select yes to check for duplicate entries. Checks the Title column by default. If Import unique name is selected, checks Unique name.

  • When found skip: select yes to skip duplicate entries. If you select No, you can set up the action to take if a duplicate is found in the next step.

  • Separator for custom fields with multiple values: if your custom fields with multiple values are all in one column, select the separator.

Click Next when done.

Step 3

Drag the column names on the right hand side to the correct fields on the left hand side. If you used the template, the columns will already be mapped correctly. You can also use the grey buttons next to the Columns heading to pair the columns by title or by order or to remove the current pairings.

If you have set Check duplicates to Yes and set When found skip to No in the previous step, select if you want to Rewrite or Add new for each field if a duplicate is found.

Click Next when done.

Step 4

You will see an overview of the entries that are to be imported. If you like, you can Save your import scheme settings for future use by entering a Scheme title and clicking Create.

Click Import.

Wait for the process to finish. If your import has finished successfully, you will see a notification at the top of your screen. Click Load new data to see your new entries.

If there were any errors, an error log will download automatically. Open it, resolve any errors and repeat the process if necessary.

Import Schemes

Import Schemes

If you often import with the same settings, save them in a scheme and save time by loading them next time you need to import data.

  • Set up your import settings by following the instructions above.

  • Before you click Import in the last step, enter a Scheme title and click the Create button at the top of the dialog.

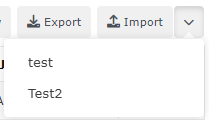
  • Next time you need to import, select your saved scheme directly from the list of items from the drop down list on the Import button:

  • Select a file to import, click Next and you will go directly to Step 4 of the import process.

Import File Requirements

Import File Requirements

Encoding:

  • .csv – UTF8 required

  • .xlsx – Standard Excel encoding

Field types

Cells must be formatted as text before you save your file.

Number of fields

The recommended max number of fields is 25, ie. columns A – Z. In some cases, more fields may not import.

Field separator

  • ✔️ comma or semi-colon (, ;)

  • ❌ tab, space, other separators

Multiple value separator in fields

You can select the separator you have used in your file during the import process. We recommend to use comma, full stop or semi-colon (, . ;)


Export from CRM to Records

Export from CRM to Records

Go to CRM → Contacts.

Click the Export to Records button at the top of the list. The Export dialog will open.

  • Check duplicates: By default duplicity is checked by Phone number.

  • Separator for custom fields with multiple values: Used when importing several CRM fields into a record custom field with a single value. If the record custom field can have multiple values, each value is set separately.

  • Record type: select to which record you want to export your contacts.

  • User: select user to assign to the record or select none.

  • Statuses: select statuses for the record.

  • Action: select action for the record. You can choose from four options – Not assigned, Done, Rescheduled, Call immediately.

  • Fields: Pair contacts fields to the records fields.

Click Export to records to finish exporting contacts.


Export decision tree

Export decision tree

This action will create an SQL file for the selected decision trees, including their decisions and actions, so you can transfer them to another database. It will also genereate a file with dependencies (e.g. queues) which you will have to transfer manually. Please be careful with IDs and make sure that relevant IDs are not taken in the target database.


JavaScript errors detected

Please note, these errors can depend on your browser setup.

If this problem persists, please contact our support.