Click-to-Call Routings
To set up the look and feel of your click-to-call client on your website, go to Manage → Routings → Web chats.
Setting up click-to-call is similar to setting up a web chat. You will simply disable the web chat and only leave click-to-call active.
These instructions only outline the settings needed for CTC. You do not need to change any of the other settings – they are only used for web chats.
Inbound Routings/Connectors
It is recommended to first create a corresponding CTC queue before creating a routing/connector so you can pair them in the routing/connector.
Go to Manage → Routings → Web chats. You will see a list of your inbound routings/connectors. Each routing/connector corresponds to a separate web chat or click-to-call.
Click Add new to create a new routing/connector. The routing/connector details will open.
When you are done creating or editing a routing/connector, click Save to return to the routing overview and make sure to click the Apply configuration changes button in the top right corner.

It will take a few minutes for the changes to take effect on your website. If you want to see them immediately, open your website in a new incognito mode window.
When you set up a new web chat routing/connector, click the blue Get code button at the top of the Preview section in the routing/connector details, copy the code and paste it into your web page.

For further customisation, use the toggle switches under Default values and Events to insert script templates into the code.
General Settings
Title: enter a title.
Description : enter a description.
Language: select your web chat language.
Important settings for using CTC without web chat:
CTC queues: select a Click-To-Call queue. If you have not created a queue yet, you can come back and select it later. Make sure your CTC queue is active!
Next destination: since you want to hide the web chat and only show CTC, select Terminate.
Client Settings
Window timeout: choose if you want your CTC to stay closed (the customer needs to click it to open it), to open immediately when the customer reaches your website or to open with a certain delay.
Important settings for using CTC without web chat:
Hide in offline: select Hide only chat.
Hide in overload: select Hide only chat.
Hide on mobile device: select Hide only chat to show CTC on mobile devices, otherwise select Hide all.
Greetings
Greetings open above the CTC and can draw attention to it. You can use greetings specific to each page of your website – just define where to use each greeting in the Url pattern field.
Enter your greeting text in the Bubble text field first to activate the other fields.
Bubble title: this text will be in bold at the top of the greeting.
Bubble timeout: choose if the greeting should open immediately or with a certain delay.
Bubble text: the main body of your greeting.
Bubble image: enter the full address of the image you would like to use in your greeting.
Url pattern: if you only want to display the greeting on a specific page, enter its relative URL here.
Design
Set up how your CTC will look. Settings with an exclamation mark 
Html holder: The html element CSS selector where the CTC will be placed. If left empty, BODY will be used.
Window design: select a design. Only one default design is available. Use the blue + button to create your own design.
Download the Translation, Template, Style and Script files, edit them to suit your needs, and re-upload them. Enter your new design title and click Save.
Button type: select Bookmark (minimised chat) or Icon (small and round).
Window position: left or right.
Widow tint: select your preferred design – see the changes in the preview window.
Window rounding: 0 = square, 50 = max. rounding.
Window shadow: 0 = no shadow, 50 = max. shadow.
Window colour: select a colour from the palette or enter a hex code.
Allow font: select No to use your website's font in the CTC.
To follow these instructions, you must already have the Google Tag Manager code installed on your website. If you don't, follow the Google documentation first.
Log in to your Google Tag Manager, open Workspace and click Add a new tag.
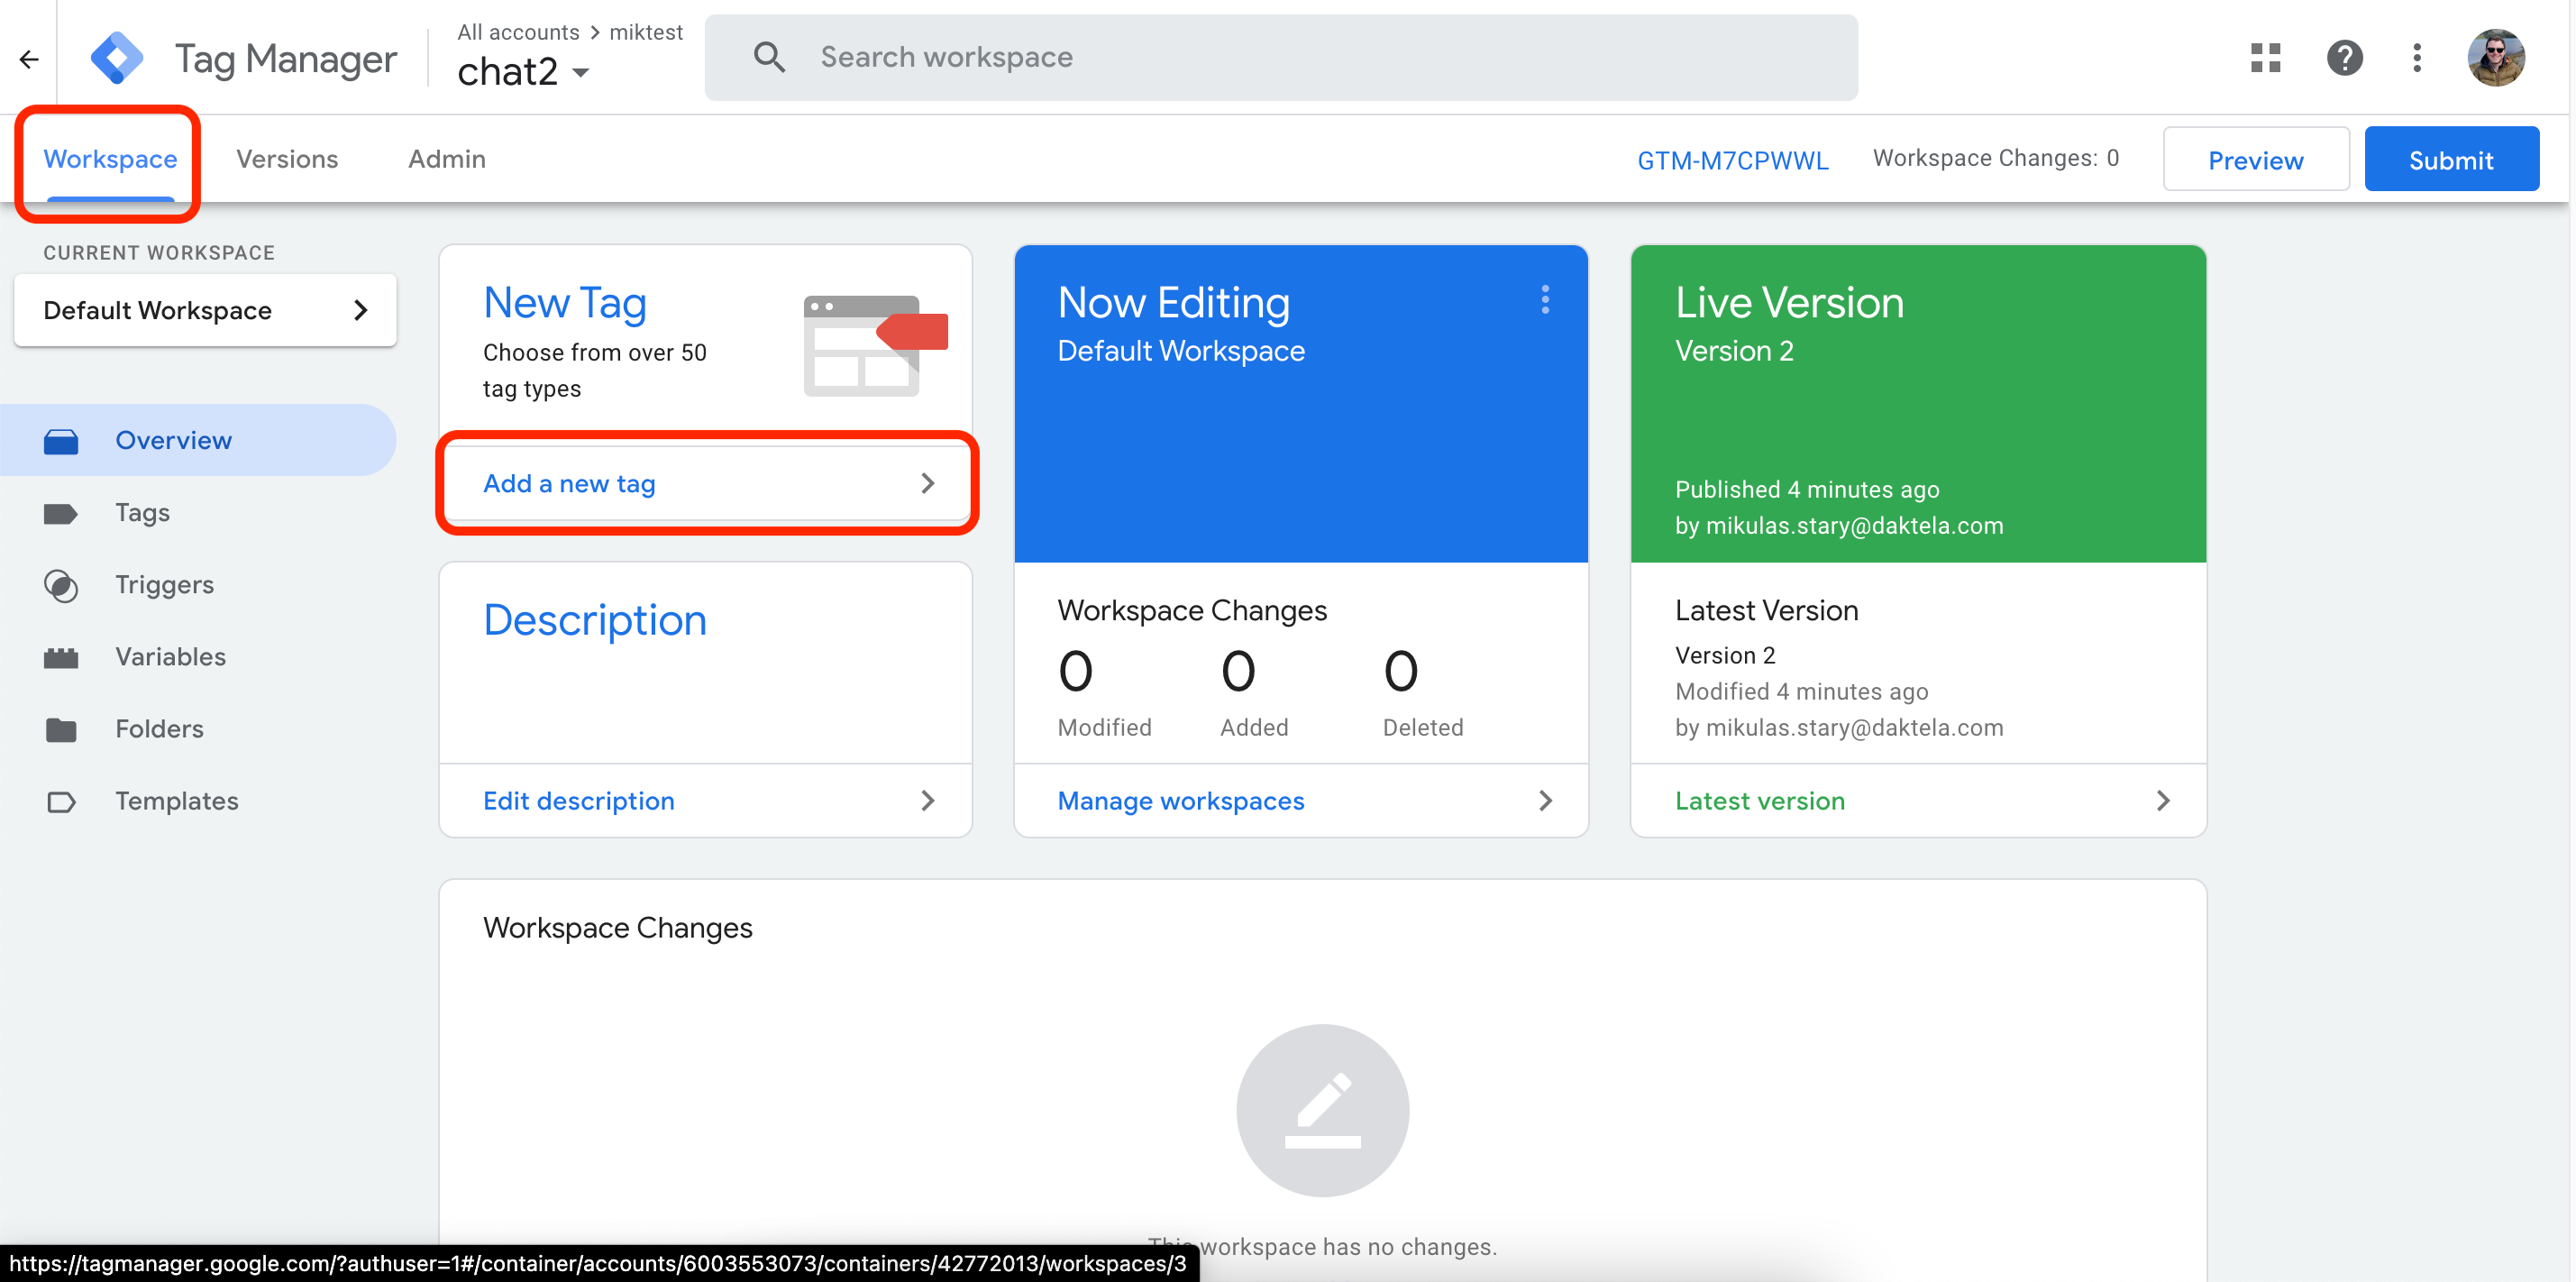
Enter a tag name, then click Tag Configuration.
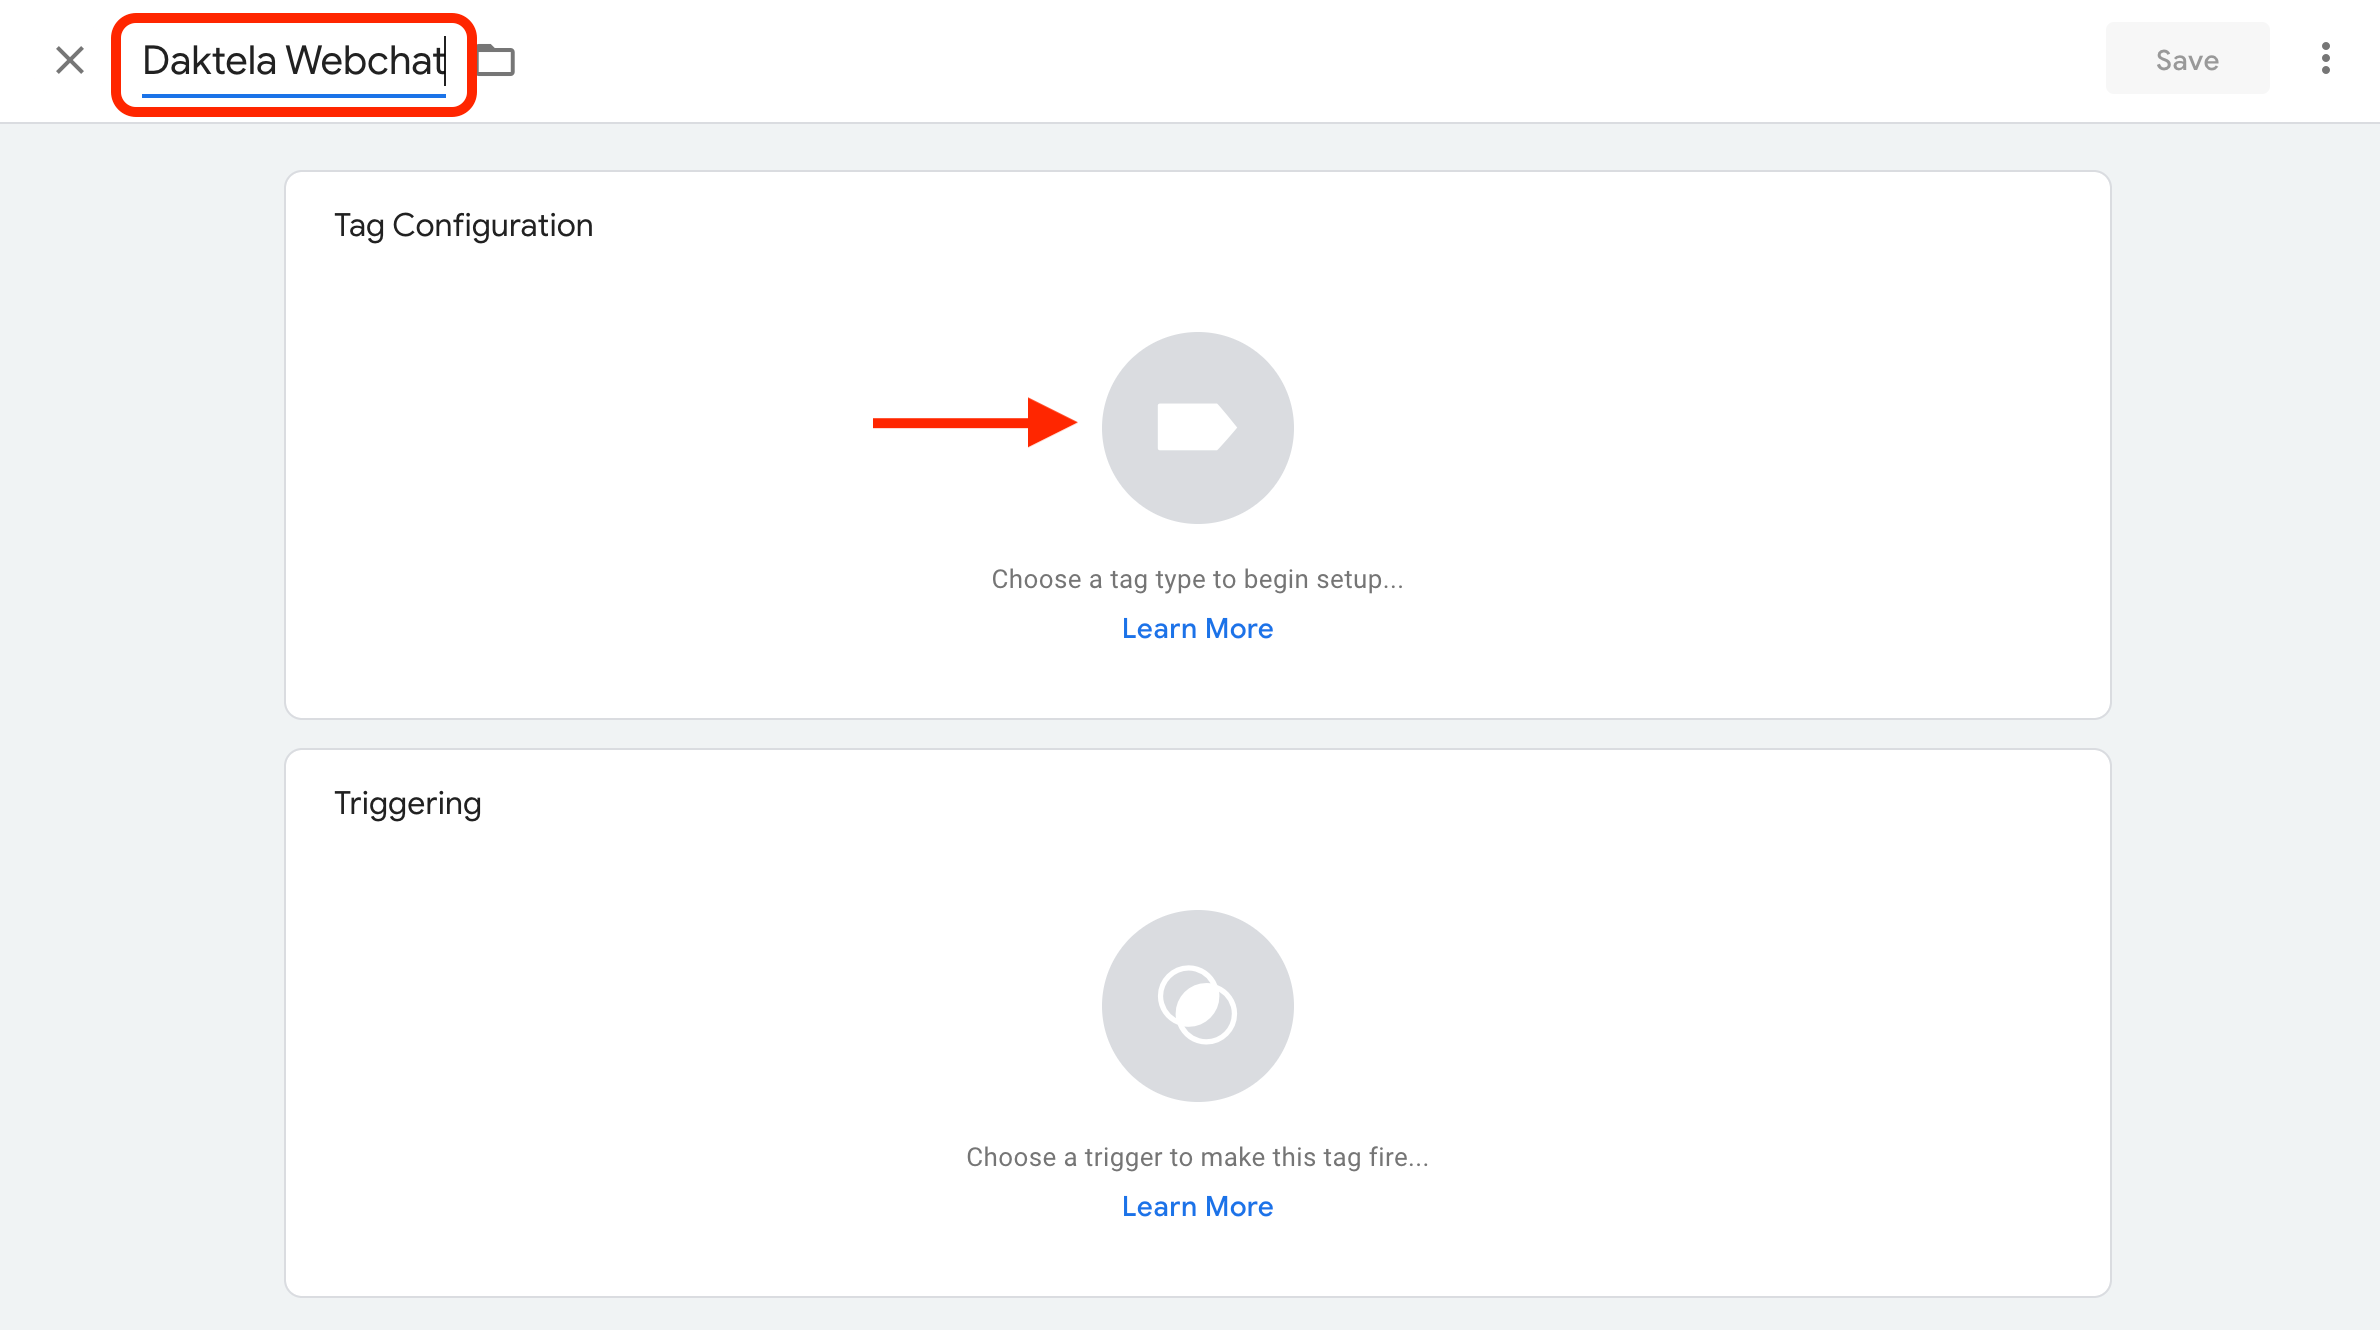
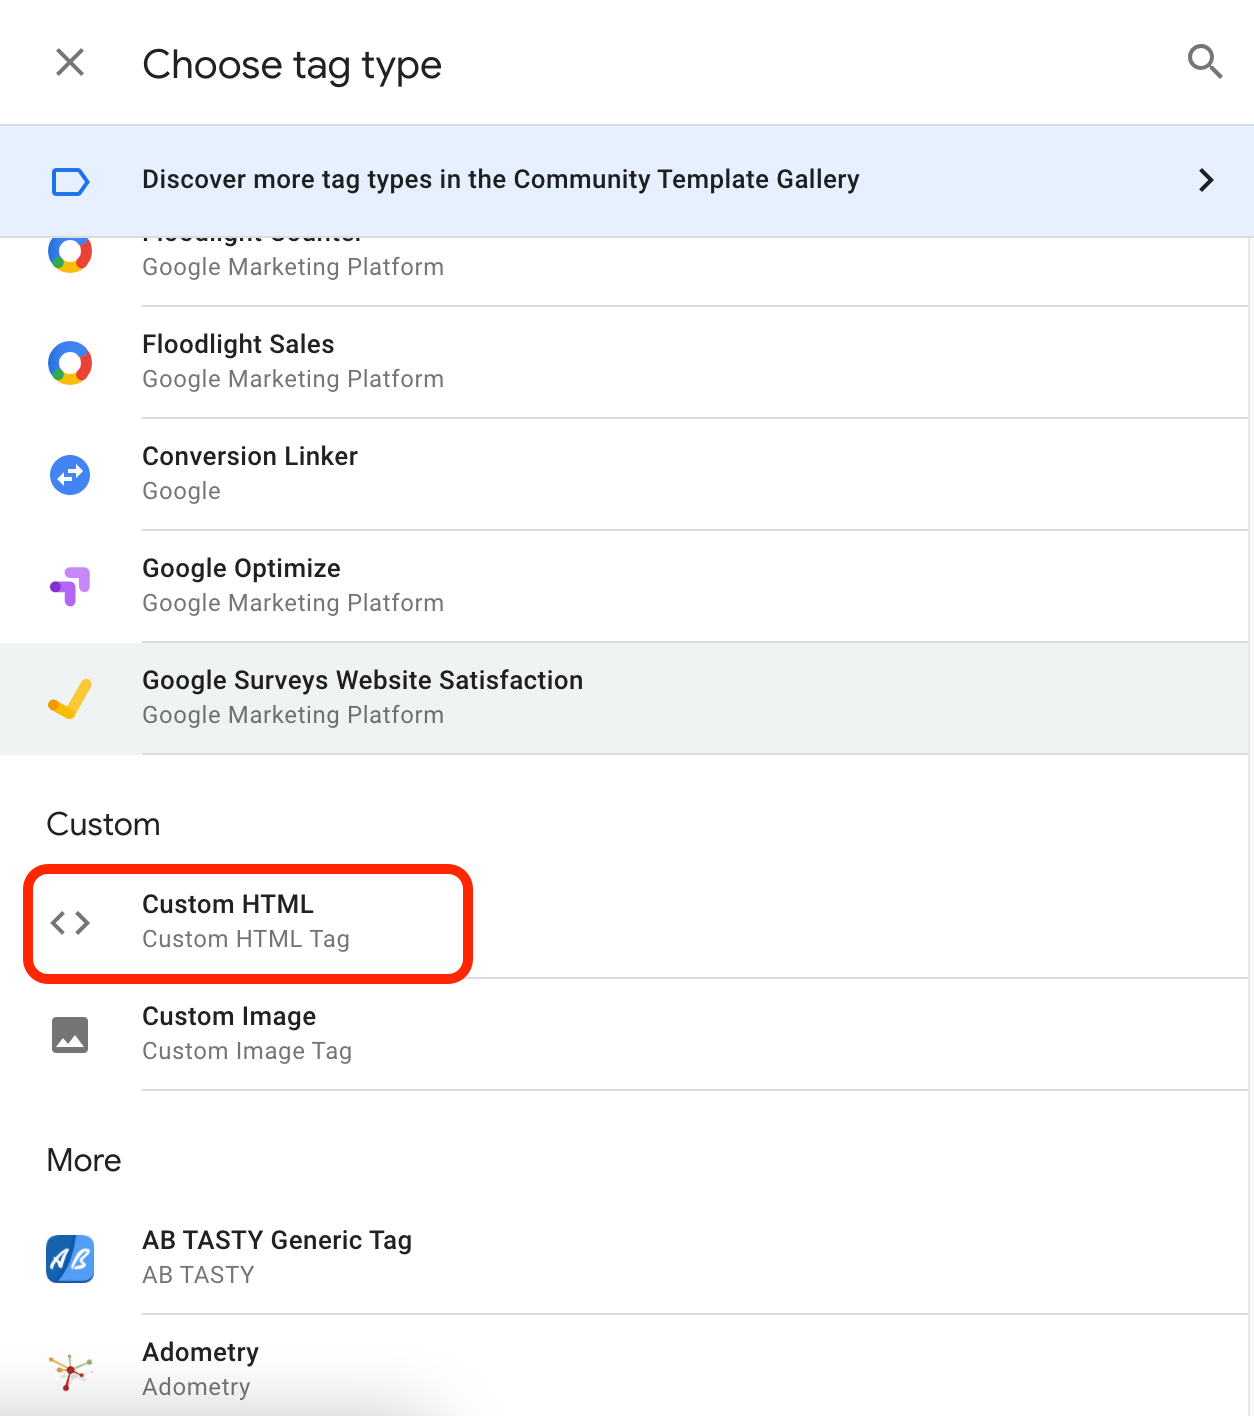
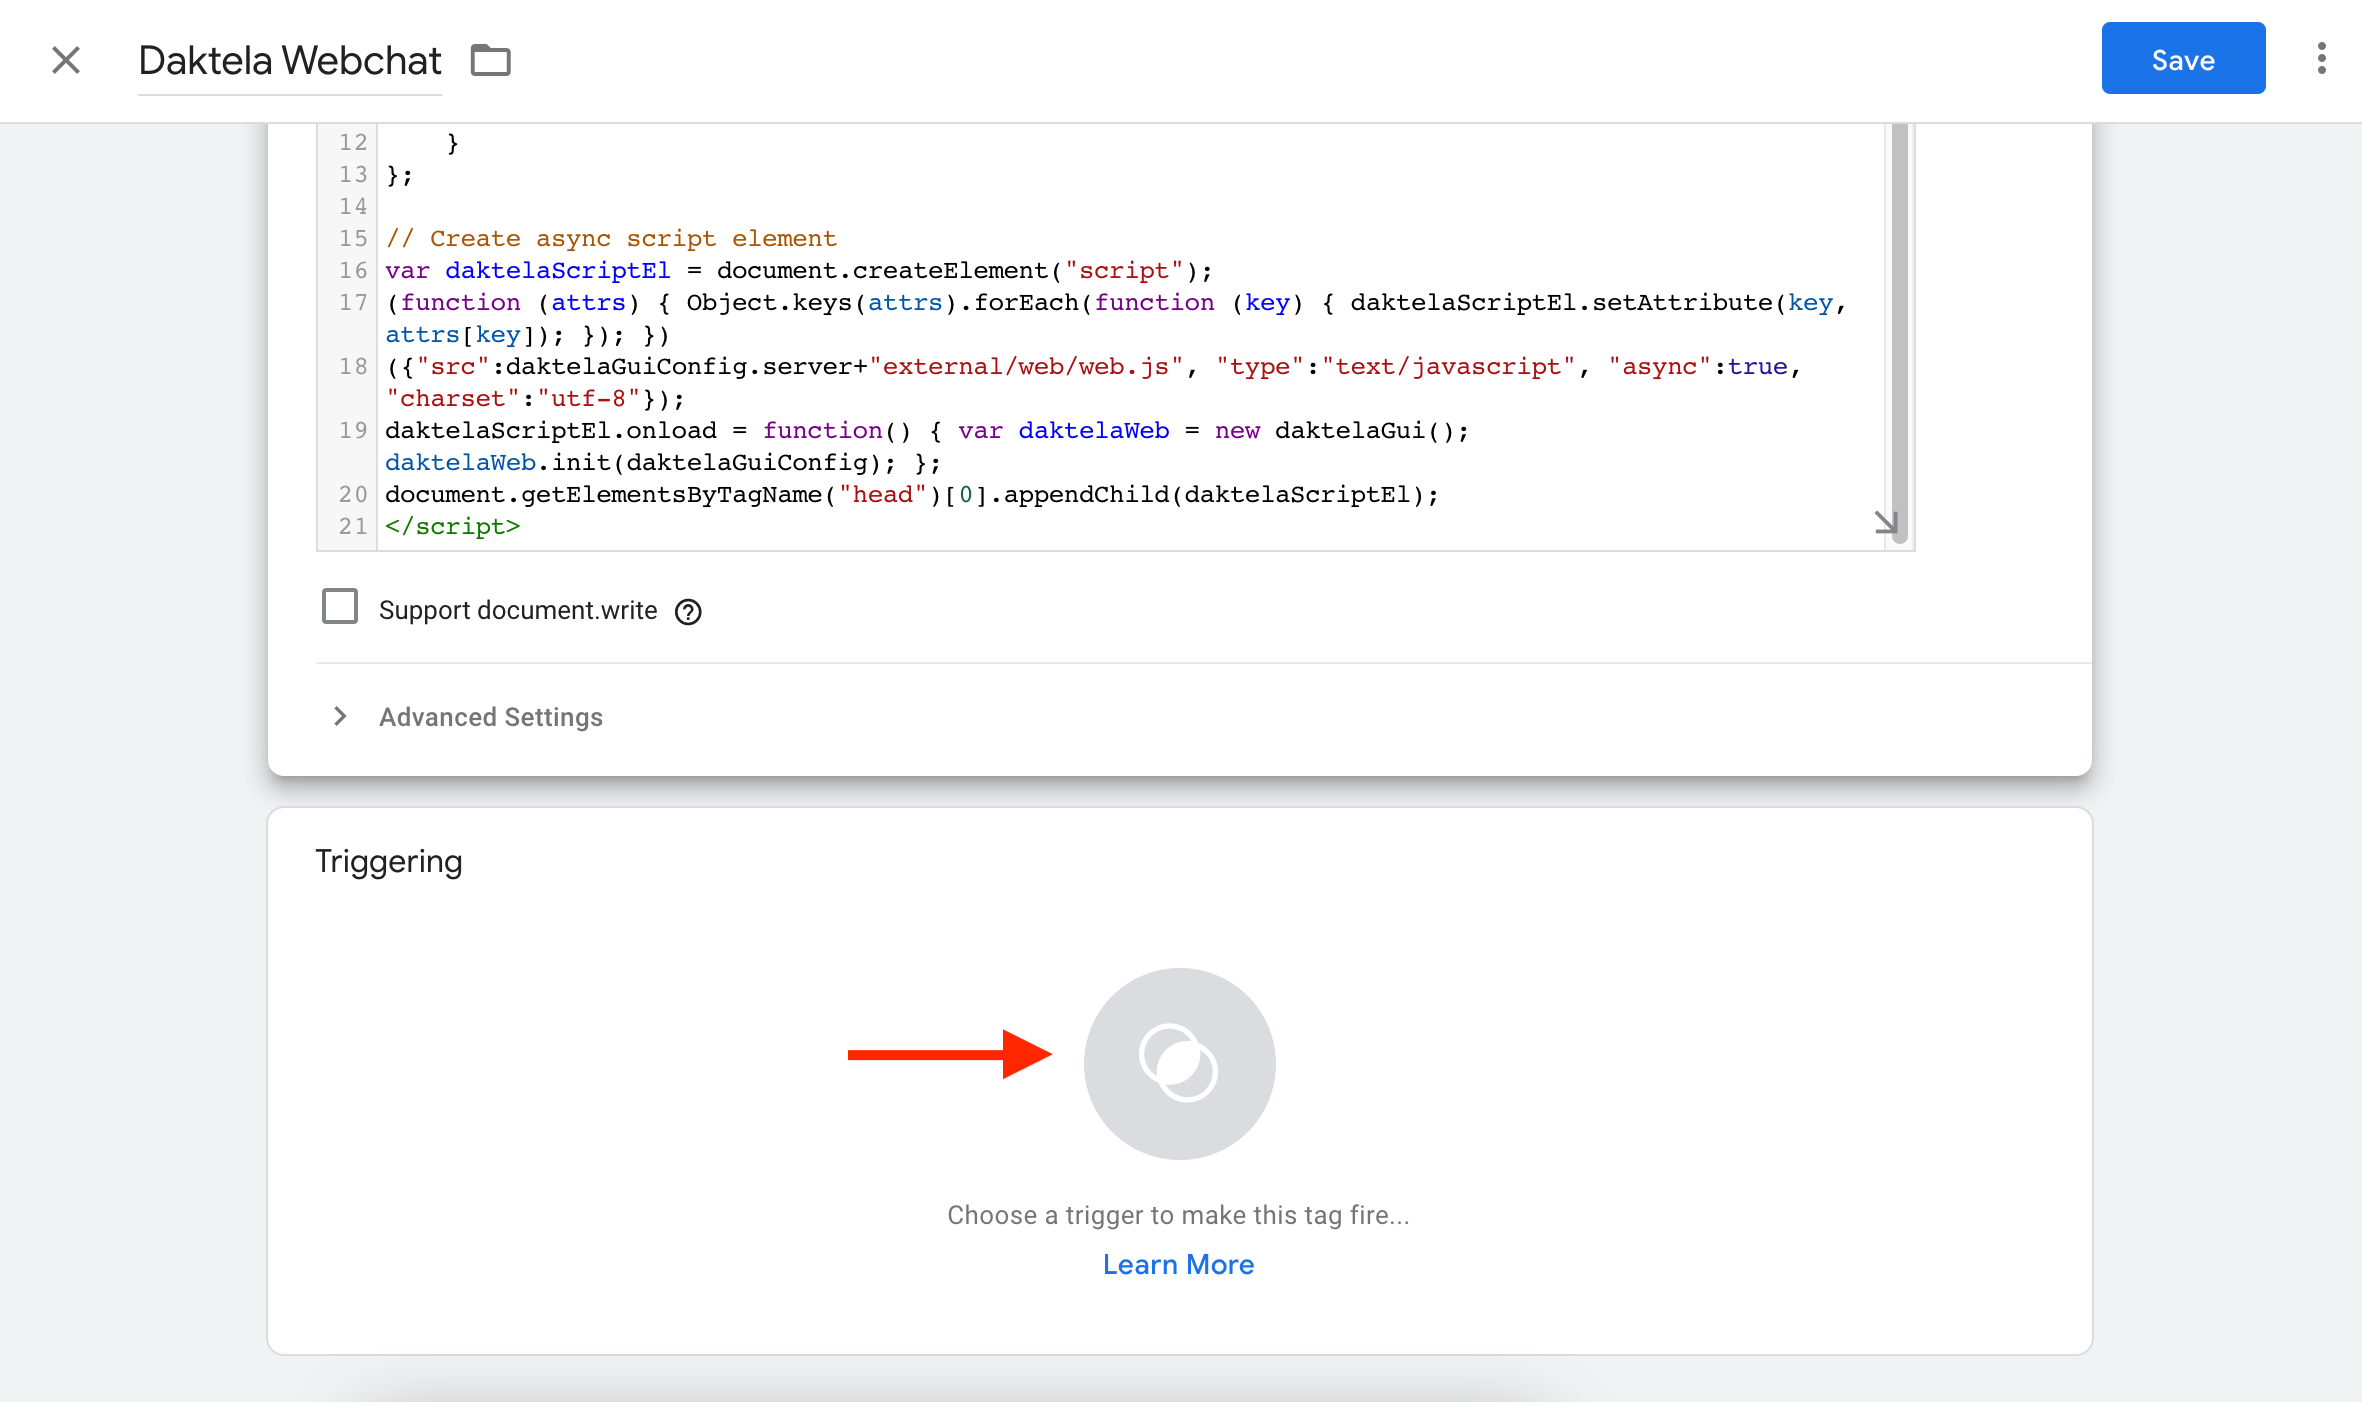
Select Custom HTML.
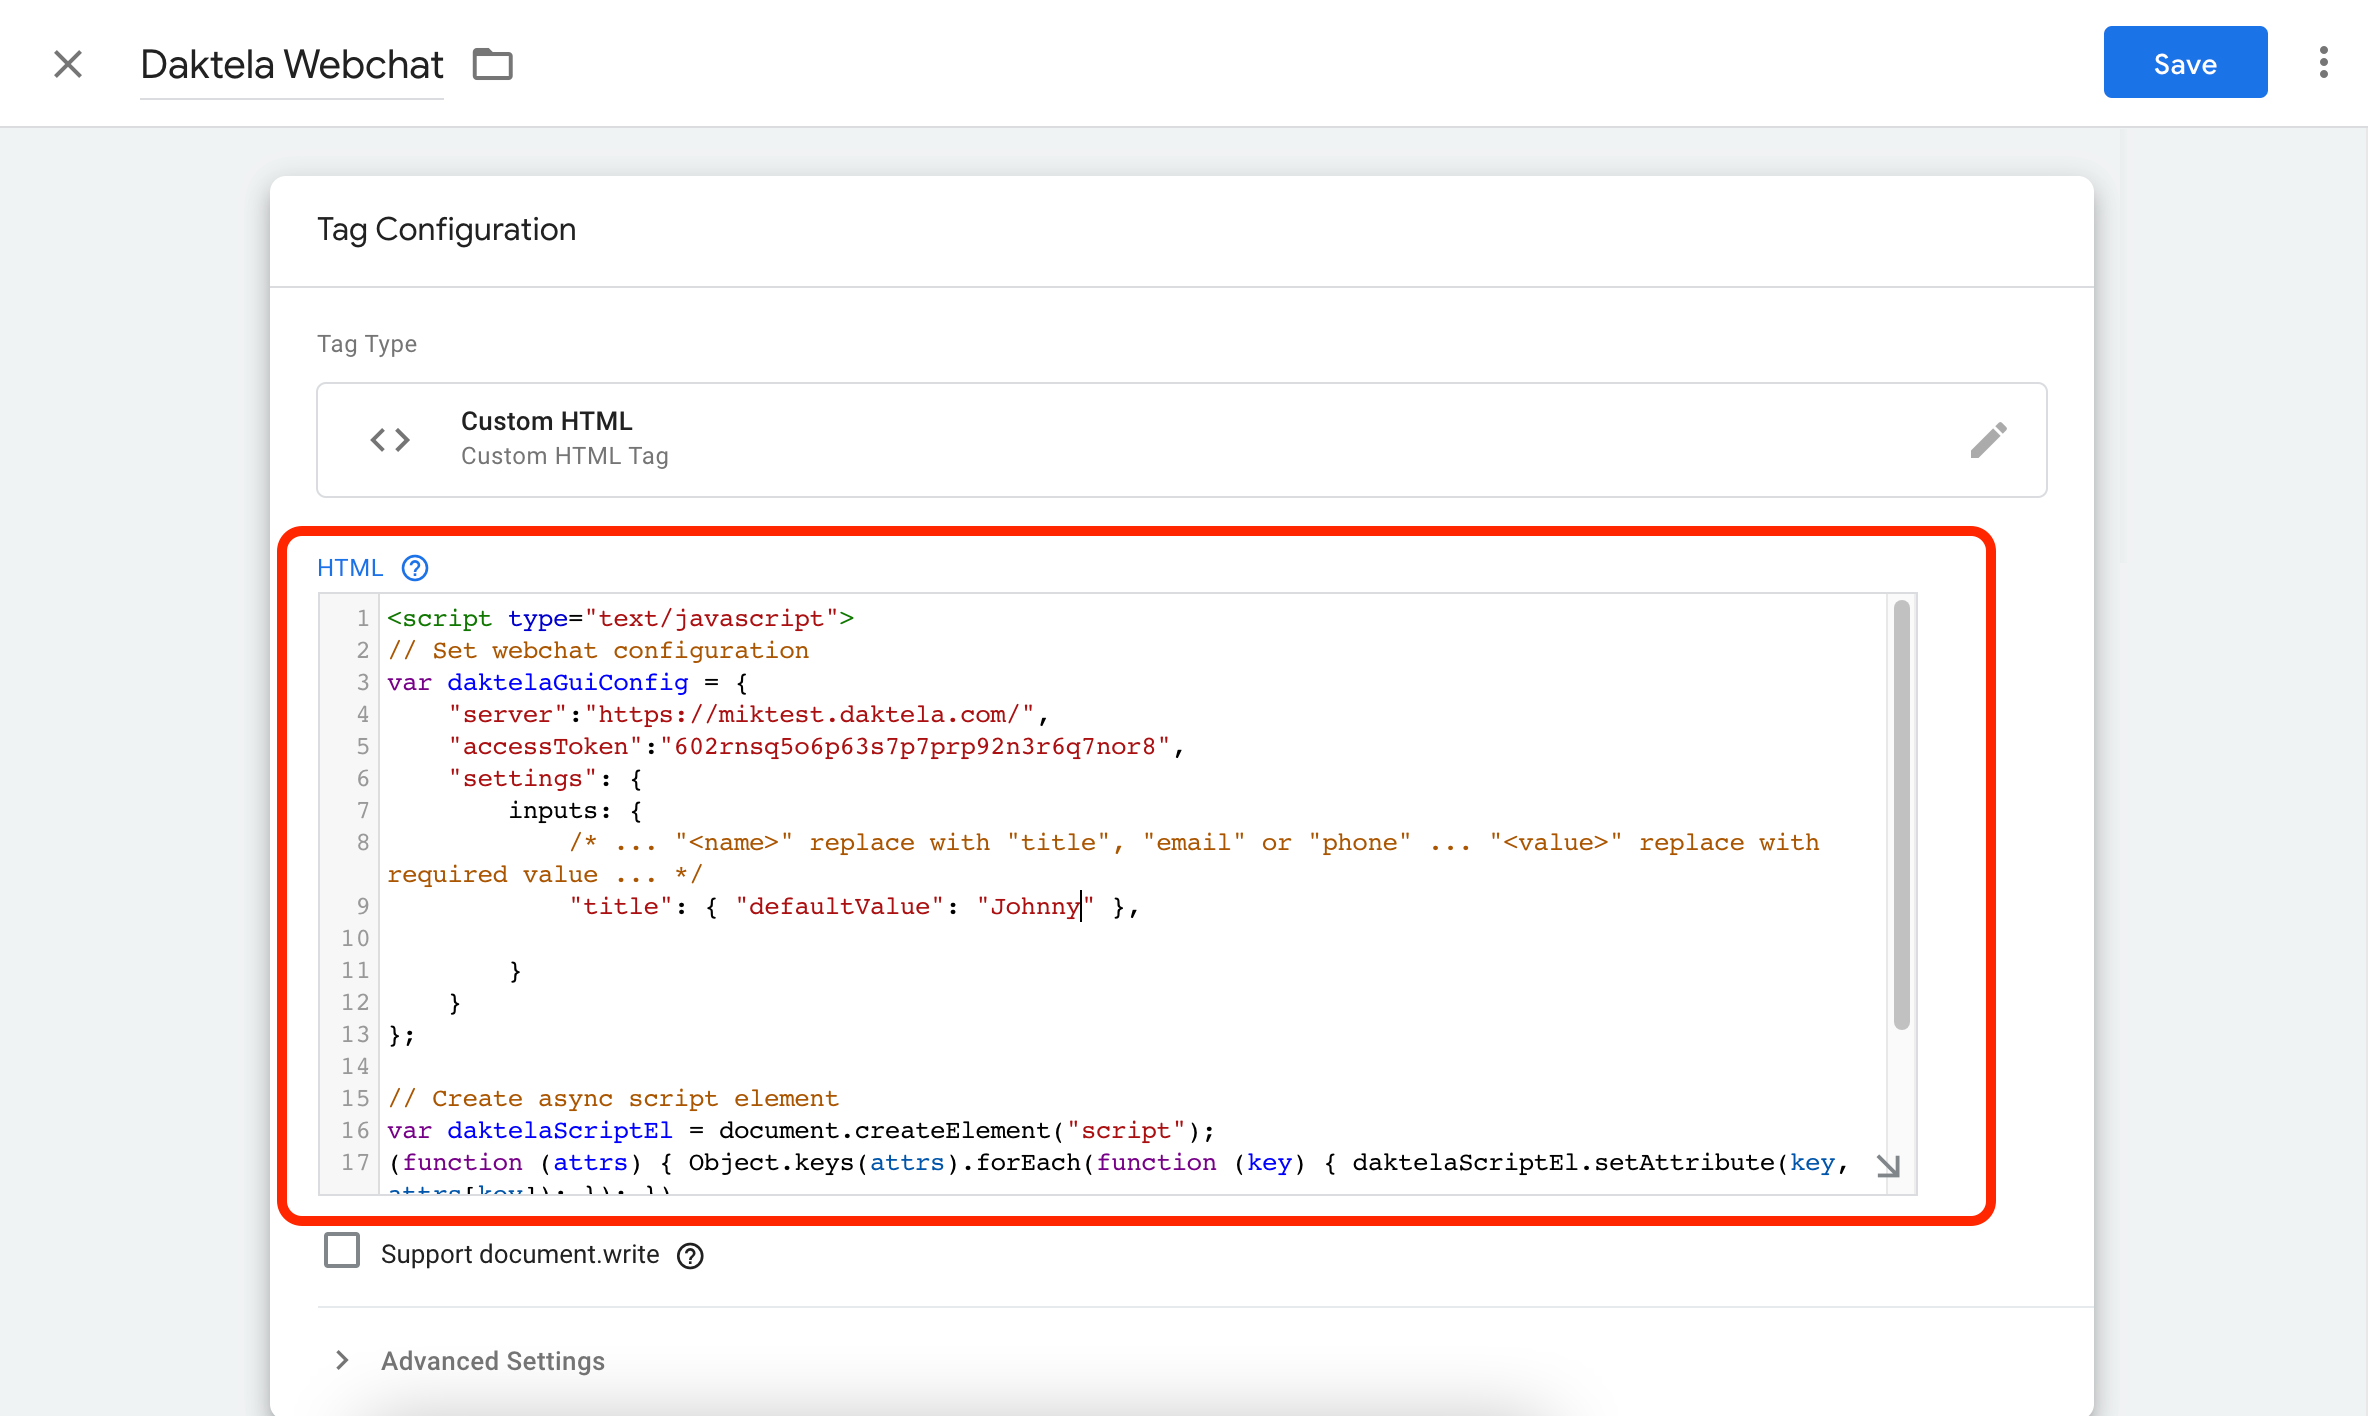
Paste the web chat code from Daktela into the HTML field.
Open Triggering.
Select All pages if you want to display it everywhere on your website.

Click Save.

Click Submit.
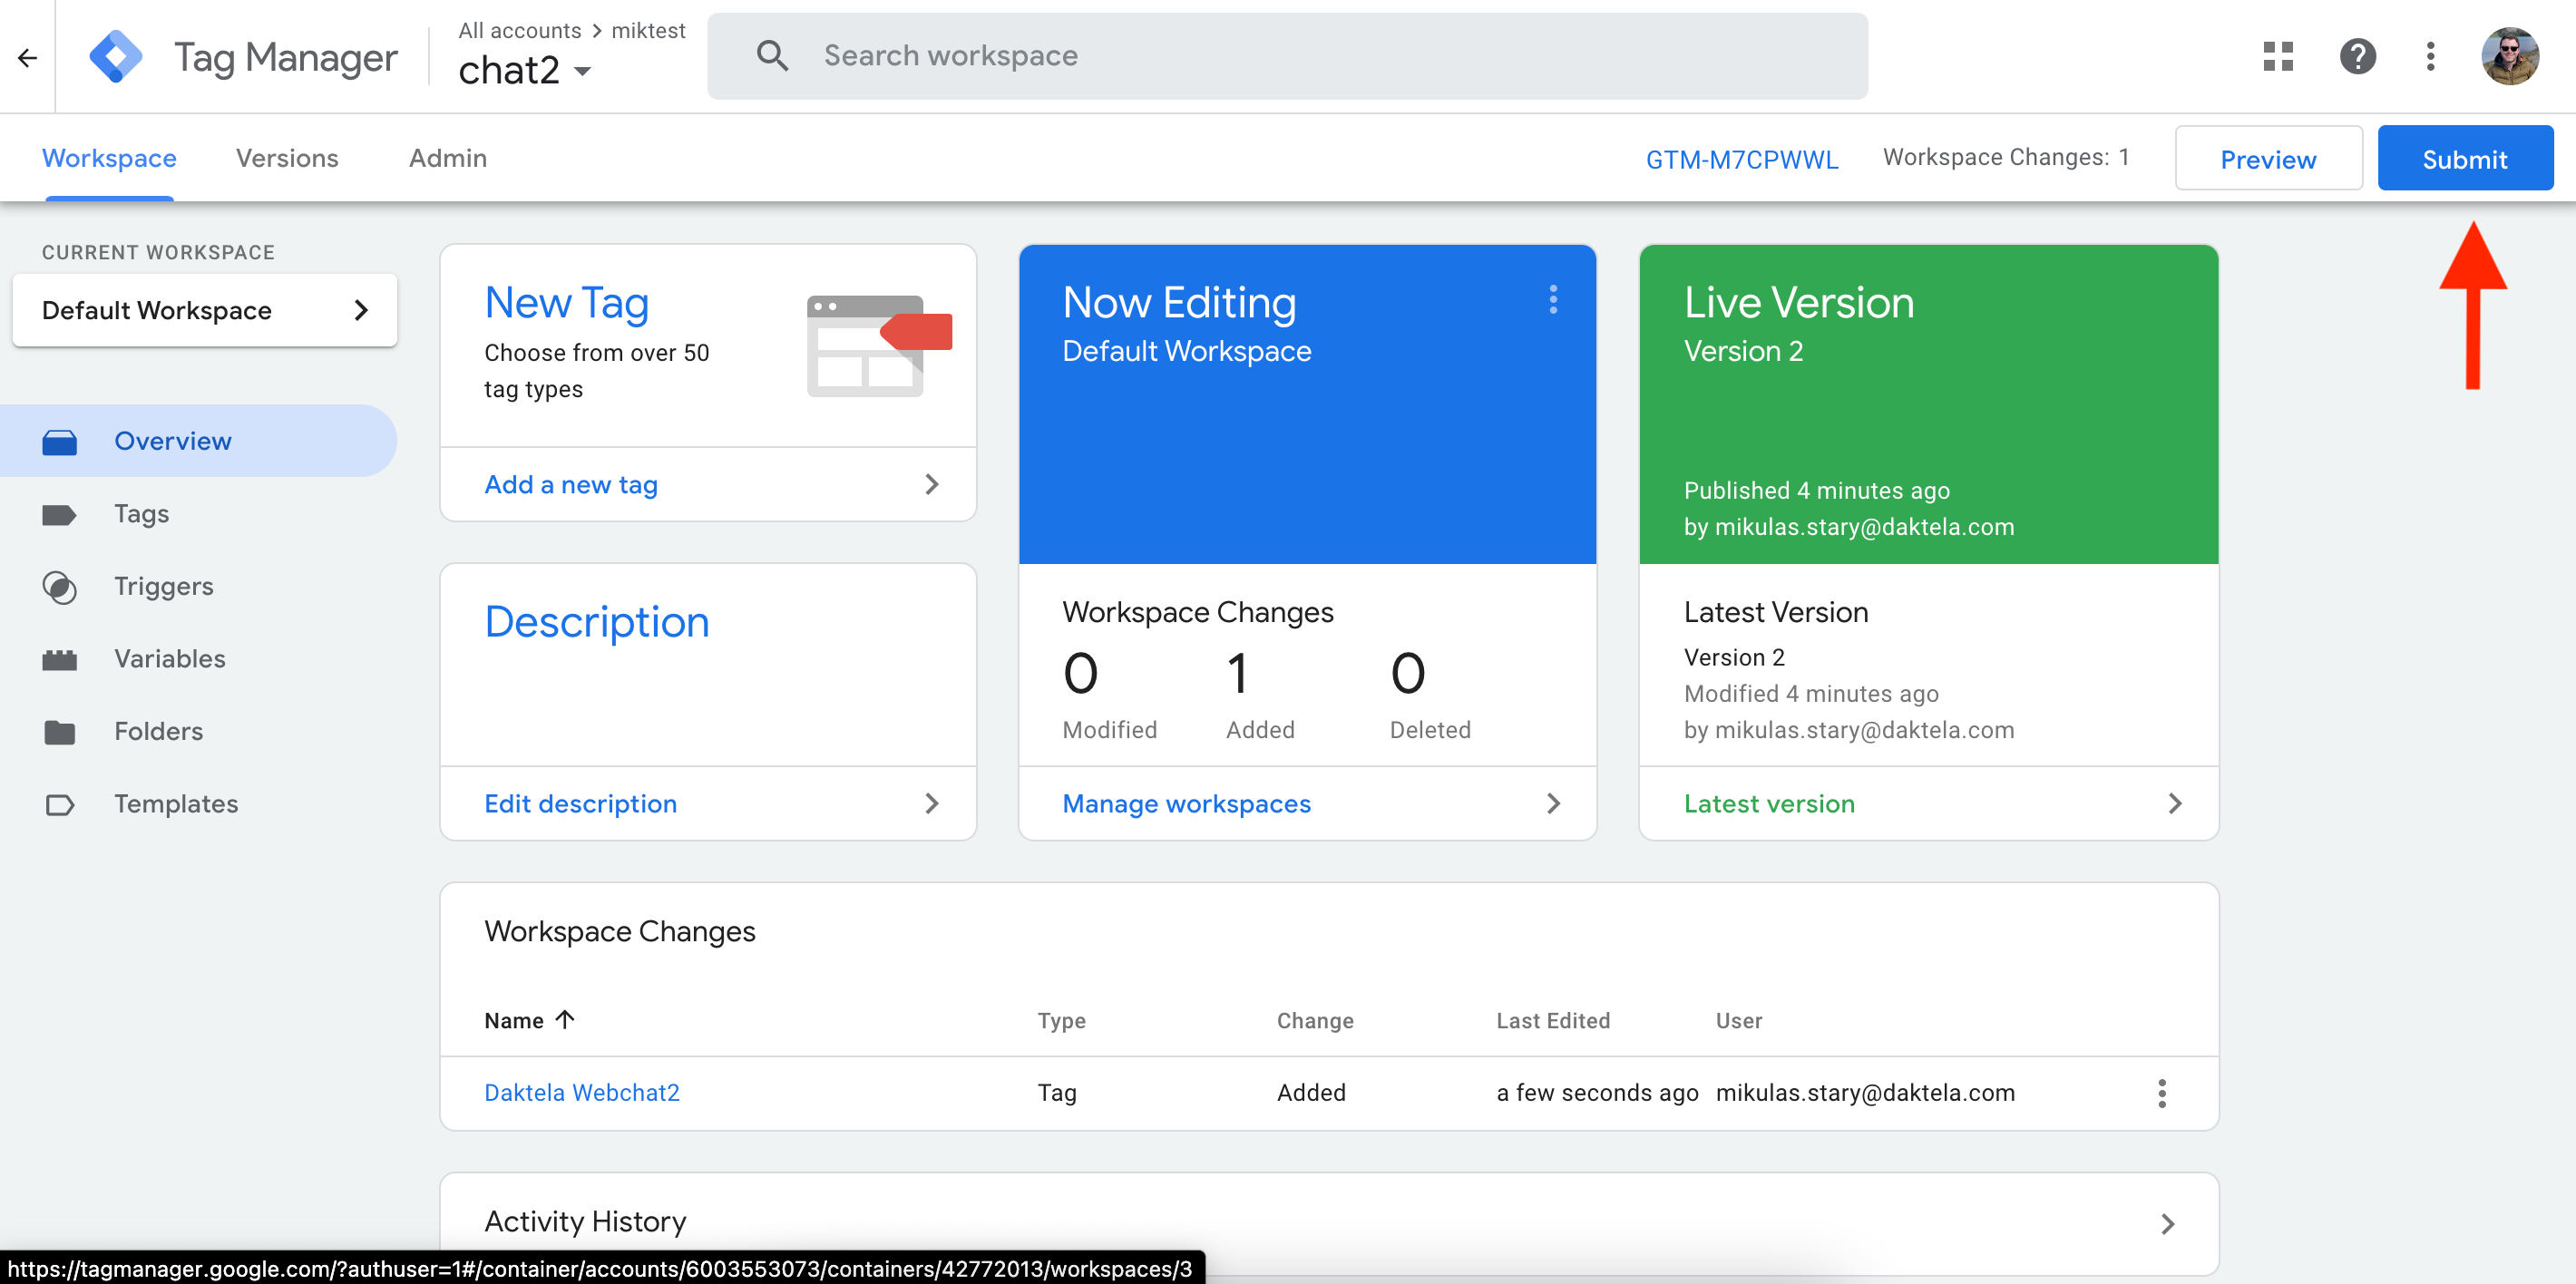
Select Publish and Create Version, enter a Version Name and click Publish.
.png?inst-v=0a276977-36e9-4a42-9759-075d5bd000f6)
Terminate
Set up a terminate destination for your CTC routing.
Go to Manage → Routings → Web chats → Terminate. You will see an overview of your terminate set ups.
Click Add new to create a terminate set up. The terminate details will open.
When you are done creating or editing a terminate set up, click Save to return to the terminate overview and make sure to click the Apply configuration changes button in the top right corner.
It will take a few minutes for the changes to take effect on your website. If you want to see them immediately, open your website in a new incognito mode window.
Set up your terminate set up in the Sandbox column. If you are editing a terminate set up, you can compare your new settings to those currently in use in the Production column.
Title: enter a title.
Description : enter a description.
Disconnection cause: select from the dropdown list – since you are only using CTC, this will never actually be used.
Queue: you need to select a web chat queue – since you are only using CTC, it will never actually be used.
Answered: toggle whether a chat terminated using this set up is logged as answered.