Accesses
Go to Manage → Users → Accesses to set up which Daktela modules agents can open and what they can do in them. Set up shortcuts agents will see below the main menu.
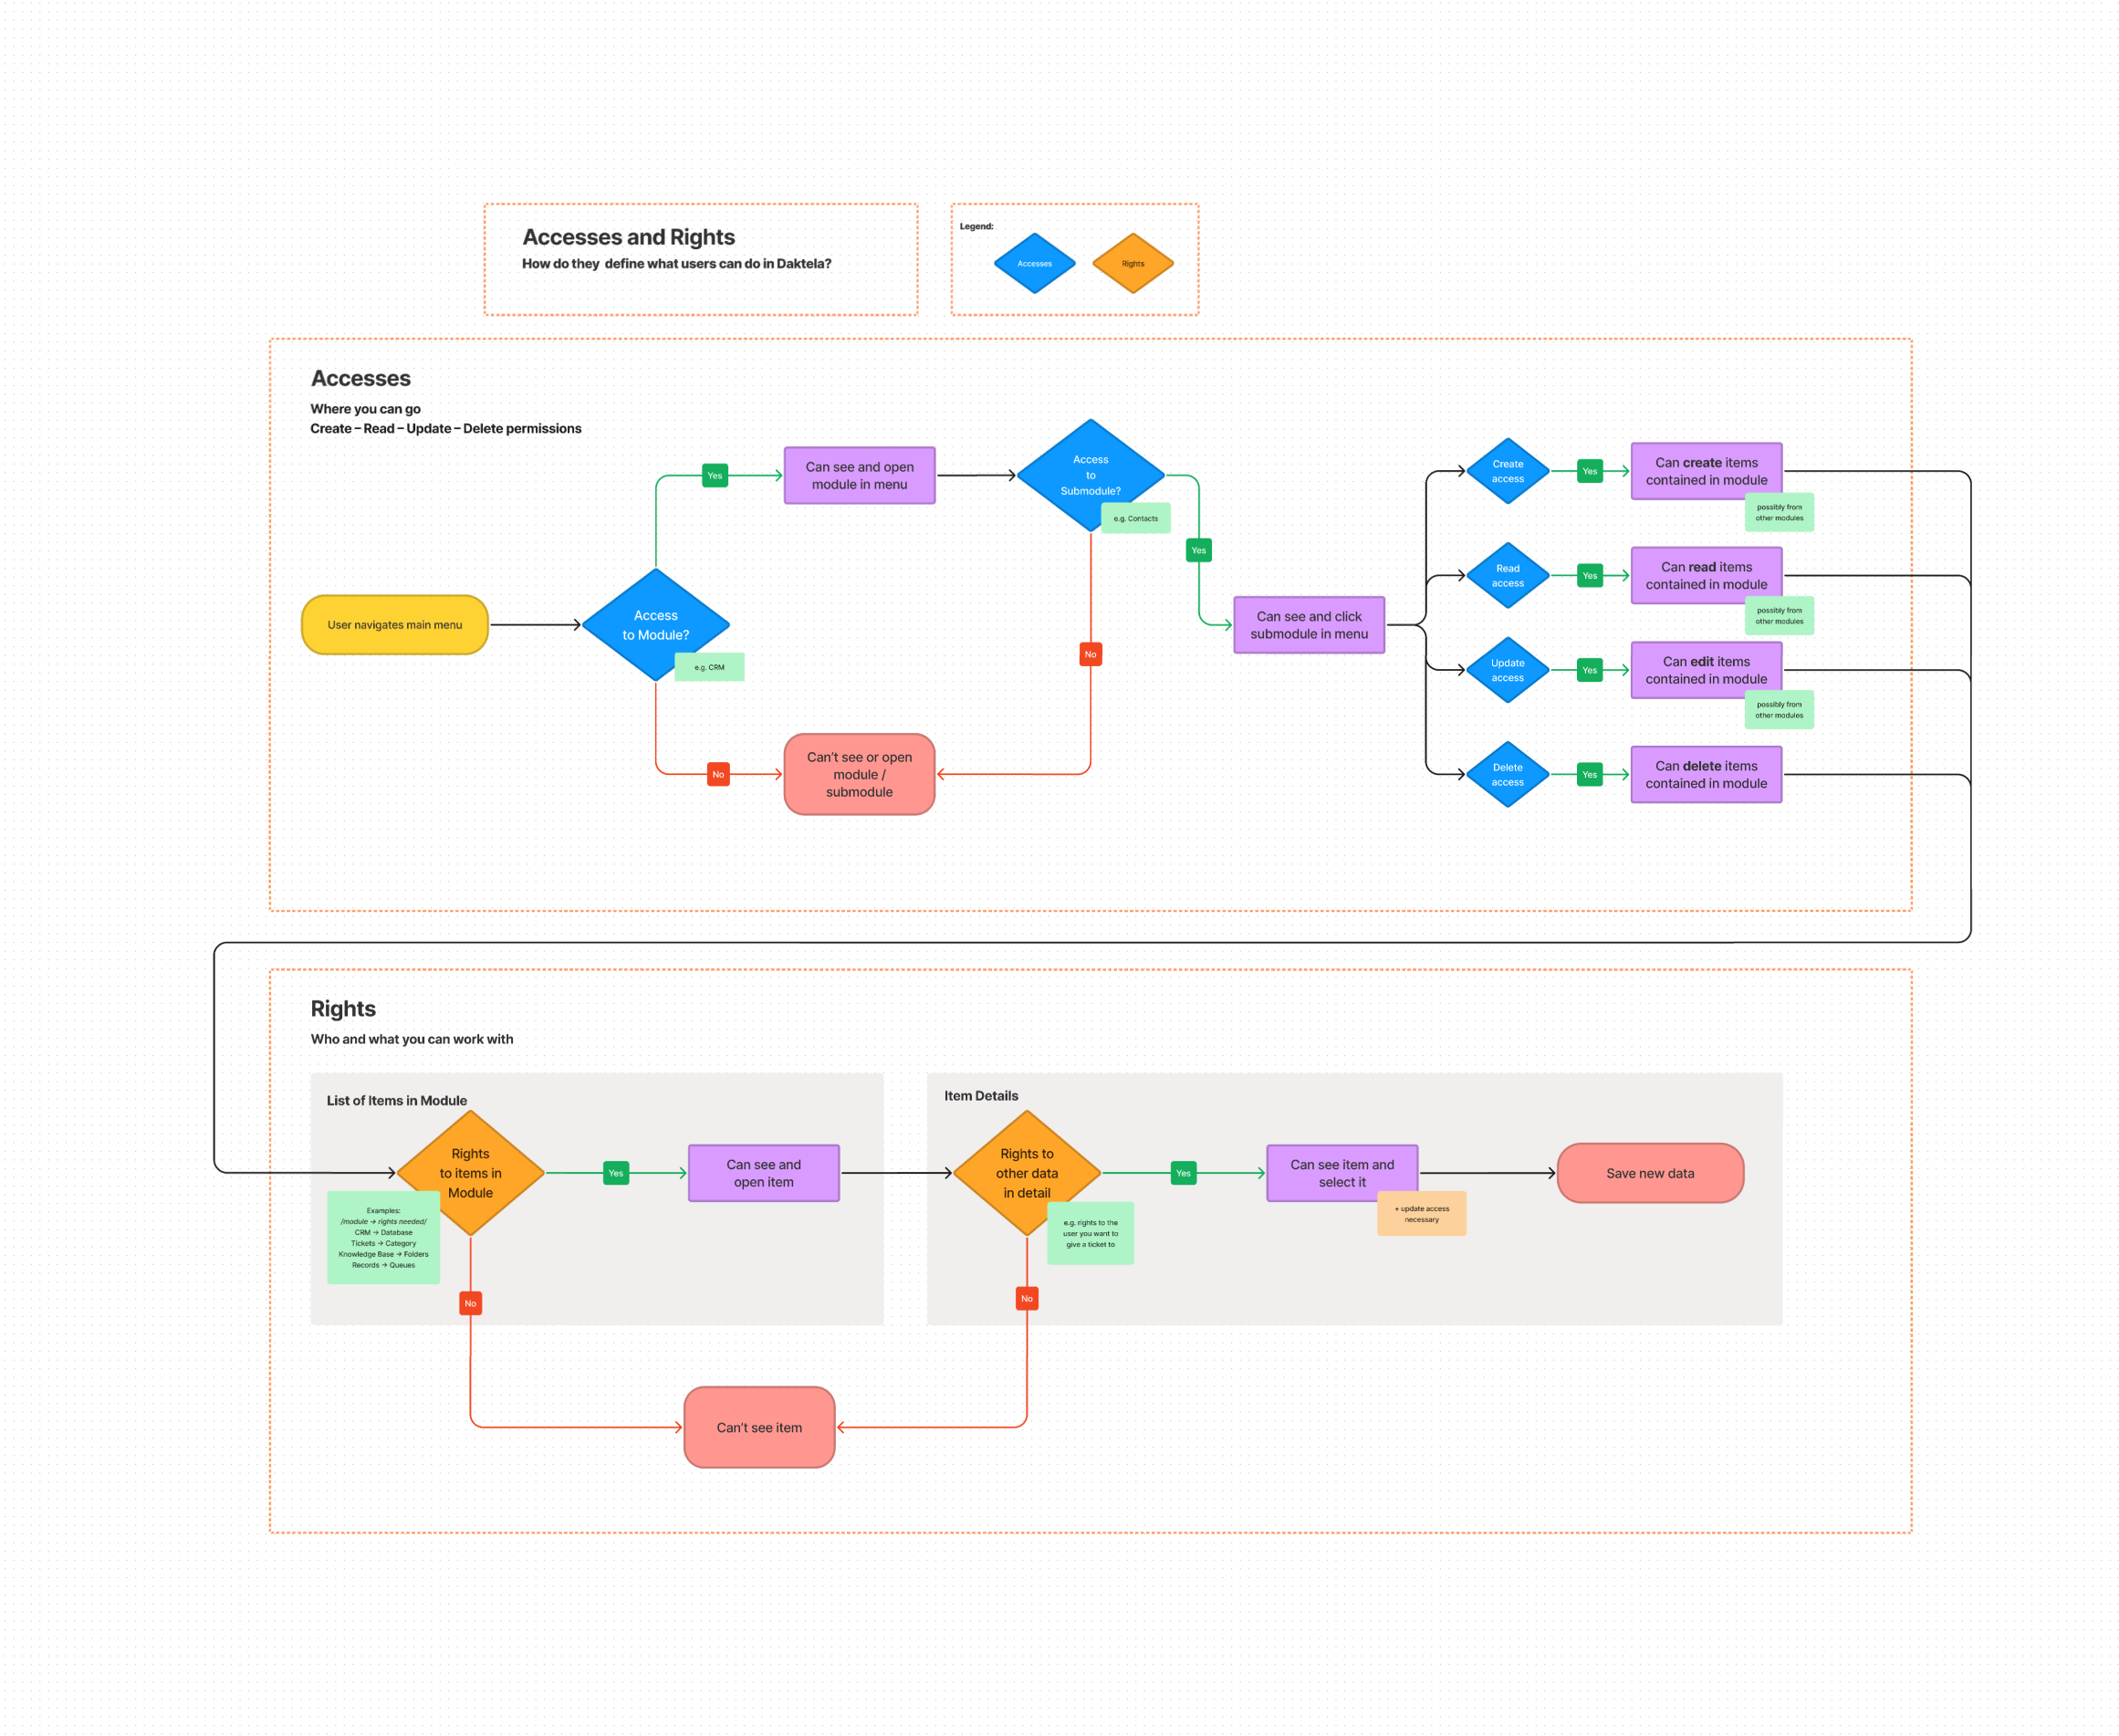
How Do Accesses and Rights Define What Users Can Do in Daktela?
Accesses
Accesses define:
which modules users with those Accesses can go to in the Daktela GUI (and via the API).
users' Create/Read/Update/Delete permissions for items contained in those modules.
The CRUD permissions for a module are not necessarily linked to access to that particular module. A user may e.g. not have access to the CRM but have read permission. As result, they can see CRM data in activities and in other modules where they do have access if the data is displayed there, e.g. Listings.
Rights
Rights define:
what specific items users with those Rights can see in the modules they have access to. E.g. users that have access to the CRM module need to also have rights to the CRM Database the CRM data is contained in to see it.
if they have create and edit permissions in Accesses, what data they can select in the details of items. E.g. users that have edit access to Tickets need to have Rights to the ticket's Category to see and open it. If they want to pass the ticket on to another user, they need to have Rights to that user.
for queues, Rights also define which ones users can log in and out of.
The diagram shows the relationship between Accesses and Rights. You can zoom in and out using ctrl/cmd + mouse wheel.
.png?inst-v=0a276977-36e9-4a42-9759-075d5bd000f6)
Edit an Access
Click the Title of an access to open its details – the Access settings screen will open.
You can edit the Title and Description (optional). The Name field can't be changed.
Set up your Shortcuts and Accesses:
When you have set up your Access, click Save.
Assign the access to a user in Manage → Users → List of users.
Shortcuts
Set up the shortcuts that agents can use below the main menu on the left hand sidebar.
We don't recommend using more than 6 shortcuts – if you add more shortcuts, they will be very small.
Add or remove shortcuts using the buttons at the end of each line.
Use the up and down arrows to change the shortcut order.
Select the type of shortcut from the drop down menu:
Empty – the shortcut will do nothing.
Link – open an internal or external page (follow Steps 4-7 below to set the link up).
Global search – search for a query in Daktela. Can search in the Menu, Contacts, Accounts, Tickets and Knowledge base.
Documentation – open doc.daktela.com.
New ticket – create a new ticket in Tickets.
Select the shortcut colour from the drop down menu.
If you have selected Link in Step 2:Select the icon type from the drop down menu.
Enter a short description of the shortcut that will be displayed on mouse hover.
Enter an absolute (e.g. https://www.google.com/) or relative (/crm/contacts/create) address.
Check the checkbox to open the link in a new tab.
Click Save or go to Accesses below.
Accesses
Use the toggle switches to enable or disable access to individual modules of Daktela.
For more detailed control, toggle Advanced settings in the top right corner of Accesses to Yes.
Each Daktela module's access settings are in a separate tab. Check the checkboxes to allow access.
In general, you can grant the following types of access:
Access – the module will be displayed in the users' main menu.
Create – the users will be allowed to create new items.
Read – the users will be allowed to open items.
Update – the users will be allowed to edit items.
Delete – the users will be allowed to delete items.
Some modules have different types of access – these are described in tooltips directly in Daktela.
To prevent application errors, some settings automatically turn others on or off after you save the Access.
From version 6.20, if you need to set up very specific accesses, you can disable Set dependencies automatically above the list of Accesses. Keep in mind that if set up incorrectly, application errors can occur.