Social Media
Social media integration enables you to directly manage comments on Facebook page posts within Daktela
List of Posts
In the list of posts, you will find an overview of each post on your Facebook page.

Open a filter scheme.
Start typing a word for a fast search
Check to display the main posts.
Check to display finished/done posts.
Export your facebook posts.
Click the title to open the post details. See more info below.
Follow the post.
Click to change to main or done.
Post Detail
Click the title to open the post details.

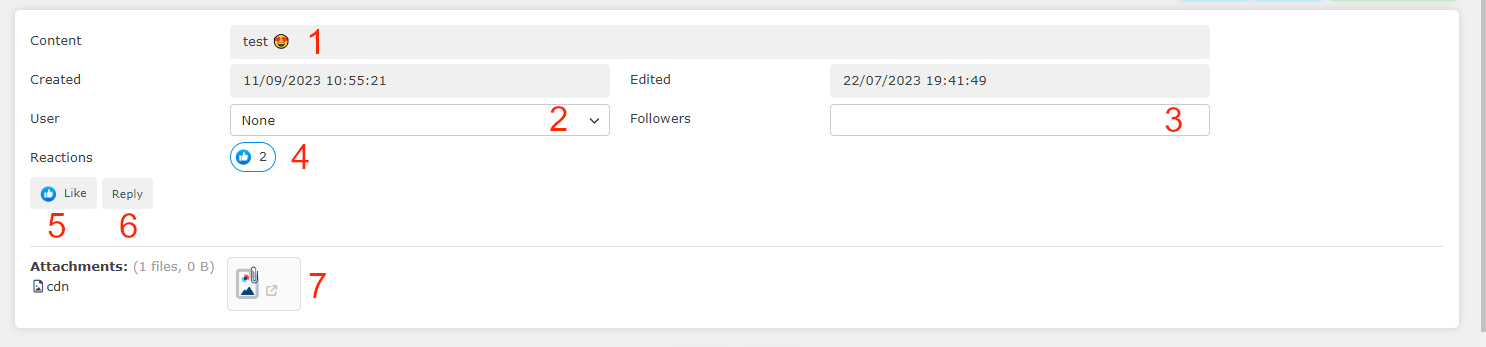
Content of the post.
Select the post owner. You can take ownership yourself or pass the post on to someone else.
Enter post followers. They will receive notifications when there are any changes to the ticket.
Display reactions of your post.
Adds a reactions to the post.
Reply to the post. It opens the Facebook comments widget.
Displays the attachment for the post.
Post Comments

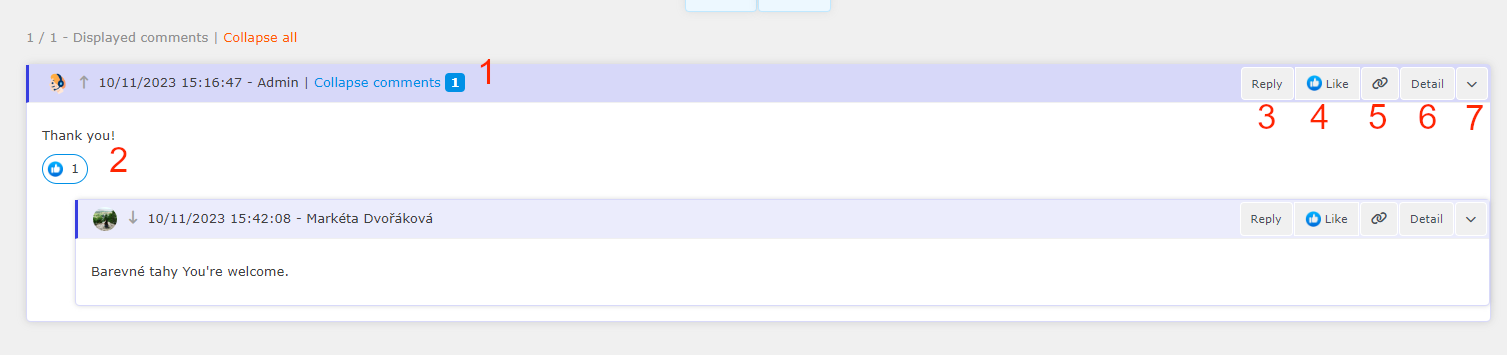
The number of responses to the comment.
Display reactions to the comment.
Reply to the comments. It opens the Facebook comments widget.
Adds a reactions to the comment.
Merge the comment into the ticket.
Open activity detail.
Dropdown menu:
Delete comment.
Hide comment on Facebook.
Continue the conversation in chat.
Expand all replies to the comment.
Hiden on the Facebook.
Delete comment.
FB Comment Widget
From the FB comment widget, you can write a reply to your post or comment.

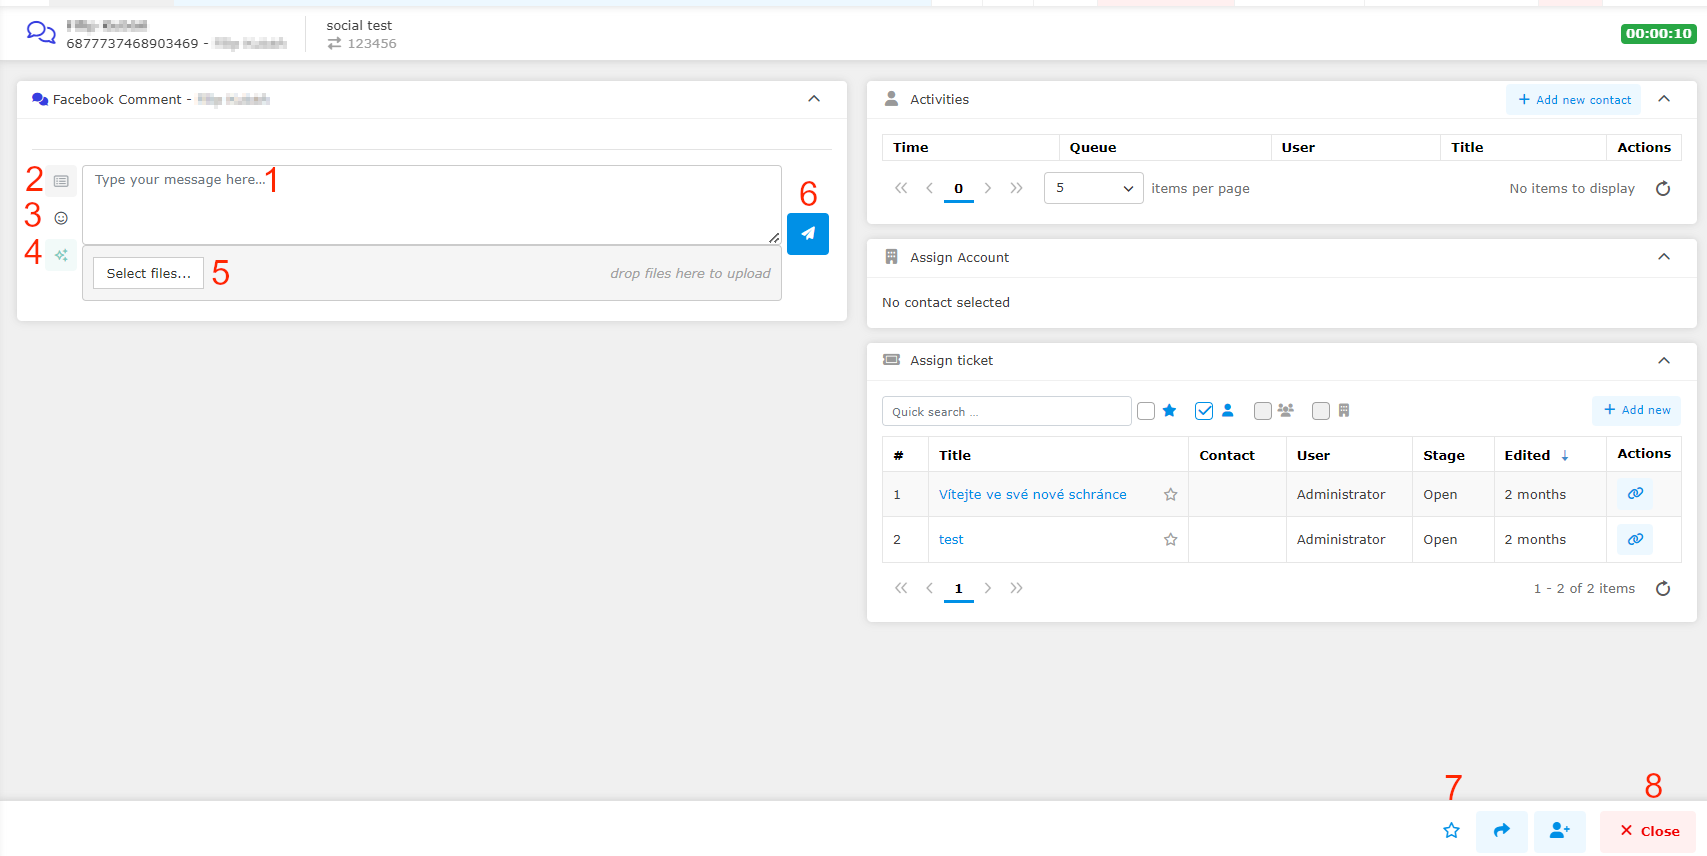
Type your message in the field. To send your message, click Send or press Enter on your keyboard. Use Shift+Enter to start a new line.
Open a dropdown menu and select a template to insert.
Open a preview with emotikons and click on to insert.
Open Compose Features. See more information here.
Select files to send to the customer or drag and drop files into the grey area around the Select files button.
Send message.
Mark the message as important.
Transfer the message to another agent.
Invite another agent to the message.
Close the message tab.
Contact and Account Widgets
The Contact and Account widgets display CRM information about the customer and the company they are calling from.

View the record in the CRM module. Click the activity tab in the top bar to return to the activity.
Edit the CRM record in the CRM module. Click the activity tab in the top bar to return to the activity.
Unpair the CRM contact from the activity.
Open the given CRM module info in the background. Click the Home button to view it.
If the phone number is associated with more than one contact, a list will appear at the bottom of the widget. Click the Link button to switch to the selected contact.Open SLA settings in the background. Click the Home button to view them.
Activities Tab

Click the Activities tab in the header to view the contact's past activities.
Open activity detail. See Activities for more detail.
New Contact
If the customer's phone number is not saved in the CRM module, the Contact widget will be open on the Activities tab.

Click Add new contact to open the CRM module and create a new entry. See CRM for more details.
Ticket Widget – Read Only
Use this widget to assign an existing or new ticket to the call. If a ticket has already been assigned, the widget will display it.

Search for a ticket.
Filter your favourite tickets.
Filter your tickets.
Filter the current contact's tickets.
Filter the current account's tickets.
Create a new ticket.
Open the ticket in the Ticket module. Click the activity tab to return to the call detail screen.
Customer journey – see the contact's history.
Assign the call to the ticket.
You can apply multiple filters to view only tickets relevant to your call.
Once you assign a ticket to the call, the widget will display the ticket details.

Calendar Widget
The Calendar widget displays your scheduled events. Days coloured blue contain events. The selected day is bold. See Dashboard for more details.

Articles Widget
The Articles widget displays a list of your available articles – these can contain info that can help you in your work.

Open the article in the Knowledge Base module.
Read the article in the Articles widget.
This is what an article open in the Articles widget looks like:

Click the Back button to return to the list of articles.
Page in iframe
The Page in iframe widget displays an external web page. Interact with the page just like you would normally. You can scroll using your mouse wheel or the controls on the right hand side.
