Skip table of contents

Shoptet

Shoptet je české řešení pro podporu eshopů s jednoduchou a intuitivní administrací. Shoptet nabízí široké spektrum funkcí bez nutnosti instalace a komplexní konfigurace.

Přihlaste se do svého Shoptetu jako administrátor a postupujte dle následujícího návodu:

Integration Limits

The Shoptet integration can't be used to synchronise customers including their orders.

Based on the hashes found in these instructions, Customers and Orders are synchronised from Shoptet to Daktela. Currently, a new contact is created in Daktela for each Customer and each Order. The name of the contact in Daktela created from Shoptet Orders is the order number and the contact can also contain the order URL. E.g. when customer Jane has 3 orders, there will be 4 contacts in Daktela – 1 from Customers and 3 from Orders.

If you want to keep your list of Customers and Orders up to date in Daktela, we recommend turning the integration off after the initial synchronisation, then merge the contacts in Daktela and add new URLs with orders to them manually.

You must always synchronise both Customers and Orders.


Zákazníci

Zákazníci

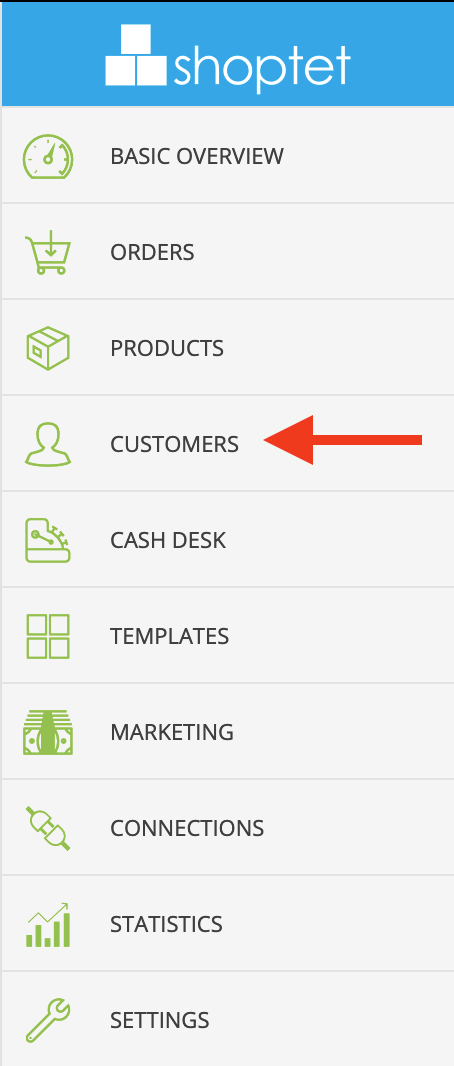
  • Krok 1.1: Klikněte na Zákazníci

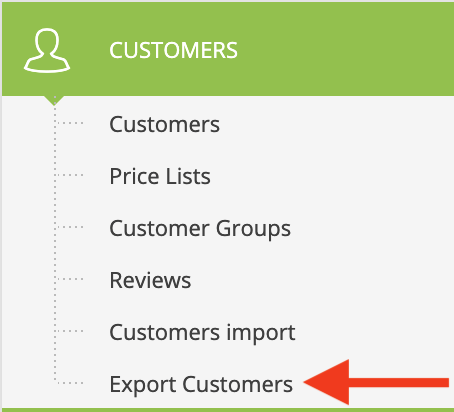
  • Krok 1.2: Klikněte na Export

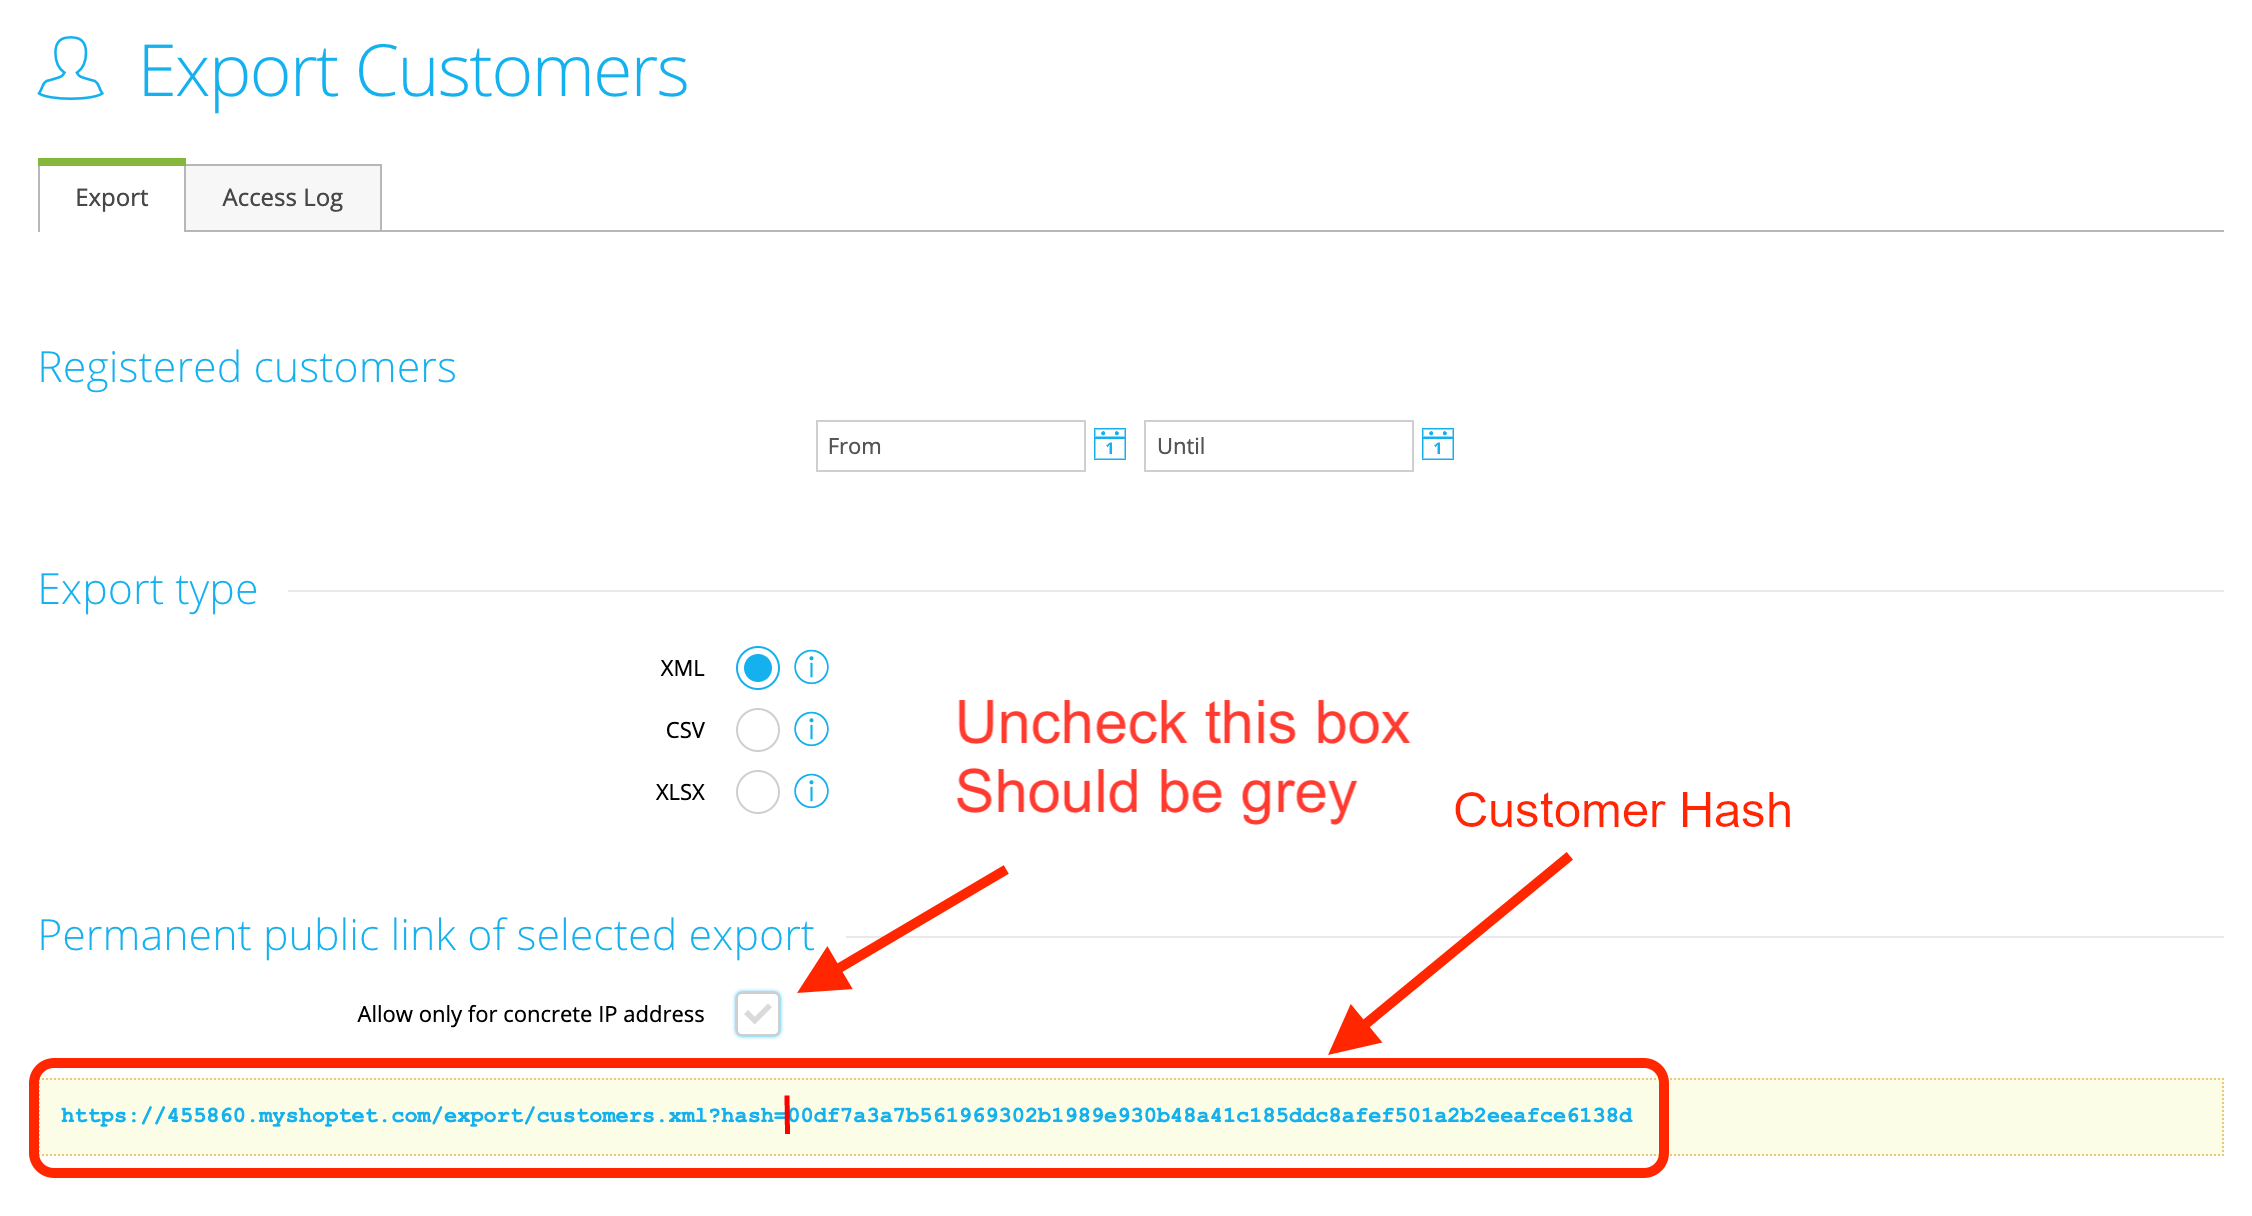
  • Krok 1.3: Pole Povolit pouze z konkrétní IP adresy nesmí být zaškrtnuté. Zkopírujte Hash zákazníka do pole Hash v Integraci v Daktele. 


Objednávky

Objednávky

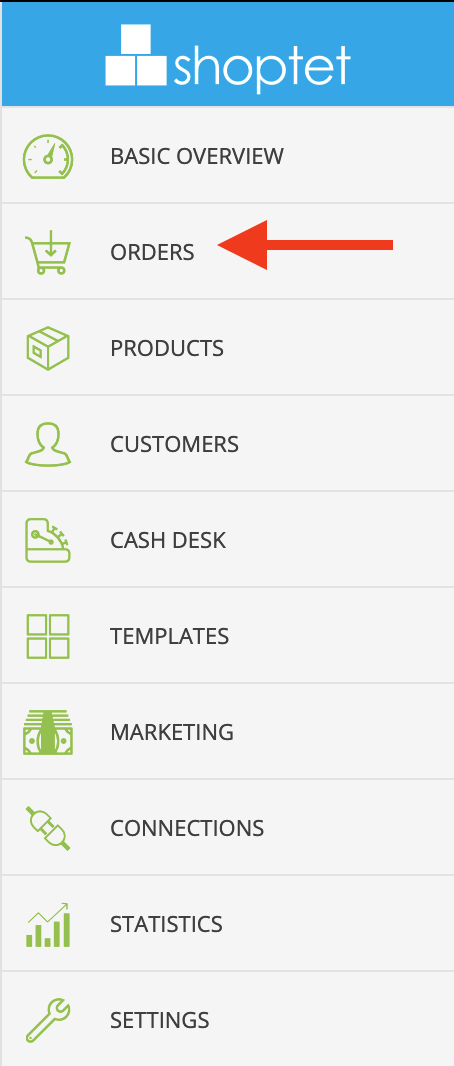
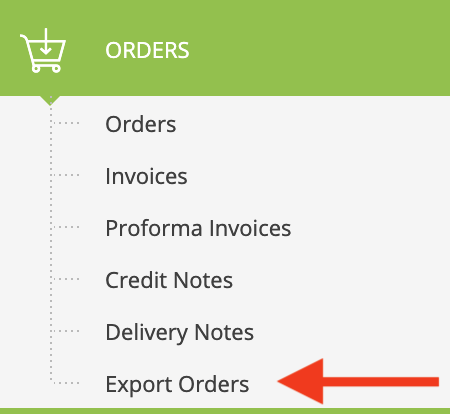
  • Krok 2.1: Klikněte na Objednávky.

  • Krok 2.2: Klikněte na Export.rs.

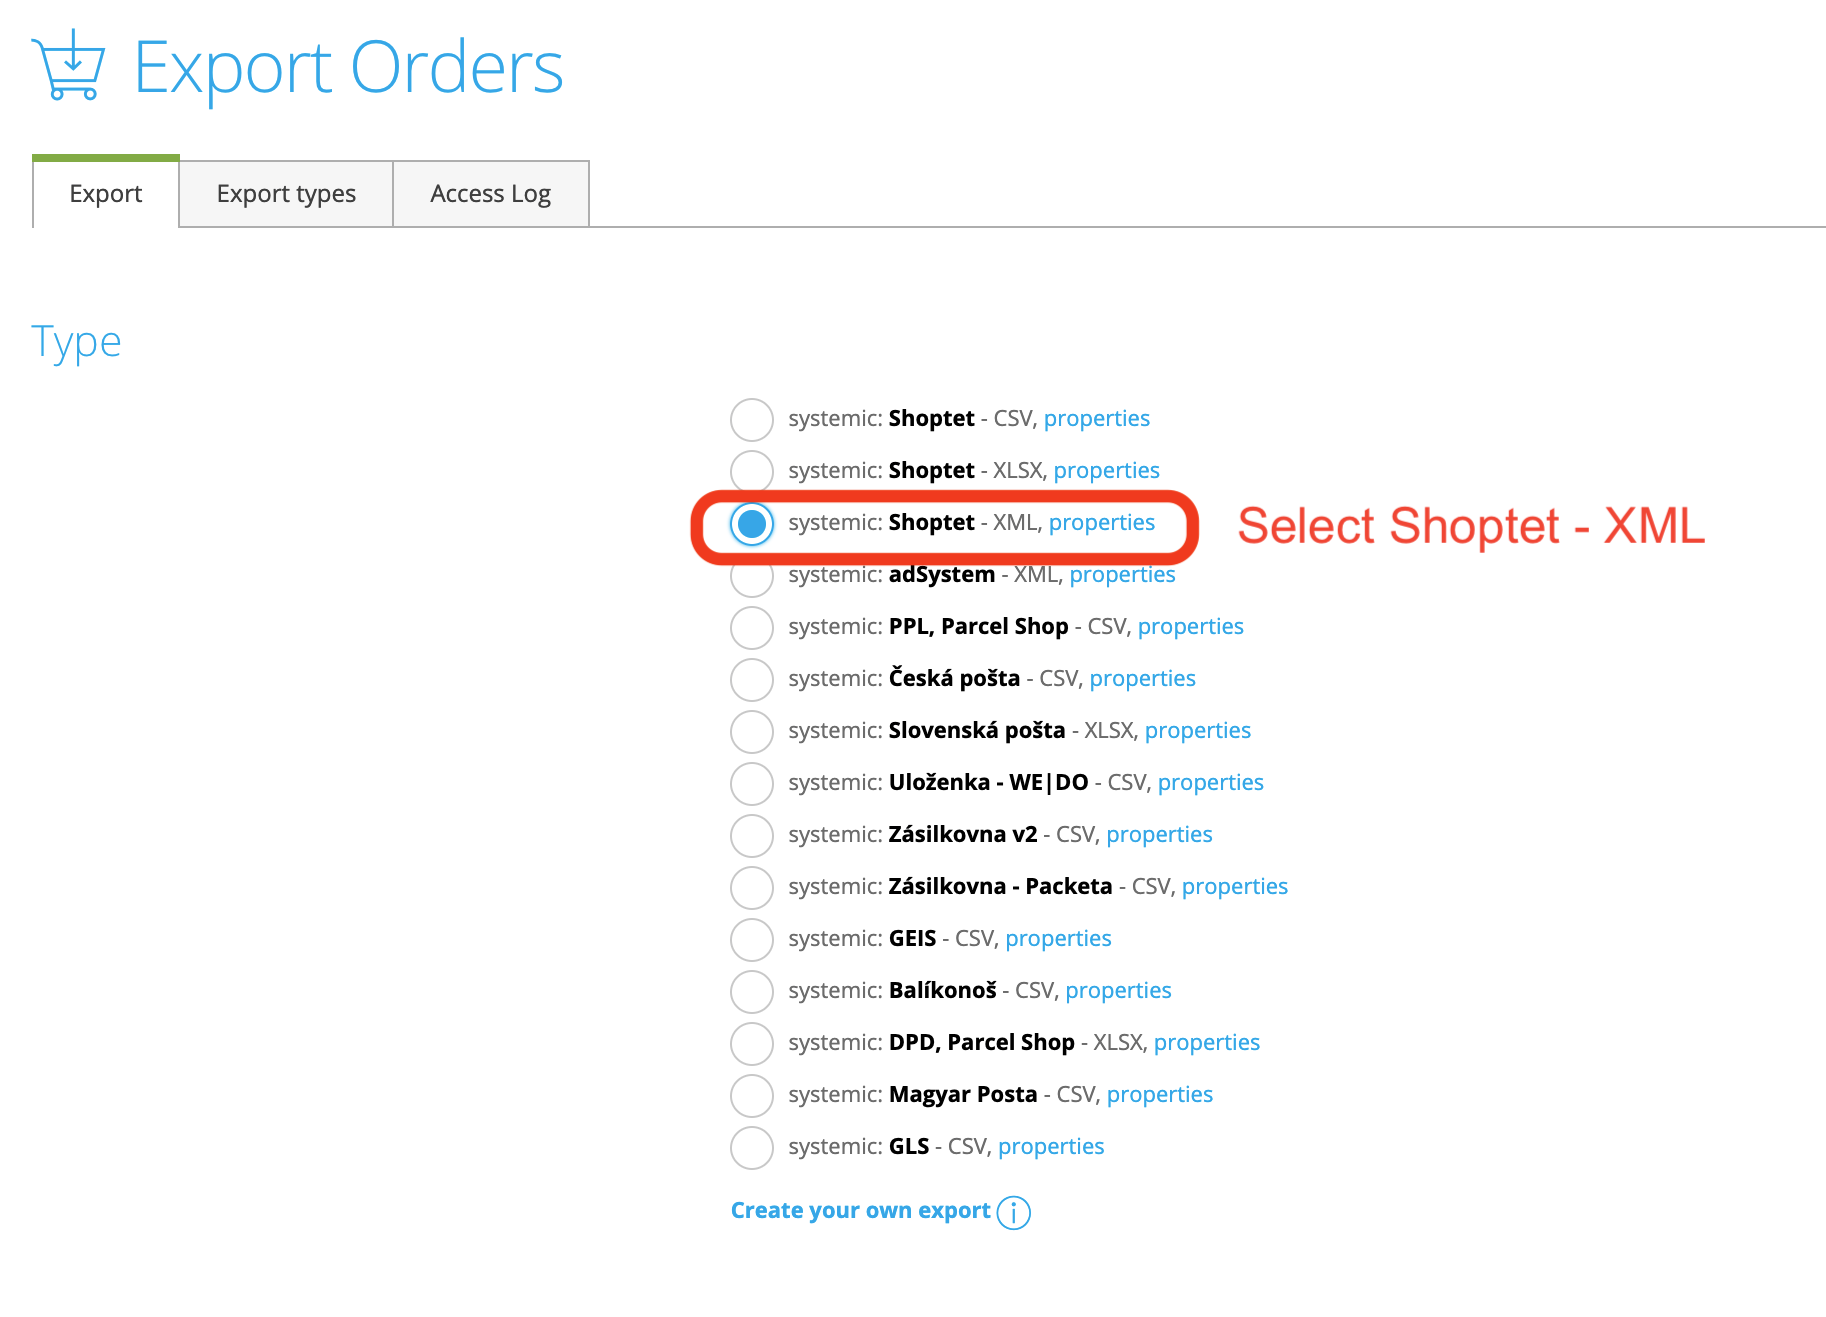
  • Krok 2.3: Nastavte Shoptet - XML formát.


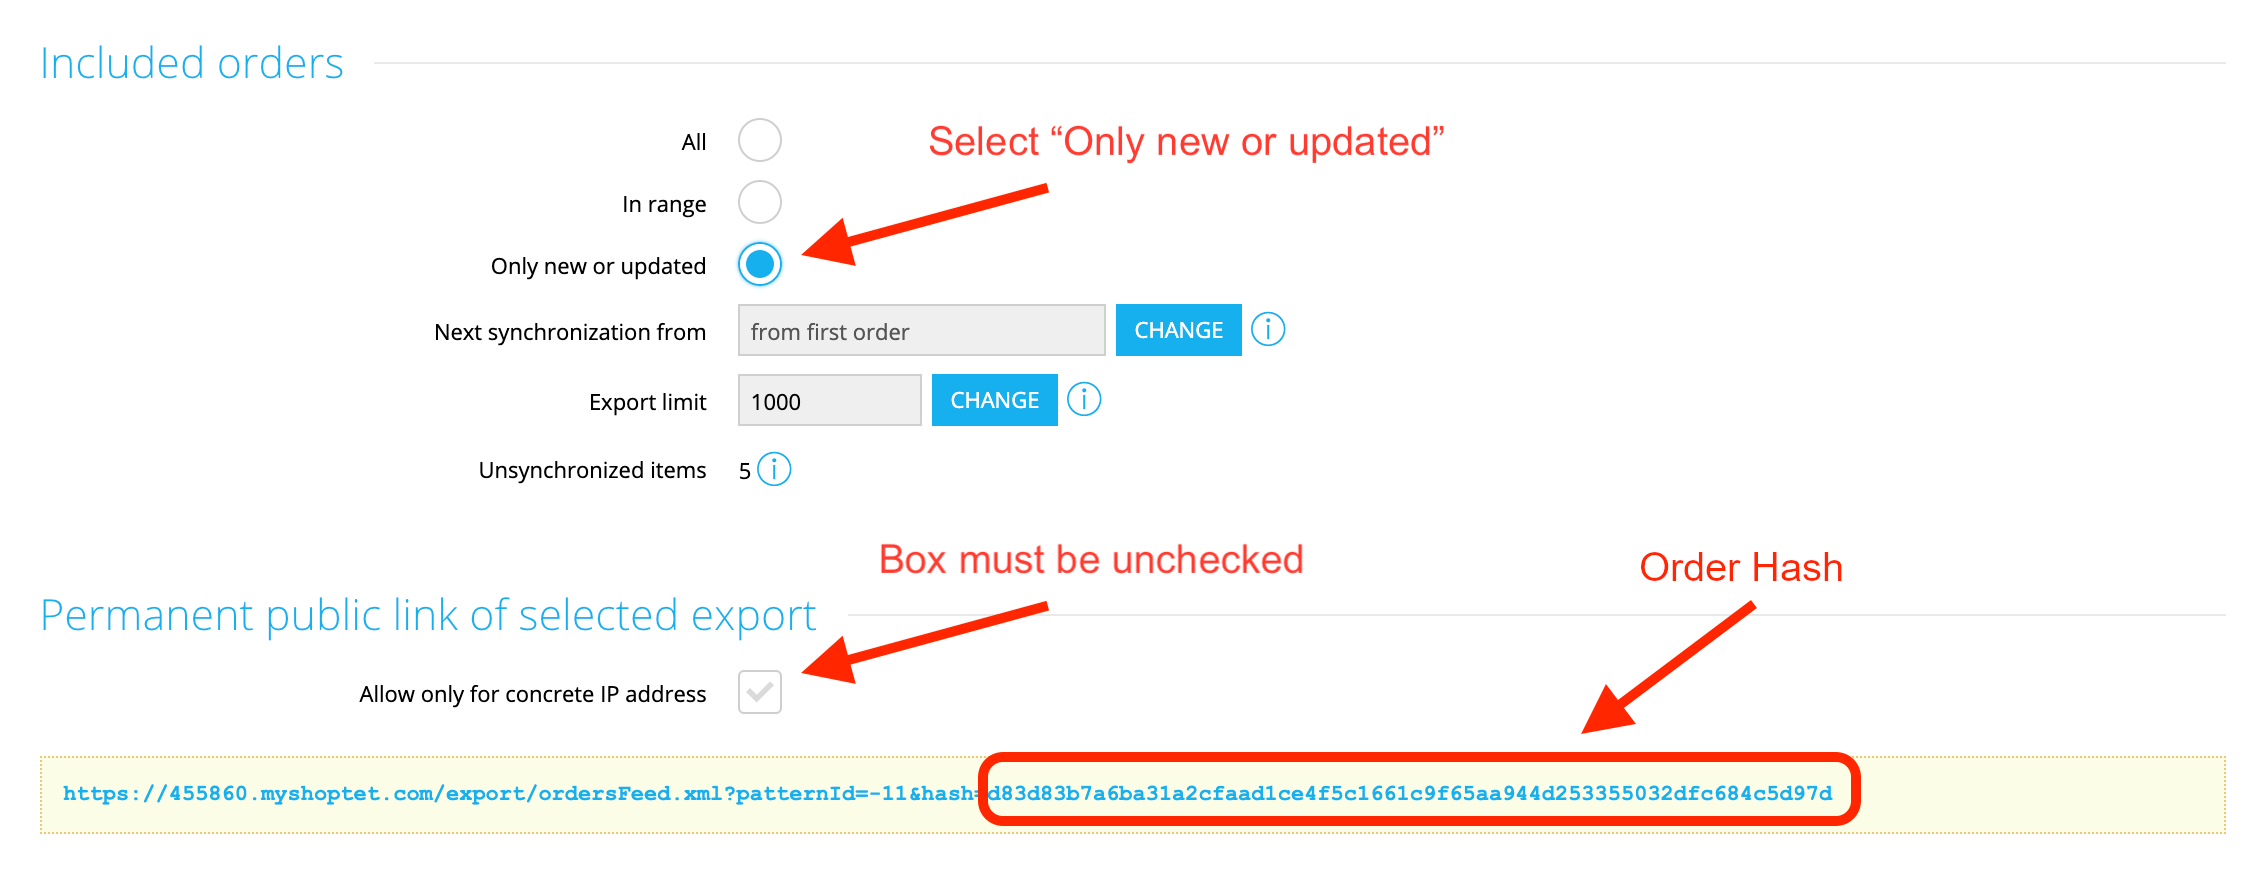
  • Krok 2.4:  Pole Povolit pouze z konkrétní IP adresy nesmí být zaškrtnuté. Zkopírujte Hash objednávky do pole Hash objednávek v Integraci v Daktele. 

  • Krok 2.5: Zvolte Jen nové nebo změněné. Pole Povolit pouze z konkrétní IP adresy nesmí být zaškrtnuté. Zkopírujte část URL objednávky objednávky do pole Orders feed hash v Integraci v Daktele. 


Nastavit integraci v Daktele

Nastavit integraci v Daktele

V Daktele přejděte na Spravovat → Integrace a v záložce Shoptet klikněte na Konfigurovat.

Vyberte, do které CRM Databáze chcete synchronizovat vaše data.

Do pole URI Instance zadejte URL vašeho obchodu, (např. https://1234.myshoptet.com).

Do pole Hash zadejte část URL zákazníka z kroku 1.3 následující po "hash=".

Do pole Hash objednávek zadejte část URL objednávek z kroku 2.4 následující po "hash=".

Do pole Orders feed hash zadejte část URL objednávek z kroku 2.5 následující po "hash=".

Do pole Orders pattern zadejte část URL objednávek z kroku 2.4 mezi "patternID" and "&".

Klikněte na Autorizovat.

Namapovat pole CRM

Otevře se seznam CRM polí Daktely. U každého pole, které chcete synchronizovat, vyberte z rozbalovacího seznamu příslušné pole z Shoptetu.

Klikněte na Aktivovat.

How to get authorisation data.

How to get authorisation data. (The Authorization guide is only available in English.)

  1. Go to the URL of your Shoptet installation's admin section (e.g., https://1234.myshoptet.com/admin).

  2. Log in as the administrator user.

  3. Go to the Connections Shoptet Addons section in the left menu.

  4. Here, search for the Daktela CC addon under Shop administration.

  5. Set the Eshop name integration configuration to the name of your Shoptet. It should be part of your Shoptet URL, e.g., (1234.myshoptet.com.)

  6. Shoptet ID can be found in the top right corner under your name if you are logged into the admin page.


JavaScript errors detected

Please note, these errors can depend on your browser setup.

If this problem persists, please contact our support.