Skip table of contents

Daktela Desktop App

Use the Daktela Desktop App to control certain Daktela features from a dedicated application.

You can:

 Download the Daktela desktop app from App store for MacOS or Microsoft store for Windows.  Follow the installation instructions and open the app when done.

WebRTC client.
The feature is available starting from version 6.24 of Daktela. It closely resembles the Daktela mobile app. All you need to do is create a WebRTC device of type Desktop (application). Once you connect to this device, the desktop app will function as a softphone.

Therefore, you won't need any additional external apps like Telephone or MicroSIP in the future.


Log in

Log in

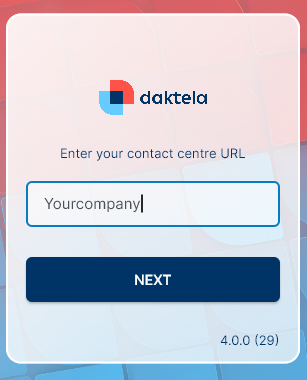
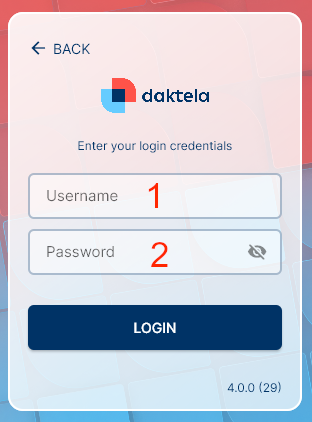
When you open the Daktela Desktop App, log in just like you would in your browser.

Enter you Daktela URL. The format of the URL is "yourcompany.daktela.com" or similar. If you don't know your URL, ask your Supervisor or Team Leader.

Click Next to continue.

  1. Enter your user name.

  2. Enter your password

Click Login or press Enter to log in.

If you are not on the http://daktela.com domain, you may need to load your SSL certificate into your Java library.


Go Ready

Go Ready

Once you have logged in, click the Go Ready button to start processing activities.

Log in and Out of Queues

Click the queue tab to open queues.

The tab will open.

In the Queues tab, select which queues you want to log in to.

Filter queues by type.

Tap the Queue Type to Filter your queues by type.

Log in and Out of Devices

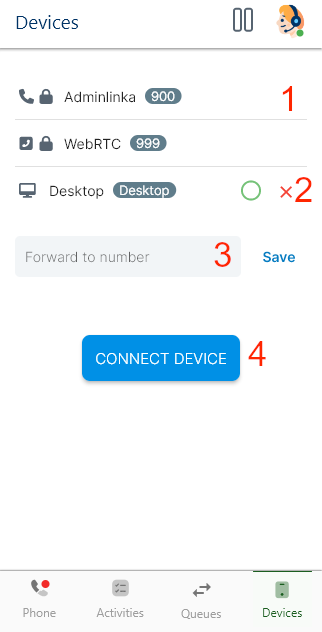
In the Devices tab, select your devices or set up call forwarding.

  1. Select a device from the dropdown list.

  2. Log out of device. You cannot log out of devices with a lock.

  3. If you want to forward your calls, enter the forwarding number.

    1. Activate call forwarding. The Save button will turn into a Delete button. Click it to deactivate call forwarding.

  4. Log in to the selected device.


Make a Call

Make a Call

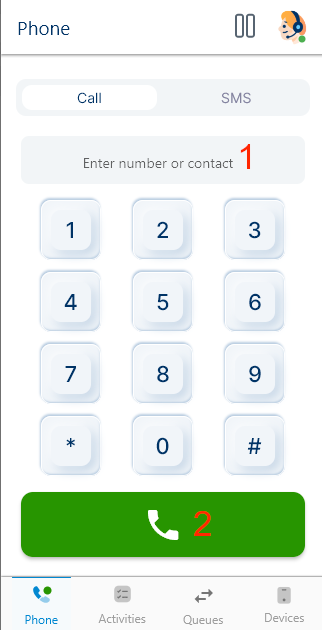
  1. Type a number or a CRM contact.

  2. Click the green call button.

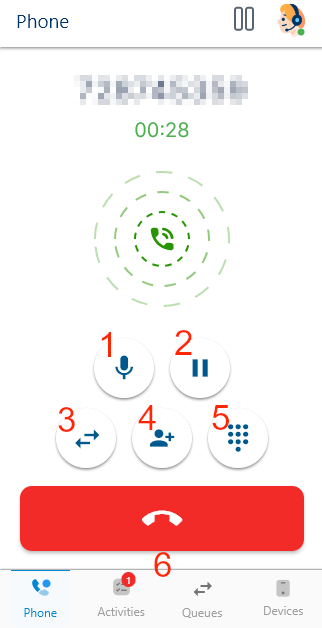
A new tab with your call will open:

  1. Mute you microphone.

  2. Put the customer on hold/unhold.

  3. Transfer the call.

  4. Invite another agent to the call.

  5. Open the numpad.

  6. Hang up.

When your call is finished, close the tab. If your queue has a mandatory status, click Save button and select one from the list and click OK.


Receive a Call

Receive a Call

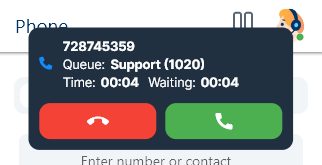
Your incoming call notification displays the customer's name or number, the queue name and activity type. Accept the call using the green button. If you have more than one device online, select which device you want to accept the call with from the drop down menu.

A new tab with your call will open:

  1. Mute you microphone.

  2. Put the customer on hold/unhold.

  3. Transfer the call.

  4. Invite another agent to the call.

  5. Open the numpad.

  6. Hang up.

When your call is finished, close the tab. If your queue has a mandatory status, click Save button and select one from the list and click OK.


Transfer a Call

Transfer a Call

  • During an ongoing call, click the Transfer button.

  • The window with options will open. Click Transfer or Blind transfer.

    • Blind transfer: your call will be ended as soon as you tap the option. The customer will be on hold while the phone is ringing and will be connected to the new agent as soon as they answer. The new agent will only know the customer's name or phone number and that you have transferred the call to them.

    • Transfer: the customer will be put on hold. You will be connected to the agent you are transferring the call to so you can explain to them what the customer needs.

  • Click the user or queue to tranfer the call.

  • Your call will be transfered.


Send an SMS

Send an SMS

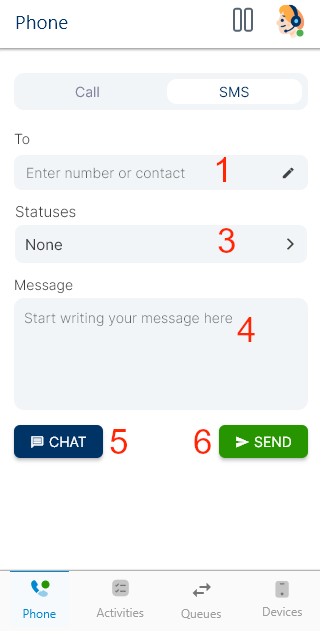
Click the SMS tab to send a new SMS message.

Set up your message:

  1. Enter a phone number or a contact or account name. Click a suggested contact to enter their number into the Number field.

  2. Select a status.

  3. Enter the text of your message.

  4. Open message in chat.

  5. Send your message.


Accept Other Activity Types and Open Them in Daktela

Accept Other Activity Types and Open Them in Daktela

Your incoming activity notification displays the customer's name or number, the queue name and activity type. Accept the activity using the green button.

A new tab with your activity will open.

Once you accept an activity, click Open in Daktela. A new browser tab with the activity will open. You can manage the activity there.

When your activity is finished, close the tab. If your queue has a mandatory status, select one from the list and click OK. You can close the activity the standard way in Daktela – the changes will be visible in Daktela Desktop too.


Select a Pause

Select a Pause

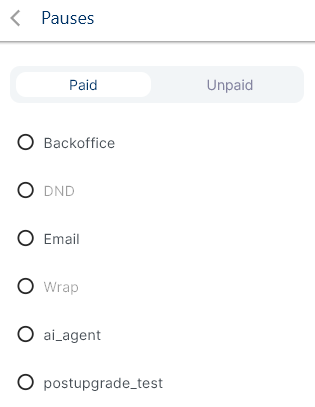
  1. Click the Pause button to open a dropdown list with available pauses.

  2. Select a pause. Some pauses are started automatically – you cannot select them.

To end your pause, click on the pause name and select No pause from the dropdown list.


Switch to Unready, Log Out, Exit

Switch to Unready, Log Out, Exit

Click the Pause button and select:

  • Switch to unready to stop processing activities.

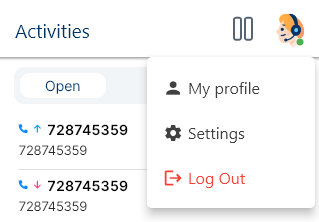
Click the Profile icon and select:

  • Log out to log out of Daktela.

If you exit the app without first switching to unready or logging out, you will remain in the state you were in before exiting the app.


Troubleshooting

Troubleshooting

Firewalls

Some firewalls may prevent the app from working correctly (e.g. ESET). If the app crashes immediately after you accept a call, disable your firewall and try again. If the issue persists, please contact support.


JavaScript errors detected

Please note, these errors can depend on your browser setup.

If this problem persists, please contact our support.