Receive Emails and Work With Tickets
In Daktela, all emails must be part of a ticket. When you send or receive a new email, a new ticket will be created automatically. Replies to your emails will be part of the ticket created when it was sent. There can be more than one email in a ticket.
Tap the Tickets button in the bottom right corner to open Tickets:
%20-%20kopie.jpg?inst-v=09d7a1da-2874-4dd9-9ba5-c7bd9eeb914b)
Your ticket overview will open:
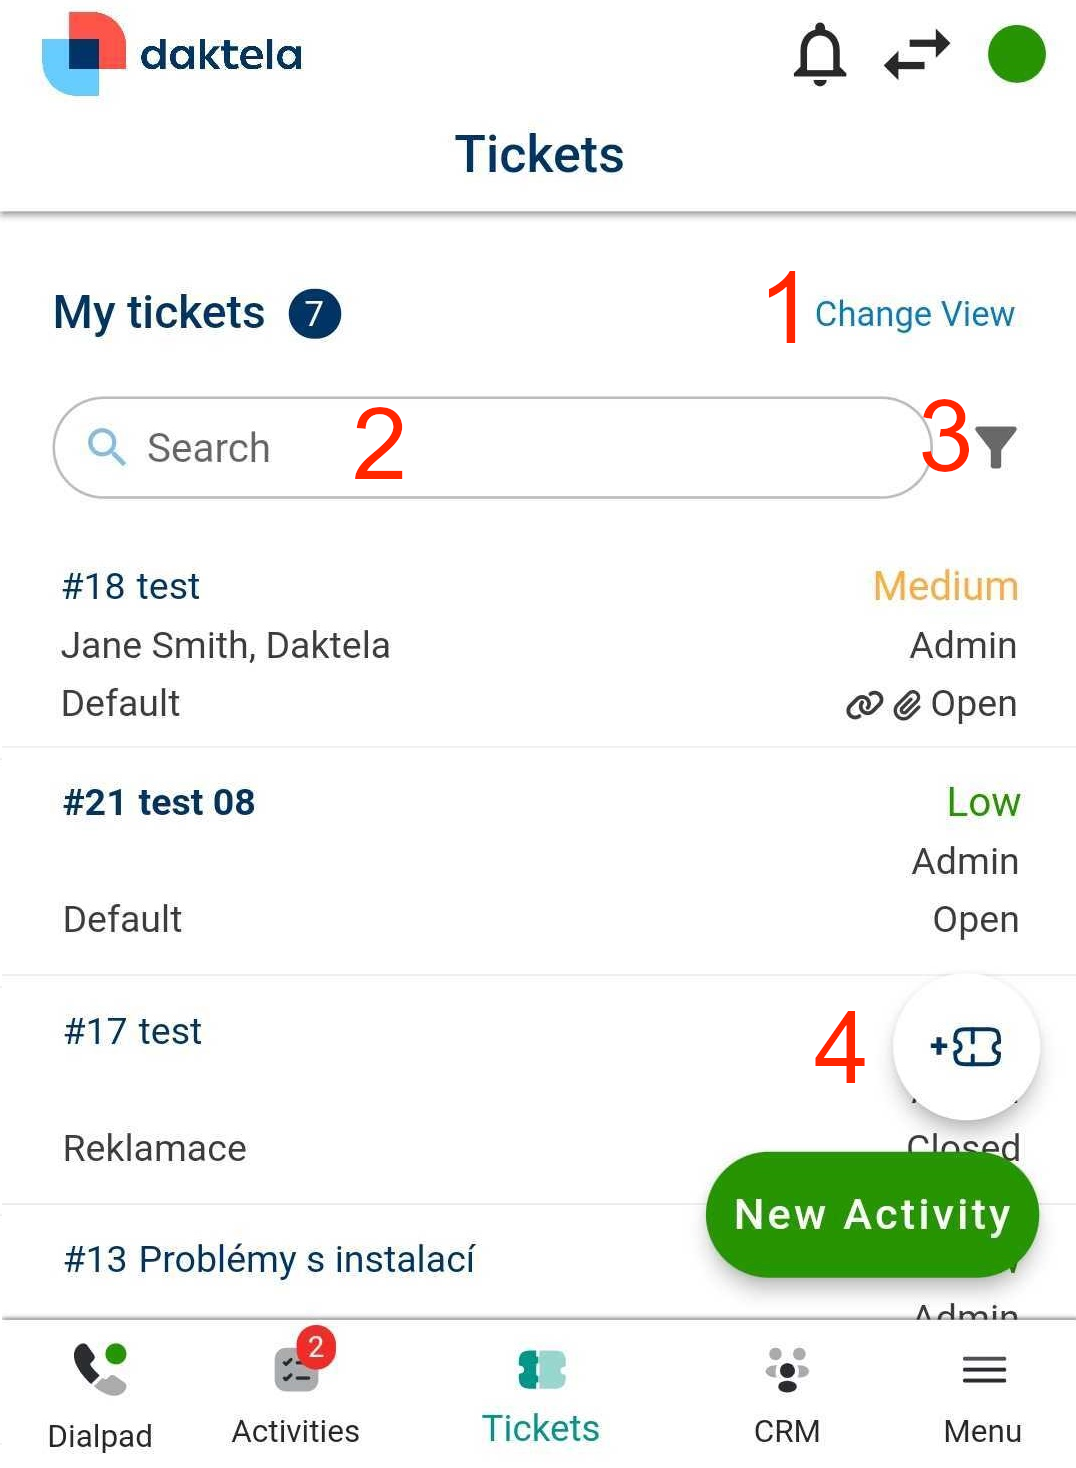
Select your ticket view. A view works like a predefined ticket filter.
Search for a ticket.
Tap to open the filters options.
Create a new ticket.
Click an existing ticket to open it.
Create a New Ticket/Edit a Ticket
The ticket detail screen contains ticket parameters:

Tap to set the ticket as a Favorite.
Tap to display the ticket change history.
Tap to save the ticket. To open ticket macros, long press the save button. The dialog with a list of macros will open.
Tap to link the ticket as a parent or as a child or merge two ticket together.
Select the user currently working on the ticket. You can assign yourself or pass the ticket on to someone else.
Select a stage:
a. Open – the ticket is being handled.
b. Waiting – a reply has been sent to the customer, waiting for their reaction. You can set a reopen date (9).
c. Closed – the ticket has been solved. You can set a reopen date (9). If the customer replies, the ticket will be set to Open again. d. Archived – the ticket has been solved. If the customer replies, a new ticket will be created automatically.Select a category.
Select a status. If the category you have chosen has a mandatory status, you must select a status when you close the ticket – you can leave it empty until then.
Enter the ticket title.
Select the ticket's primary contact.
Open the account the primary contact is associated with.
Select ticket followers. They will receive notifications when there are any changes to the ticket.
Select a deadline manually (set by your SLA and priority if left empty).
Select a priority.
Select a date to reopen the ticket if stage set to Waiting or Closed.
Type a description.
If you have a custom form set up for your tickets, you will find it below this part. Ask your Team Leader or Supervisor if you are unsure how to fill it out.
The ticket history is located in the bottom part of the ticket details. It displays all the ticket's activities and attachments.
Tap an activity to open its details. Tap an attachment to download into your mobile phone.
Tap the New activity button in an open ticket to add a new comment or to start a new call or email in the ticket.