CRM
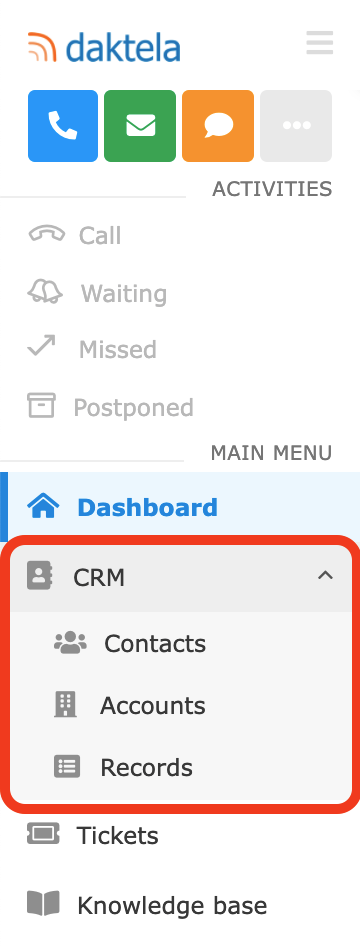
Open the CRM module from the main menu and choose Contacts, Accounts or Records
Contact List
When you open the Contacts section, you will see a list of your contacts.

Filter your contacts.
Open bulk select options.
Open the contact details.
Open the account details.
Bulk operations – only appears if 1 or more contacts are selected.
Change.
Merge selected contacts – if 2 or more contacts are selected.
Delete.
GDPR erasure. If you choose GDPR erasure it will delete CRM contact and all related data. It will anonymise all activities related to this contact, physically remove recordings, attachments, messages, text from emails etc. This operation can't be reverted
Create new contact.
Export your contacts.
Export your contacts to records.
Import contacts.
Clone contact.
Delete contact. After you click Delete, choose whether to simply delete the contact or to perform a GDPR erasure, which will delete all data related to the contact. Use GDPR erasure with caution!
Contact Details / Create a New Contact
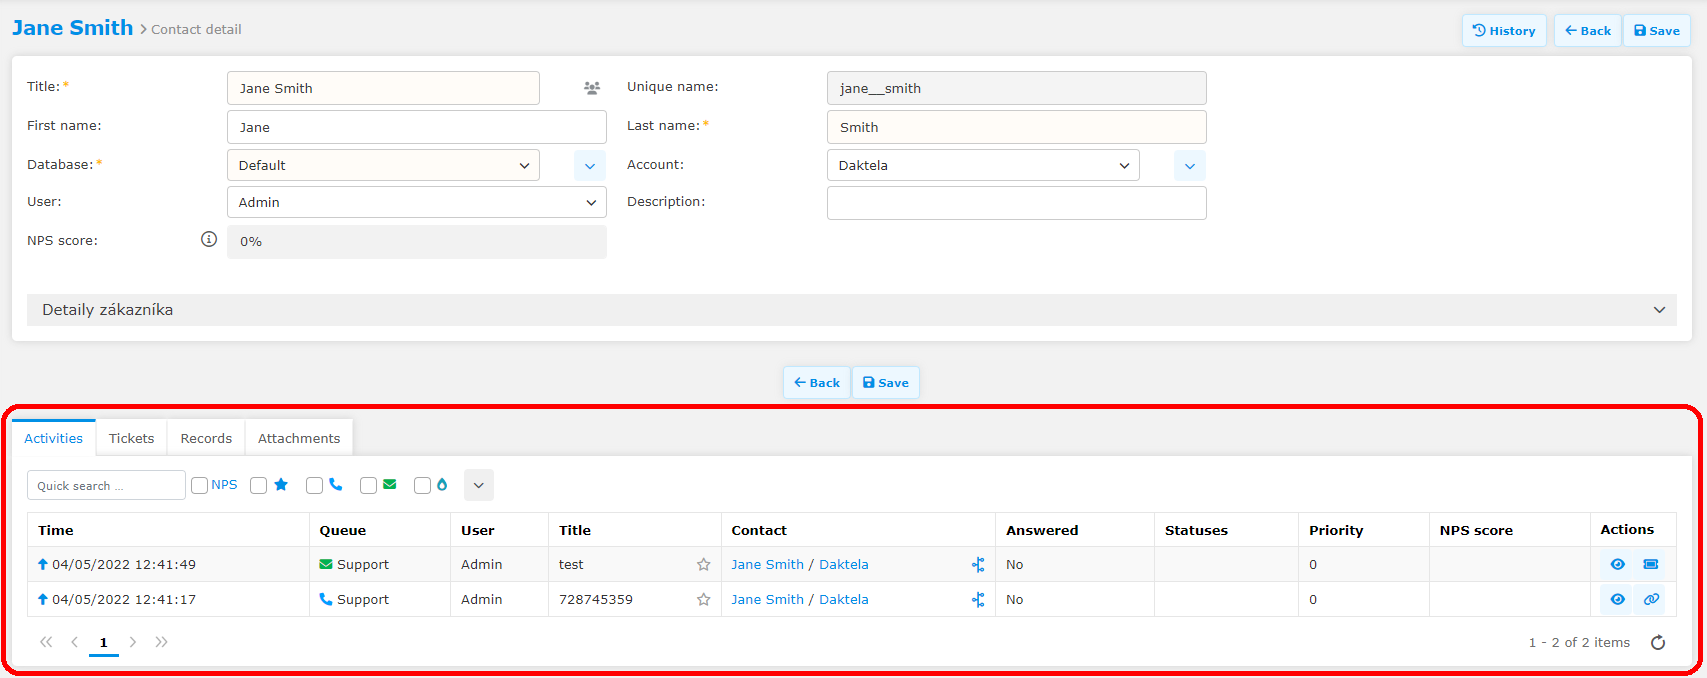
When you open a contact's details or when you create a new contact, the only difference is that the fields will already contain data when you open an existing contact.
The top part of the contact screen is always the same and contains several mandatory fields.

Open a list of options for managing accounts or add new account.
Select an Agent for this contact.
Select on which database you want to add this contact.
Pair an open activity without a contact to this contact.
Open the contact's change history.
Go back to the Contact list.
Save the contact.
Fields such as Phone, Email, Address etc are in a custom form just below the top part. If you are unsure how to fill it out, your team leader or administrator will take you through this form.
There is an overview of the contact's past activities, tickets, records and attachments at the bottom of the contact detail screen.
Account List
When you open the Accounts section, you will see a list of your accounts.

Filter your contacts.
Open bulk select options.
Open the account details.
Clear filter and selection.
Bulk operations – only appears if 1 or more contacts are selected.
Change.
Merge selected contacts – if 2 or more contacts are selected.
Delete.
Create new account.
Batch import and export.
Clone account.
Delete account.
Account Details / Create a New Account
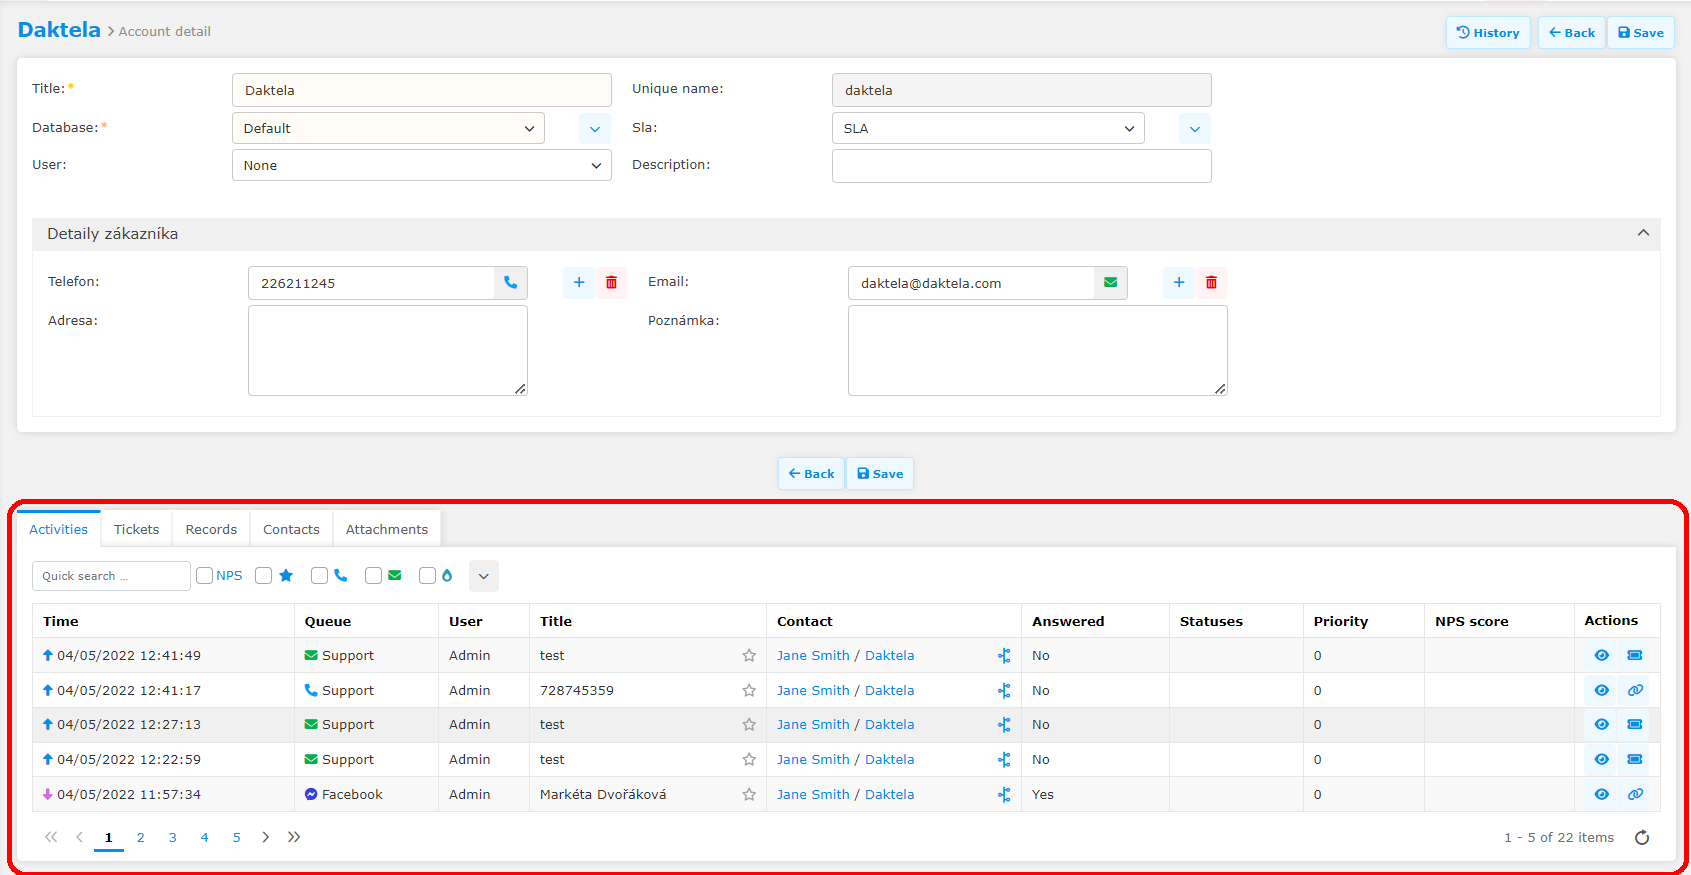
When you open an account's details or when you create a new account, the only difference is that the fields will already contain data when you open an existing account.
The top part of the account screen is always the same and contains several mandatory fields marked with an asterisk symbol.

Select an SLA or open a list of options for managing SLAs using the blue button. The SLA setting here will override the category SLA setting of tickets belonging to CRM Contacts from this CRM Account.
Open the account's change history.
Go back to the Account list.
Save the account.
Fields such as Phone, Email, Address etc are in a custom form just below the top part. If you are unsure how to fill it out, your team leader or administrator will take you through this form.
There is an overview of the contact's past activities, tickets, records and attachments at the bottom of the contact detail screen.
Contact and Account History
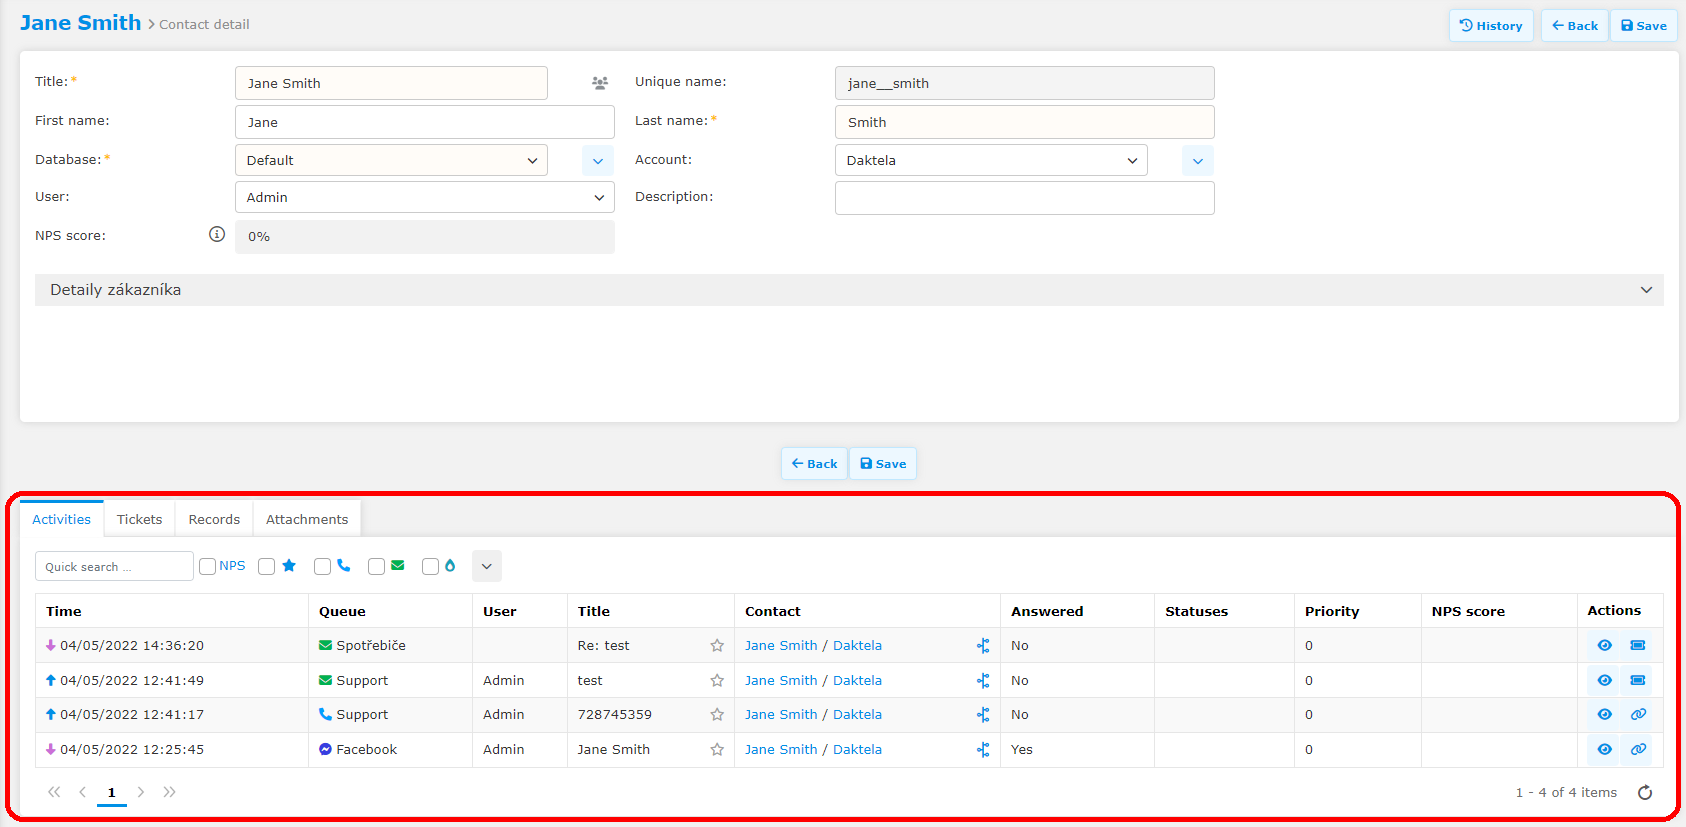
There is an overview of the contact's or account's past activities, tickets, records and attachments at the bottom of the detail screen. See below for a description of each tab.
Activities
Click the Activities tab at the top of the table.

Quick search activities.
Filter activities by type. Click the down arrow to open more options. You can select multiple types.
Open CRM contact/account details.
Customer journey – see the contact's history.
Open activity details. See Activities for more info.
Merge activity with ticket.
Open ticket.
Tickets
Click the Tickets tab at the top of the table.

Open ticket.
Open CRM contact/account details.
Customer journey – see the contact's history.
Create new ticket. You can create ticket only from contacts.
Clone ticket.
Records
Click the Records tab at the top of the table.

Open record details.
Open CRM contact.
Customer journey – see the contact's history.
Open CRM account.
Create new record. Select the CRM record type from the dropdown menu.
Clone record.
Attachments
Click the Attachments tab at the top of the table.

Open attachment.
Upload an attachment or drag and drop files into the grey area around the Select files button.
Delete attachment.
Merge Contacts or Accounts
To merge contacts or accounts, open your Contact or Account list. Select 2 or more contacts or accounts and click the yellow Merge button at the top of the table:

The Merging contacts/accounts window will open:
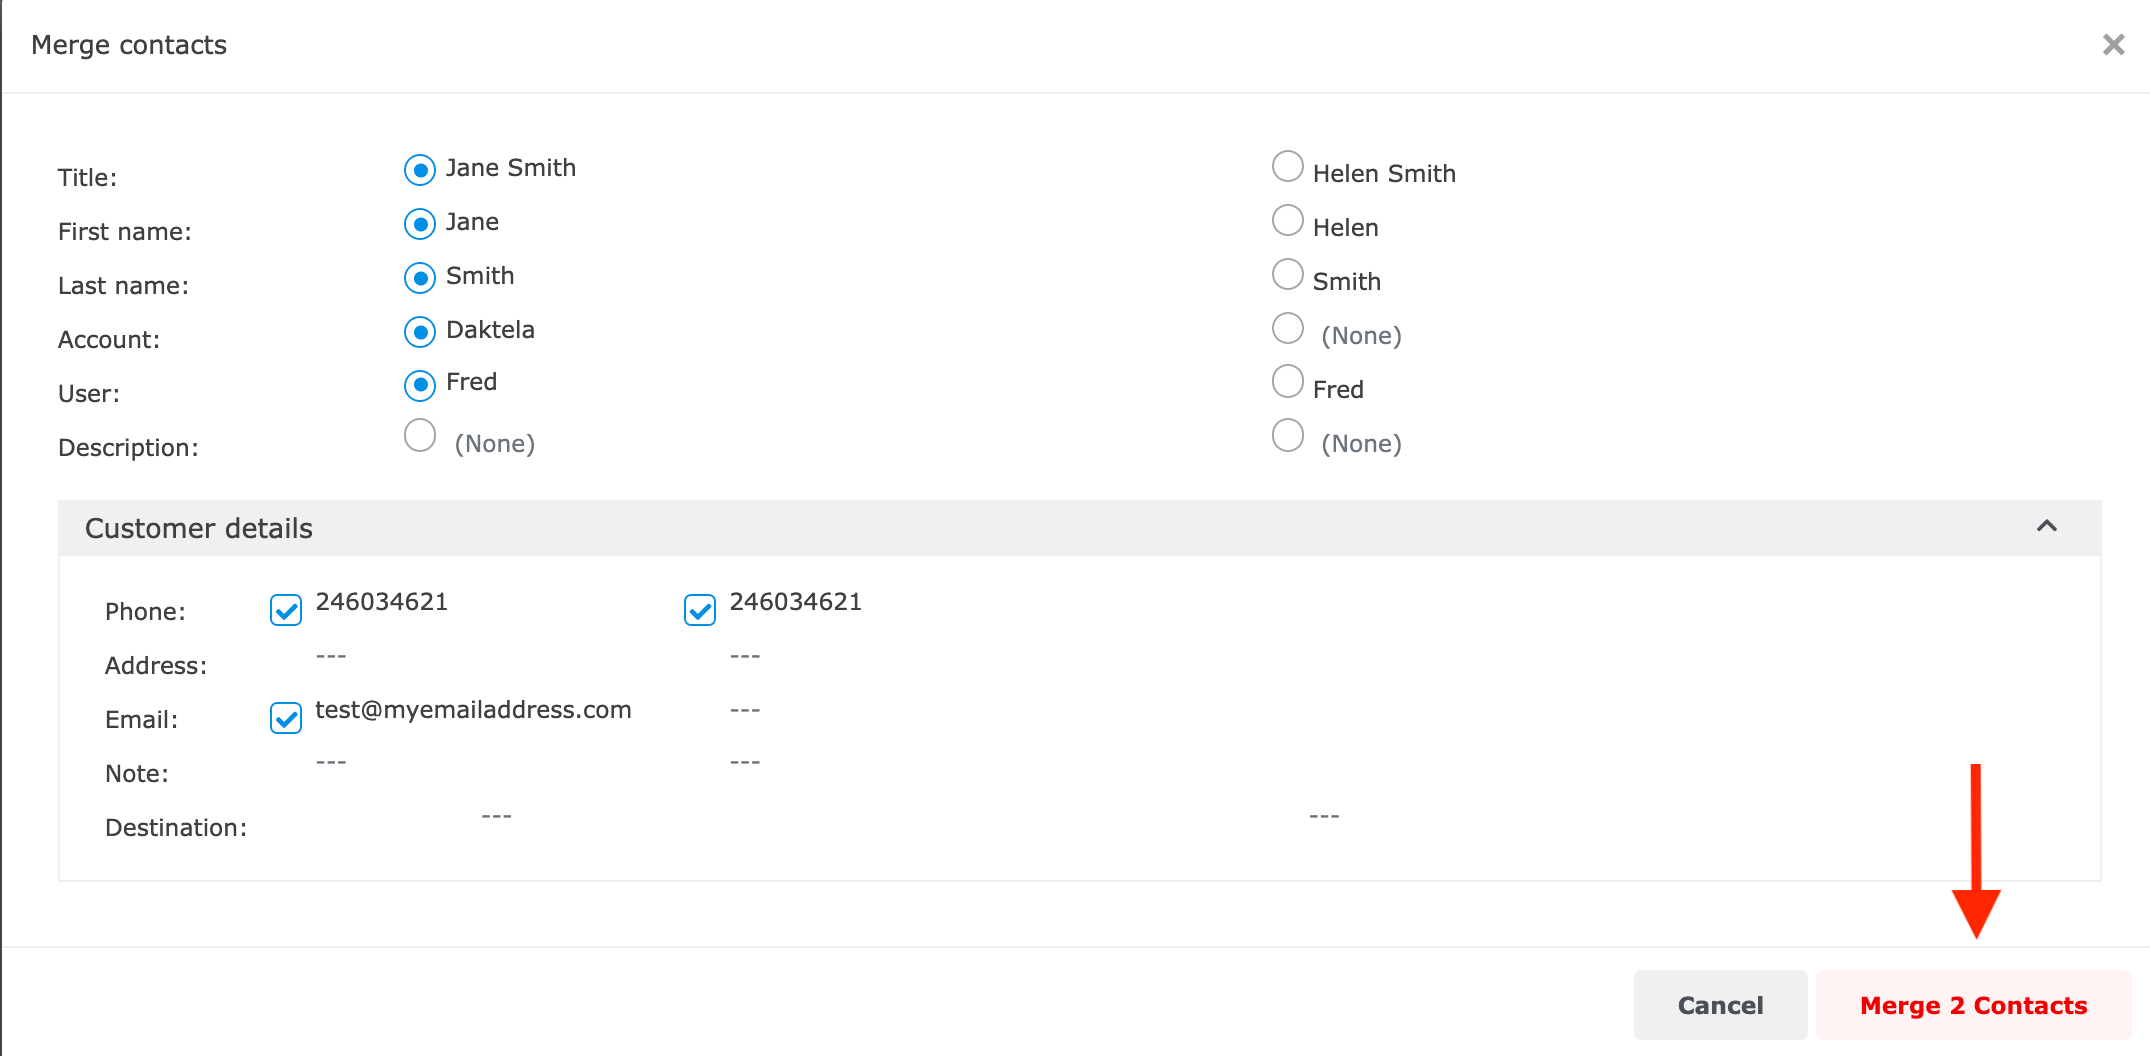
Select which info to merge.
In the top part with radio buttons, you can only select 1 option per line.
In the bottom part with checkboxes, you can select as much information as you wish.
Warning
Any info you don't choose will not be merged and as such will be deleted.
What fields you see in the bottom part depends on what custom fields your team leader or administrator has set up.
When you have finished selecting your info, click Merge Contacts/Accounts in the bottom right of the Merging window.
Filter Contacts, Accounts or Records
To set up a filter, click the blue Filter button at the top left of the contact, account or record list.

The Search window will open. Define your filter and click Search at the bottom of the window to apply the filter. You can save your filter using Filter schemes.

Filter Schemes
You can save a filter to use it again in the future using Filter schemes. Define your filter and click Save as.

Type your Scheme title and click Save. Click Search at the bottom of the window to apply the filter.

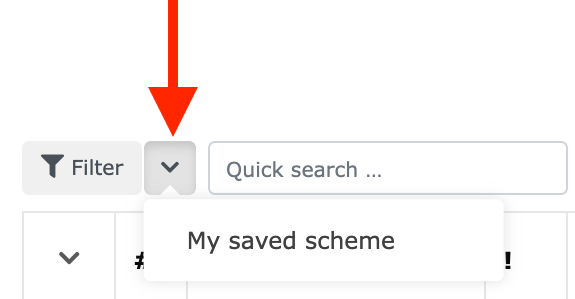
You can quickly access your saved Filter scheme using the dropdown menu next to the Filter button. Click the scheme title to apply it.
Record List
When you open the Records section, you will see a list of your records.
Use Records to store your customer data such as contracts, documents and any other supplementary information.

Filter your contacts.
Open bulk select options.
Open record details.
Open the contact details.
Open the account details.
Bulk change selected records – if 1 or more records are selected.
Bulk delete selected records – if 1 or more records are selected.
Create new record. Select a CRM record type from the drop down list.
Batch import and export.
Clone contact.
Delete contact.
Record Details / Create a New Record
Use Records to store your customer data such as contracts, documents and any other supplementary information.
When you open a record's details or when you create a new record, the only difference is that the fields will already contain data when you open an existing record.
The top section of the record detail screen contains basic information, with mandatory fields marked by an asterisk symbol.

Click the dropdown icon to open a list of options for Contact, Account and Ticket. When the field is empty, there will be a + icon instead of the dropdown icon. Click it to create a new entry.
Detail – open the entry details without editing.
Update – open the entry details with editing enabled.
Create – add a new entry.
Open the record change history.
Custom fields
The middle section contains custom fields created by your team leader or administrator. Please contact them if you are unsure about how to fill this section out.
The bottom section of the record detail screen contains attachments.

Download attachment.
Select a file to upload or drag and drop files into the grey area around the Select files button.
Delete attachment.
