Tickets
Ticket Views
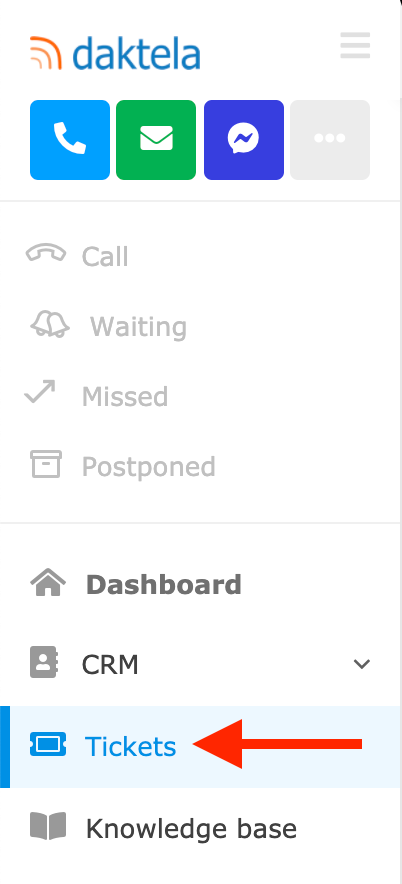
Open the Ticket module in the main menu.
Views
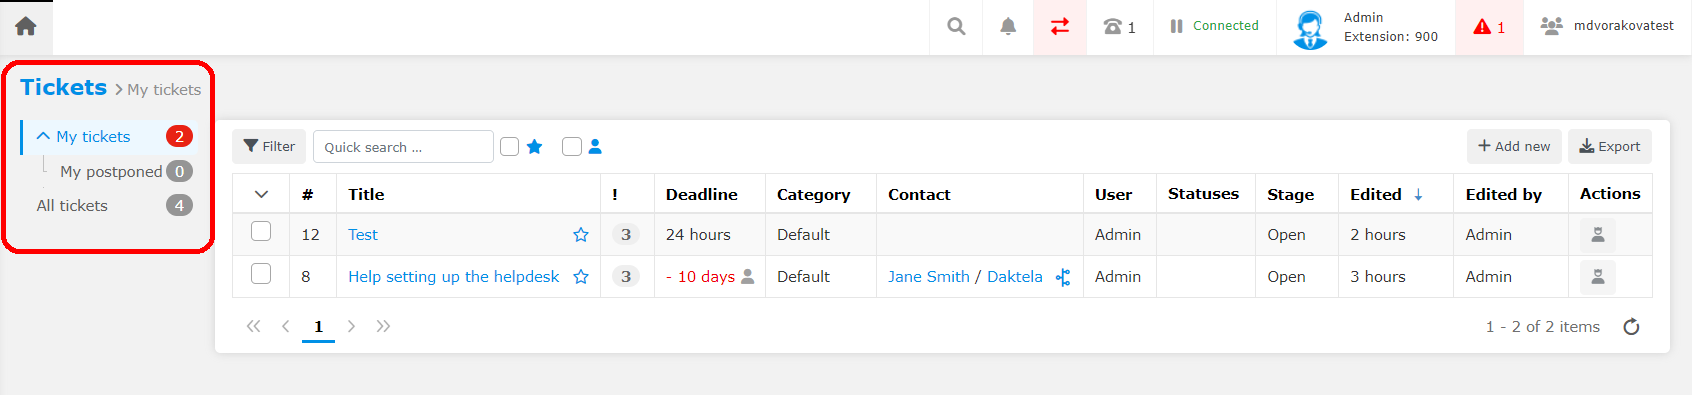
Select a view from the list between the main menu and the tickets. A view works like a predefined filter that helps you see relevant tickets. Views are set up by your administrator or team leader. To set up your own filters, see Filtering.
Filtering
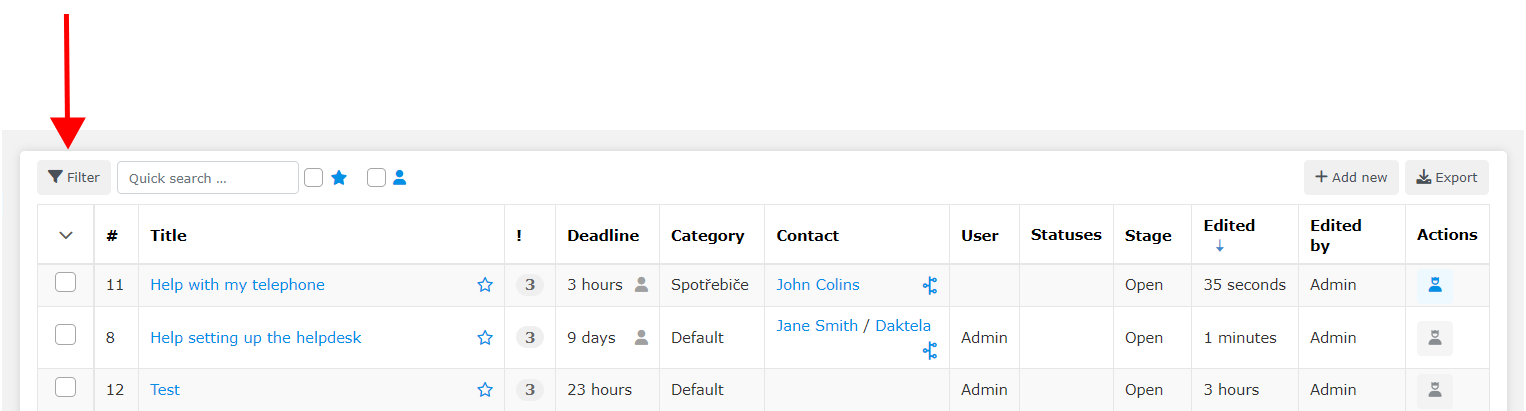
To set up your own filter, click the blue Filter button at the top left of the ticket list in any view.
The Search window will open. Define your filter and click Search at the bottom of the window to apply the filter. You can save your filter using Filter schemes.

Filter Schemes
You can save a filter to use it again in the future using Filter schemes. Define your filter and click Save as.
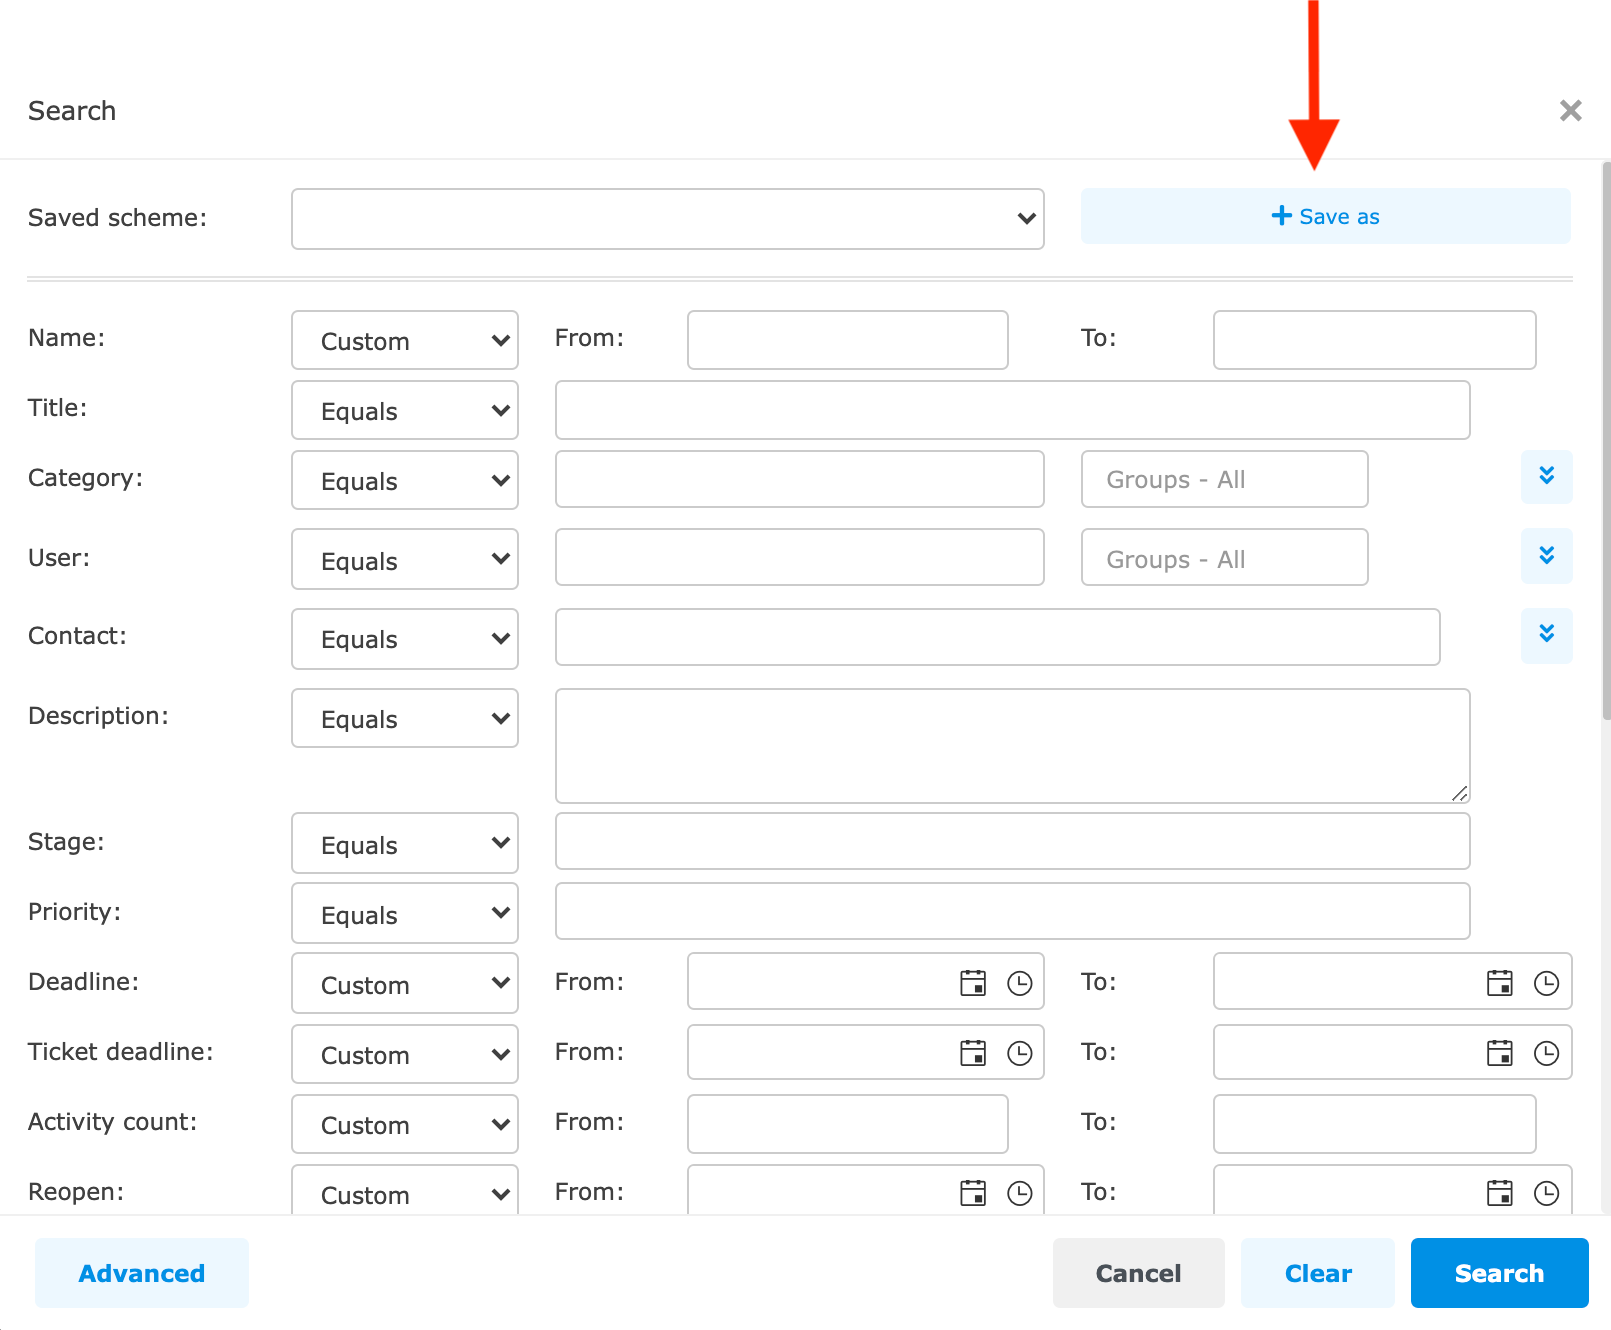
Type your Scheme title and click Save. Click Search at the bottom of the window to apply the filter.

You can quickly access your saved Filter scheme in any view using the dropdown menu next to the Filter button. Click the scheme title to apply it to the current view.

Customer Journey
If you would like to see the history of your communication with the customer you can find it in the contact column by clicking the symbol Customer Journey.

Ticket List
Each view displays a list of tickets that match its criteria. The top of the list contains bulk controls.

Filter tickets. Use the drop down menu to select a saved filter scheme.
Filter only your favourite tickets.
Filter only your tickets.
Clear filter and selection.
Bulk change selected tickets (1 or more tickets need to be selected).
Merge selected tickets (2 or more tickets need to be selected).
Delete selected tickets (1 or more tickets need to be selected).
Create a new ticket. See Ticket details.
Export the list of tickets in the view.
The list of tickets is below the controls. Sort the tickets by individual columns by clicking the column name.
A new ticket or a ticket with a change will be bold (unread) until its owner opens it.

Bulk select tickets.
Open ticket.
Open the Contact or Account in the CRM module.
Customer journey – see the contact's history.
Take ownership of the ticket – only active if the ticket has no owner.
Delete the ticket. After you click Delete, choose whether to simply delete the ticket or to also anonymise all related activities and all data is now anonymised including comments to the ticket. Anonymised tickets are no longer deleted – they remain in your helpdesk but don’t contain any personal information. Use anonymising with caution!
Ticket stage. Closed tickets with this symbol have a re-open date and time set.
Ticket Details
The top part of the ticket detail screen contains general ticket controls.
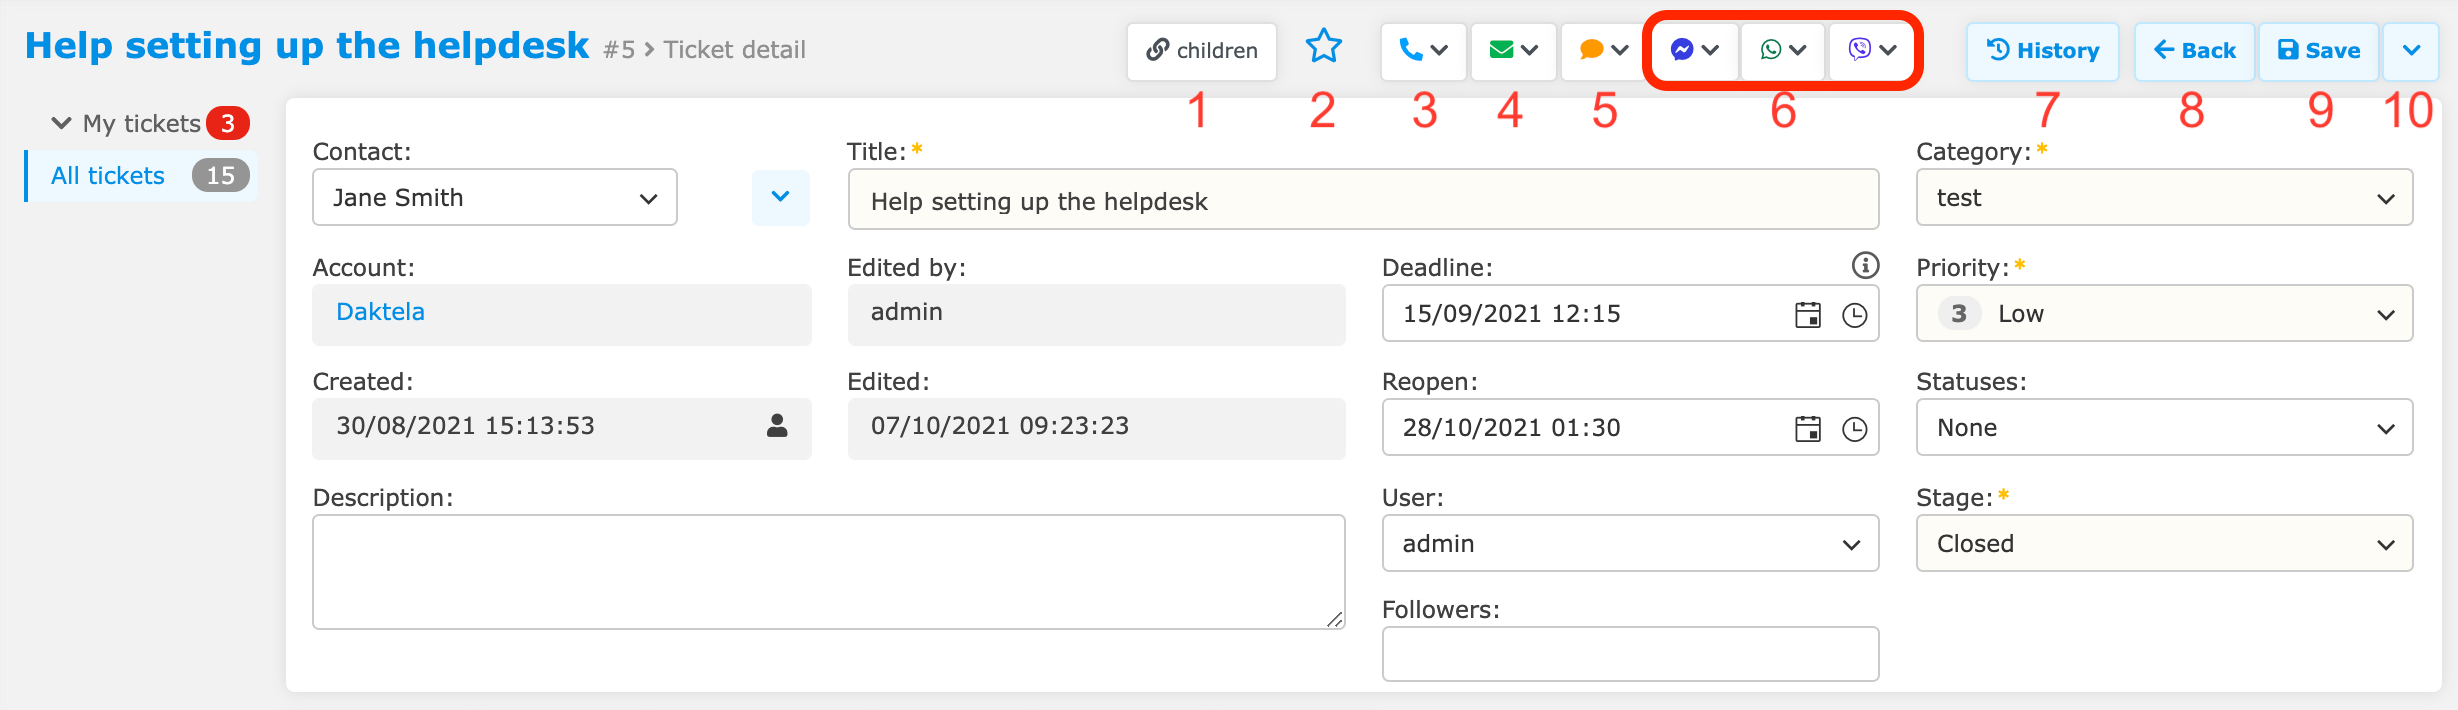
Hover over to display the ticket's parent and/or child tickets. Click to open the ticket's list of parent and/or child tickets in the Tickets tab – see 4 in the bottom part below.
Follow ticket. Your user name will appear in the Followers field (see 11 in middle part of ticket details below).
Call from ticket.
Email from ticket.
SMS from ticket.
Chat from ticket.
Display ticket change history.
Go back to the list of tickets.
Save ticket.
Open list of macro options (see 10 in bottom part of ticket details below).
The middle part of the ticket detail screen contains important ticket parameters.
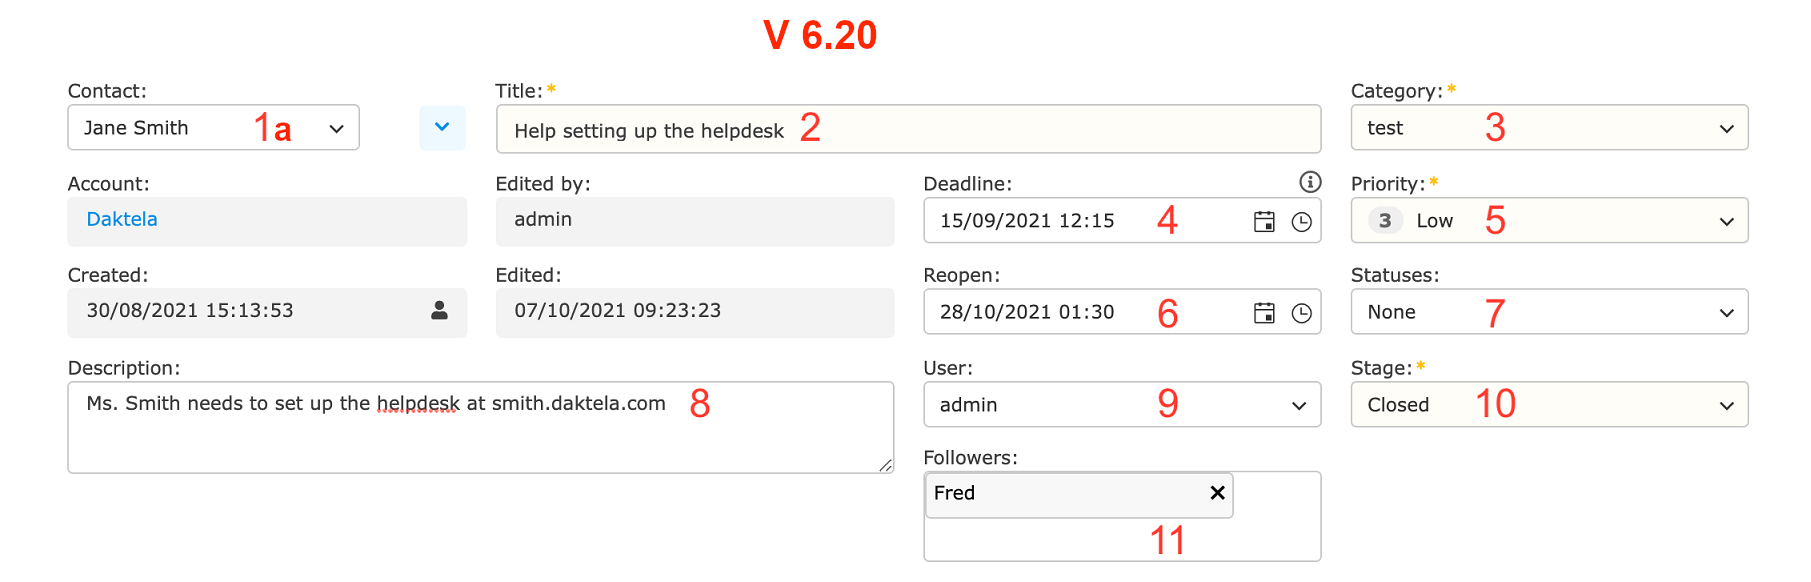
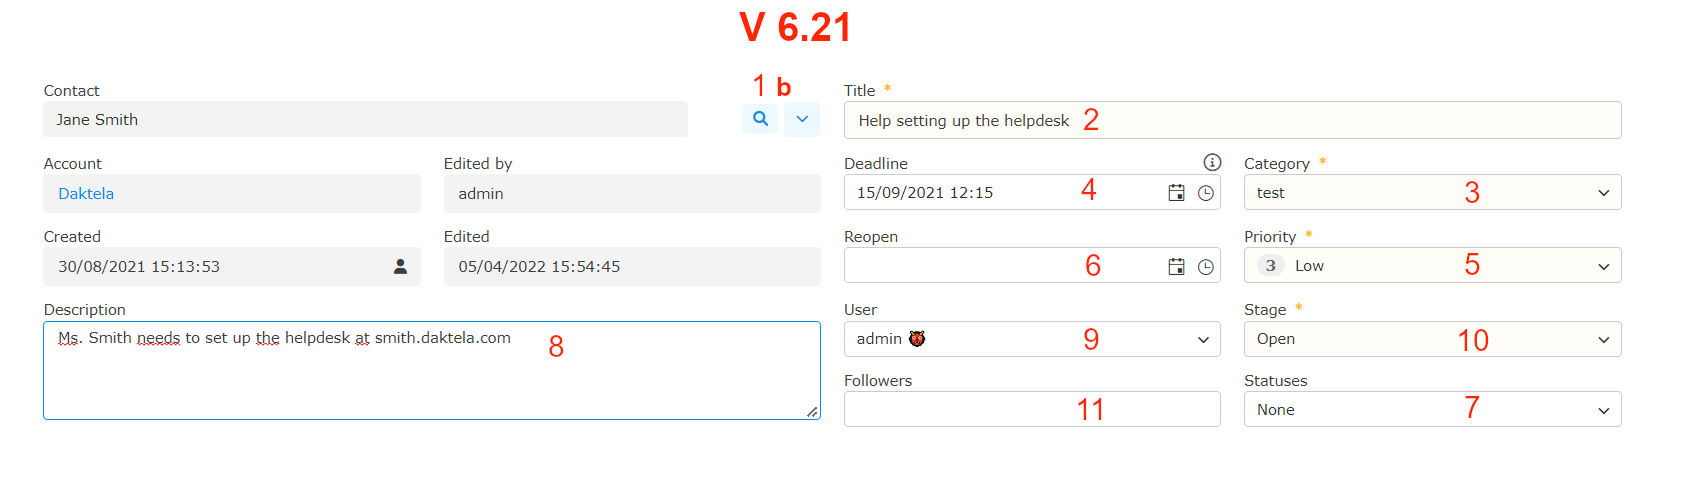
Contact:
a. Select the ticket's primary contact.
b. Click the magnifying glass and search for the ticket's primary contact.If you select a Contact that is part of a CRM Account with an SLA set up, its SLA will be used instead of the Category's one.
Type the ticket title.
Select a category. The ticket's category sets its SLA unless a Contact that is part of a CRM Account with a different SLA is selected in 1. above.
Select a deadline manually (set by your SLA and priority if left empty).
Select a priority.
Select a date to reopen the ticket if stage set to Waiting or Closed.
Select a status. If the category you have chosen has a mandatory status, you must select a status when you close the ticket – you can leave it empty until then.
Type a description.
Select the ticket owner. You can take ownership yourself or pass the ticket on to someone else.
Select a stage:
Open – the ticket is being handled.
Waiting – a reply has been sent to the customer, waiting for their reaction. You can set a reopen date (6).
Closed – the ticket has been solved. You can set a reopen date (6). If the customer replies, the ticket will be set to Open again.
Archived – the ticket has been solved. If the customer replies, a new ticket will be created automatically.
Enter ticket followers. They will receive notifications when there are any changes to the ticket.
If you are in the ticket and someone made the change you get notification which agent made the change.

If you have a custom form set up for your tickets, you will find it below this part. Ask your Team Leader or Supervisor if you are unsure how to fill it out.
The bottom part of the ticket detail screen contains additional info and controls.
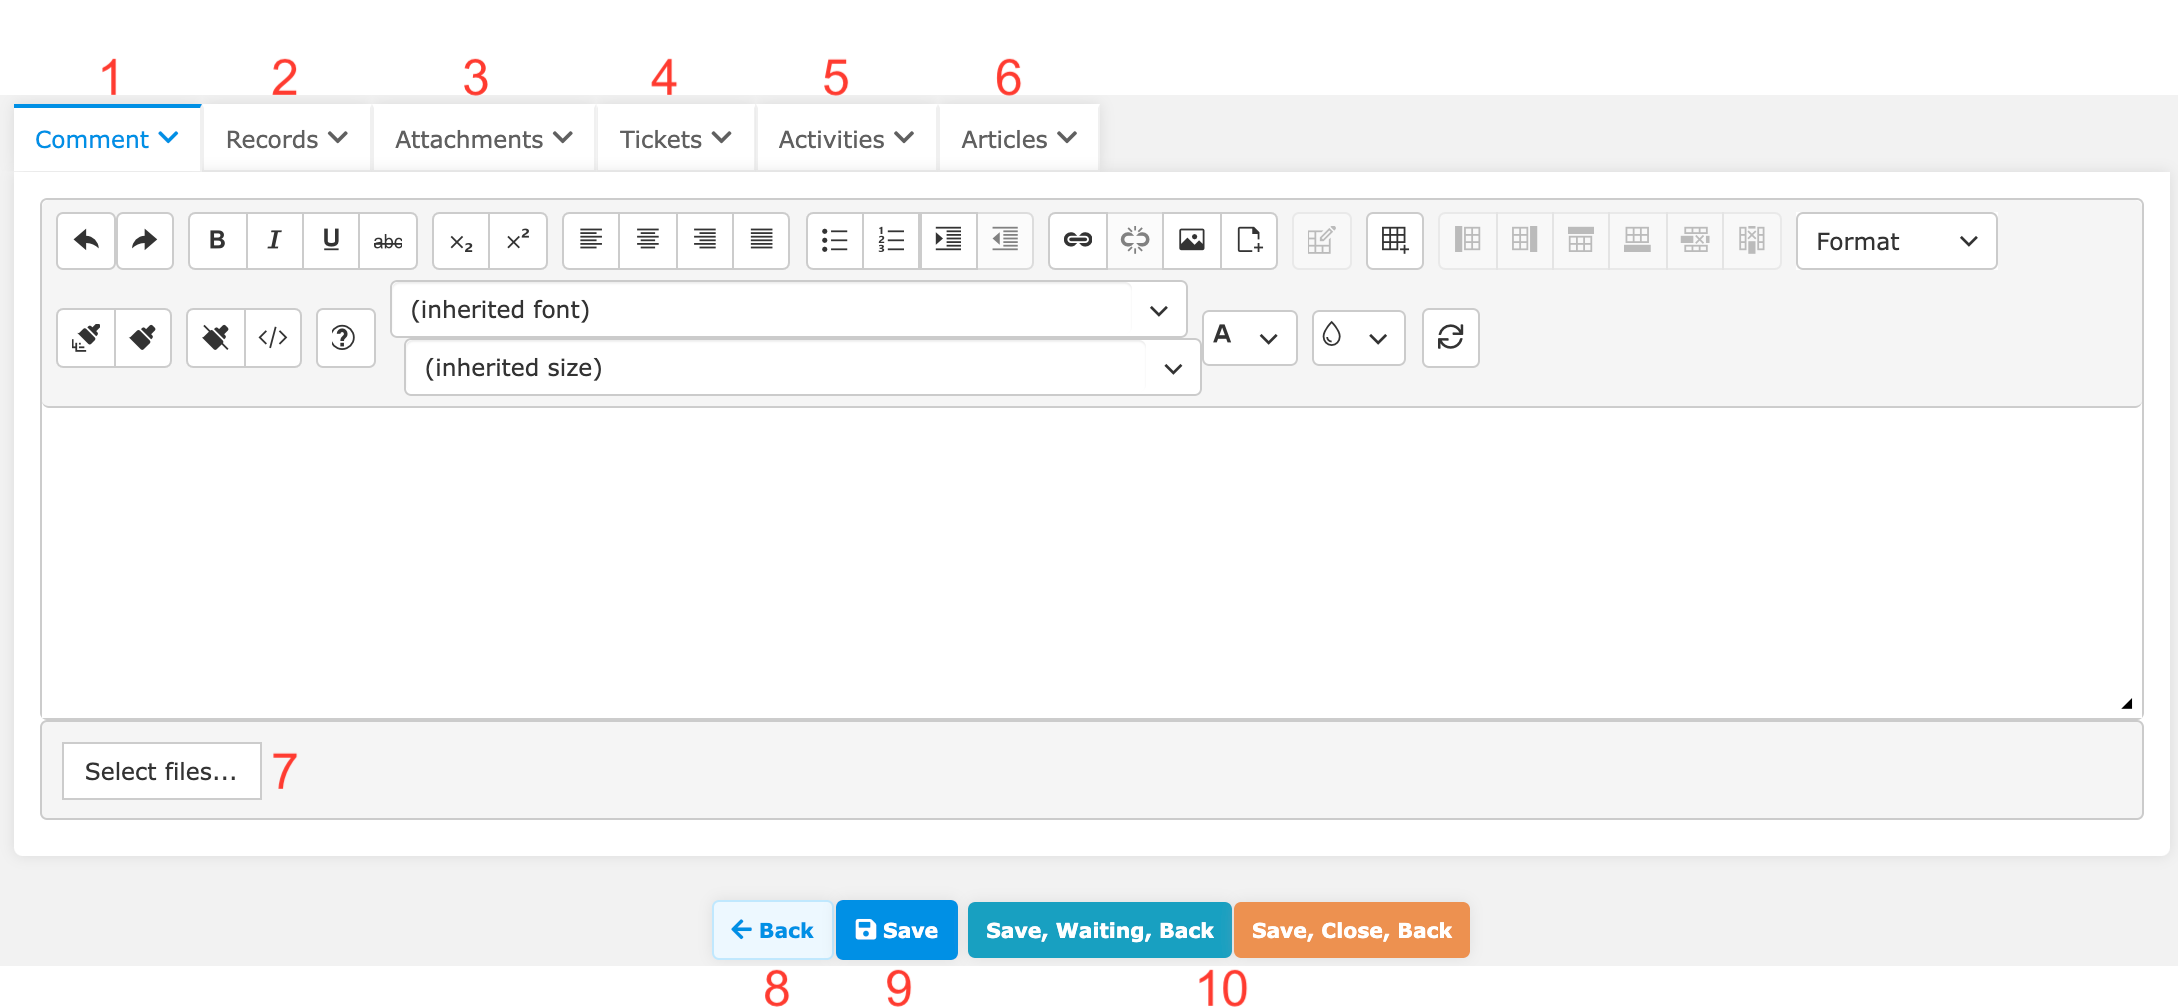
Add a comment to the ticket.
View and add CRM records.
View ticket attachments.
View previous tickets. In the Actions column, you can merge them with the current ticket by clicking Merge:

Add them as a child or parent ticket by clicking Link as:

Remove their child/parent relationship by clicking Unlink:

View past activities.
View articles.
Select a file to attach to the ticket or drag and drop files into the grey area around the Select files button.
Go back to the list of tickets.
Save the ticket.
Custom macros – your team leader or administrator may set up different ones.
The ticket activity history is located below.

Expand/collapse all activities in the ticket.
Filter specific activity types. Open more activity types using the dropdown list.
Refresh the activity list.
Expand single entry.
Mark as important and activity controls. You can:
Call and text from activities with a phone number.
Send an email (reply or forward) from activities with an email address.
Send messages from activitites with a Facebook/WhatsApp/Viber contact.
Add a Comment. A summary of the activity you are commenting on will be added to your comment.
Open the activity detail.
Using the dropdown menu, you can Create a child ticket, Print the activity, Create an article from comments and emails and Create a template from emails.
Jump to the next activity in the list.
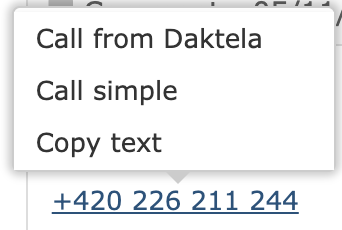
Hover over phone number and email links to bring up a list of actions: