Outgoing Calls
Manual Call
To make a manual call, click the New call button in the left panel above the main menu.
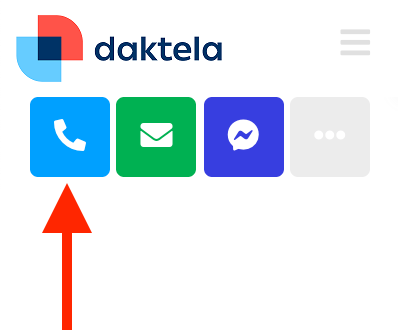
The Call number window will open.

Enter a phone number or choose from your contacts in the dropdown menu. You can choose a specific person or a queue. Click Call. Your call will start. See Call details for instructions on how to manage the call.
From the CRM Module
Open the CRM module in the main menu and go to Contacts on Accounts.
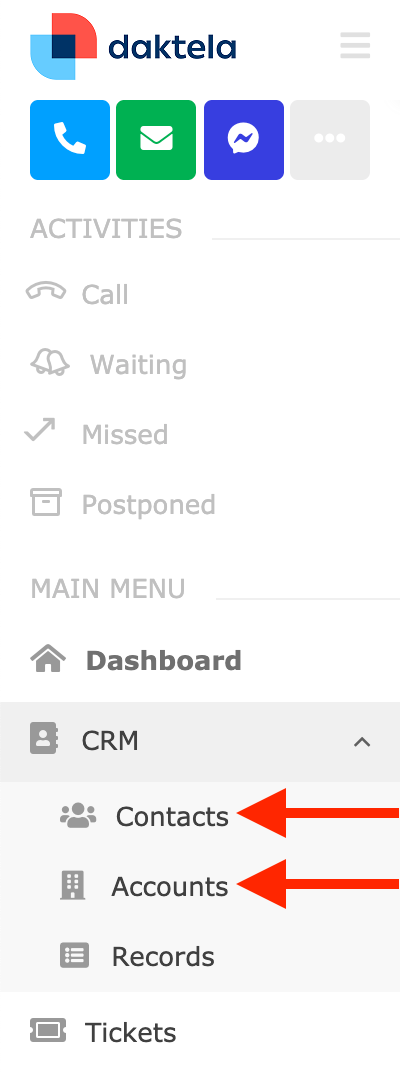
Find the Contact or Account you would like to call and open the details. See CRM for detailed instructions.
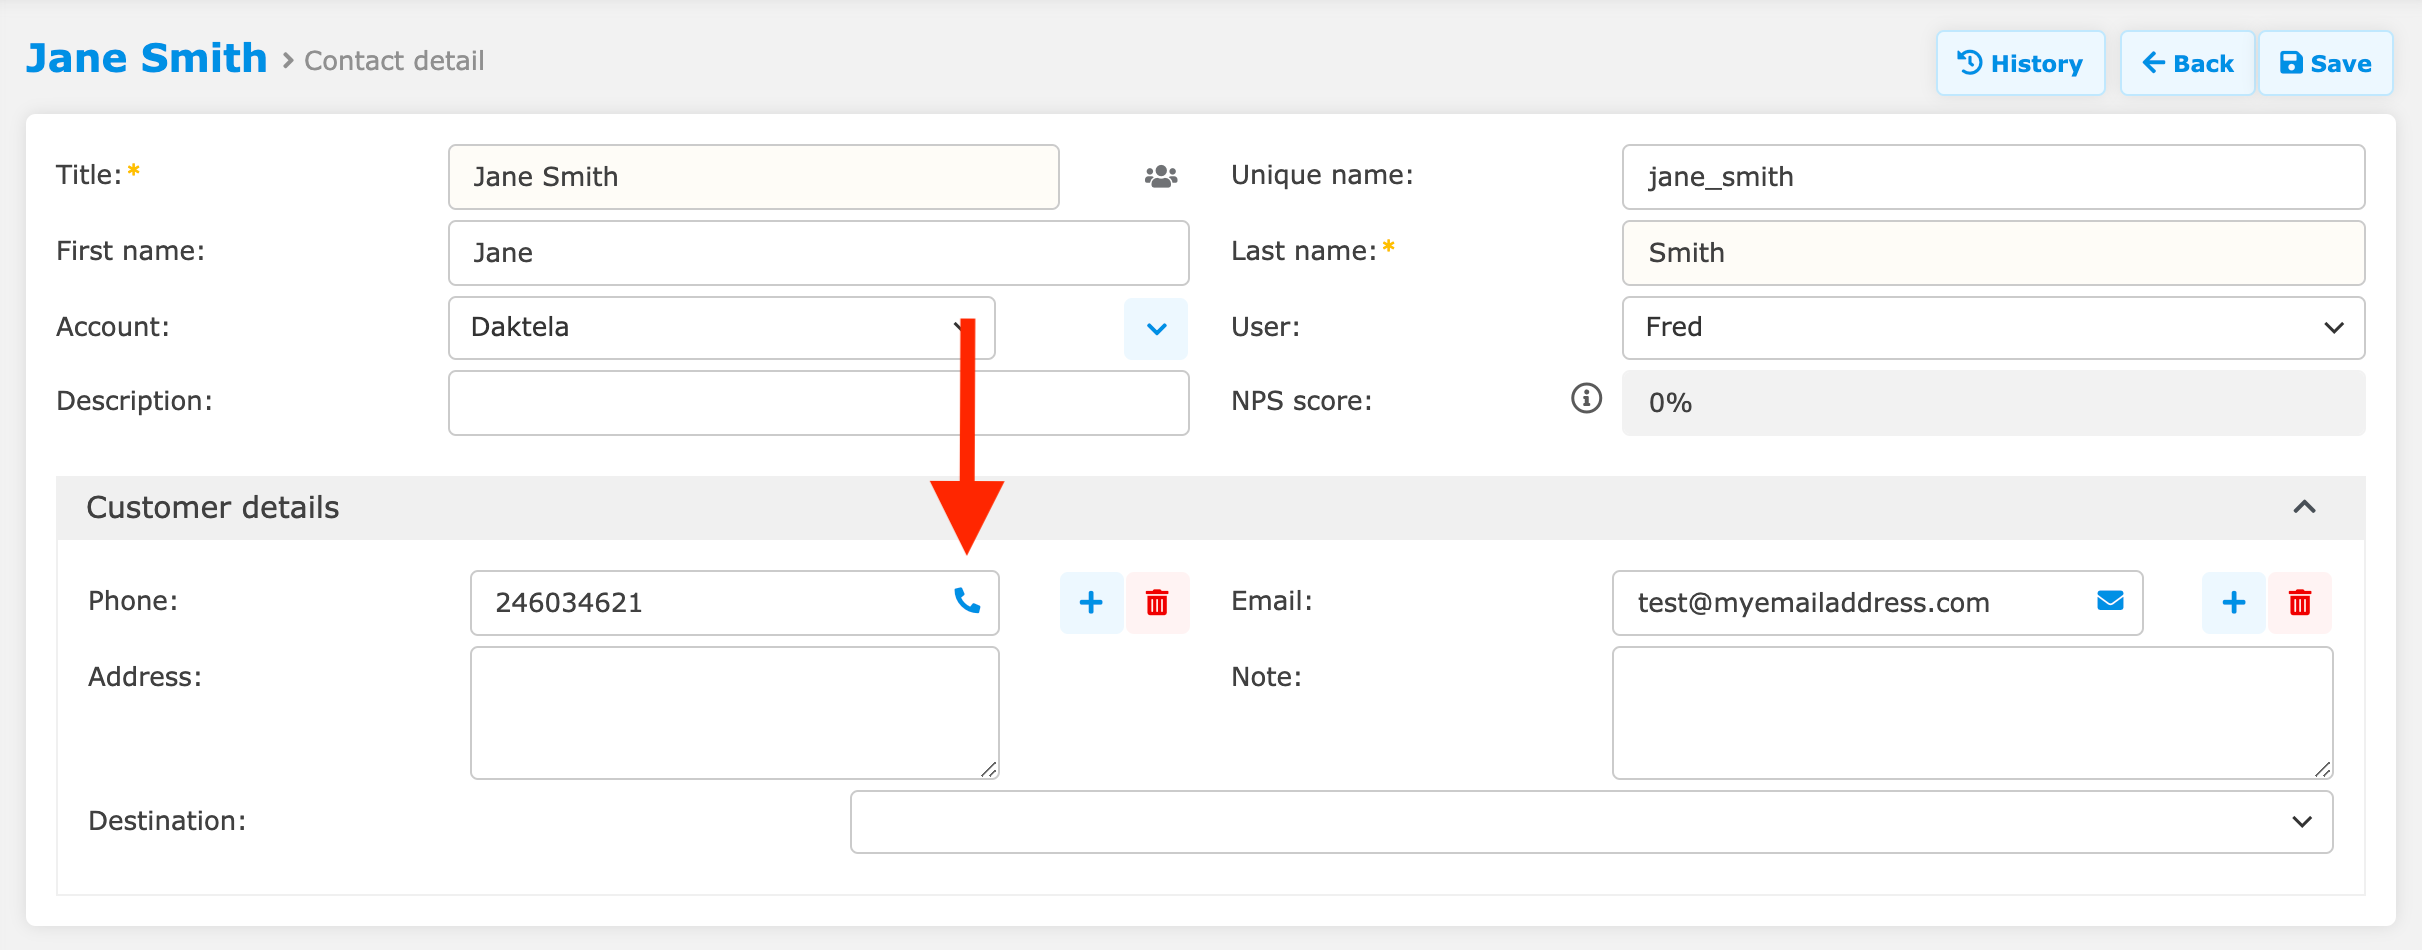
Click the Phone icon next to the Contact or Account phone number. Your call will start. See Call details for instructions on how to manage the call.
From a Ticket
Open the Ticket module in the main menu.
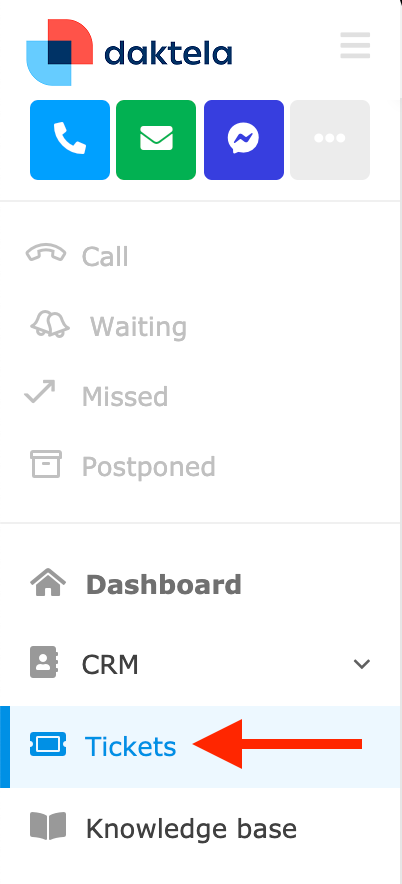
Open the ticket that you would like to make a call from. See Tickets for detailed instructions.

Click the blue Phone button in the top right corner of the ticket and choose the customer's number that you would like to call. Your call will start. See Call details for instructions on how to manage the call.
If you choose Other number, the Call number window will open. Follow the instructions in Manual call.
If your ticket contains past calls, you can also call from one of those.

Click the Call button. Your call will start. See Call details for instructions on how to manage the call.
From a Missed Call
When you see a missed activity notification in the static panel, hover over the Missed button.
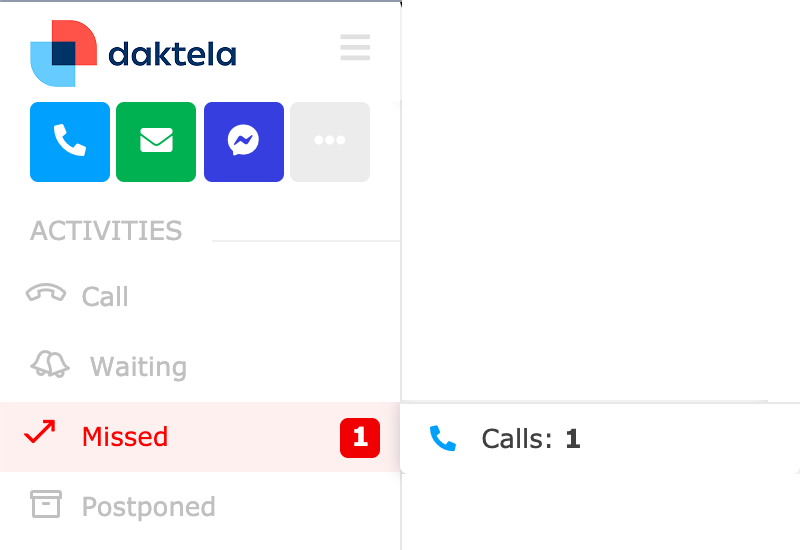
Click Calls to open the Missed activities window with only missed calls filtered.

Click the Call button to start your call. See Call details for instructions on how to manage the call.
Call Details
Once you have dialled a call or opened a campaign record, a new tab will appear in the static panel. It will be labeled with the caller's name or phone number. Once the call is dialled, your Call button above the main menu will turn red and display the duration of the call.
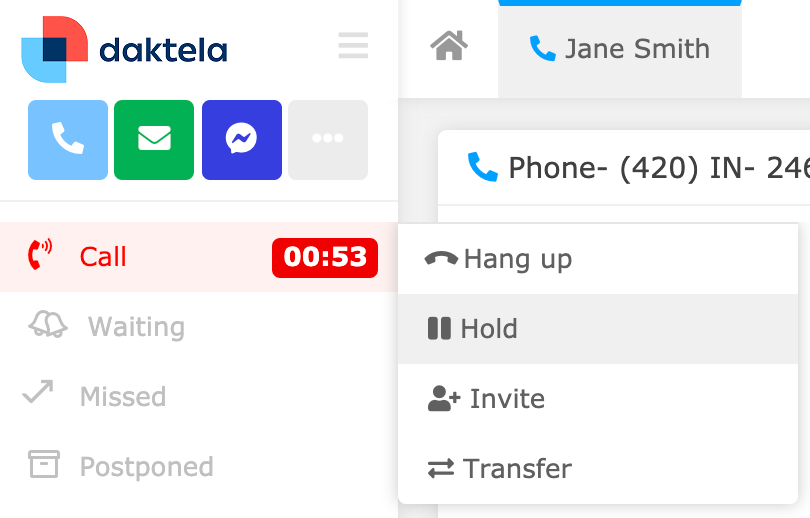
Click the red Call button to open a list of actions:
Hang up.
Put the customer on hold/unhold.
Invite another agent to the call.
Transfer the call to another agent.
Click the call tab to see the call details. Click it again to return to the previous screen (e.g. the Dashboard).
The call detail screen may contain different widgets set up in different order. The Phone widget is the only mandatory one.
Phone Widget
The Phone widget header displays the Queue number and name, the body displays the customer's phone number and call duration. The widget allows you to manage the call.

Select a status. You must select a status before saving the call.
Select a recoding to play back to the customer. Playback controls will appear once you select a recording.
Click for ask for asissistance with call.
Mark the call as important.
Transfer the call to another agent.
Invite another agent to the call.
Put the customer on hold or end hold.
Open a screen pop (set up by your administrator).
Hang up.
Open the numpad.
Call Monitoring
If you have turn on Show monitoring notification to agent in your queue settings you, will get a notification that your call is monitoring.

f you have turned on Play monitoring audio notification in call in your queue settings, a recording will be played when monitoring starts and ends.
After your call has ended, the buttons at the bottom of the Phone widget will look like this:

Click Call again to call the customer back.
Click Save to save and close the activity. You may need to select a status first.
Campaign Record Form Widget
Use this widget to assign a status to the campaign record and schedule another call if necessary. If your cam

Schedule another call. Select a date and time using the corresponding symbols or click the grey watch symbol and select one of the preset times from the dropdown menu.
Select a status.
The phone number you called. Click the phone symbol to call the customer again after your call has ended.
Your Campaign record form may contain other fields you may need to fill out such as Name, Surname, E-mail, Address etc. Your supervisor or team leader will give you instructions on how to fill them out.
Contact and Account Widgets
The Contact and Account widgets display CRM information about the customer and the company they are calling from.

View the record in the CRM module. Click the activity tab in the top bar to return to the activity.
Edit the CRM record in the CRM module. Click the activity tab in the top bar to return to the activity.
Unpair the CRM contact from the activity.
Open the given CRM module info in the background. Click the Home button to view it.
If the phone number is associated with more than one contact, a list will appear at the bottom of the widget. Click the Link button to switch to the selected contact.
Open SLA settings in the background. Click the Home button to view them.
Activities Tab
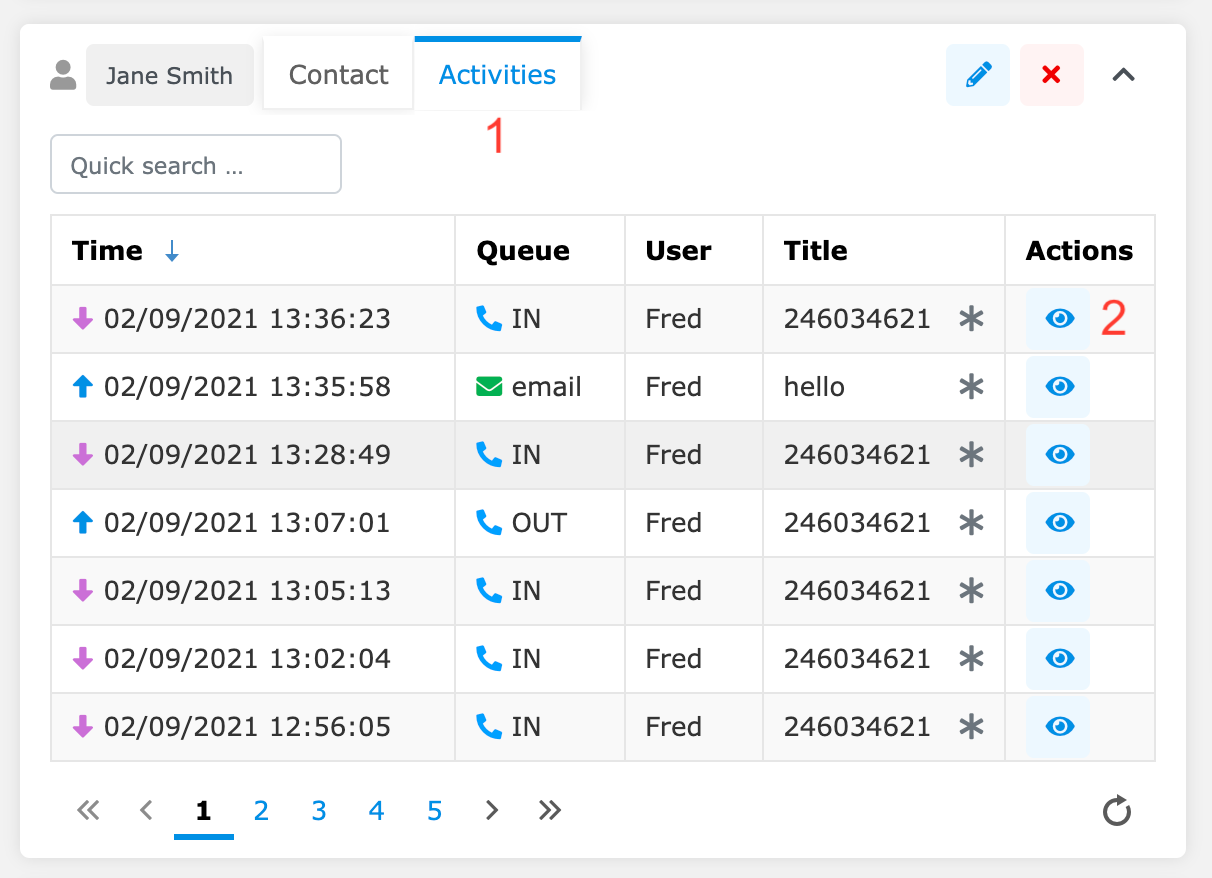
Click the Activities tab in the header to view the contact's past activities.
Open activity detail. See Activities for more detail.
New Contact
If the customer's phone number is not saved in the CRM module, the Contact widget will be open on the Activities tab.

Click Add new contact to open the CRM module and create a new entry. See CRM for more details.
Ticket Widget
Use this widget to assign an existing or new ticket to the call. If a ticket has already been assigned, the widget will display it.
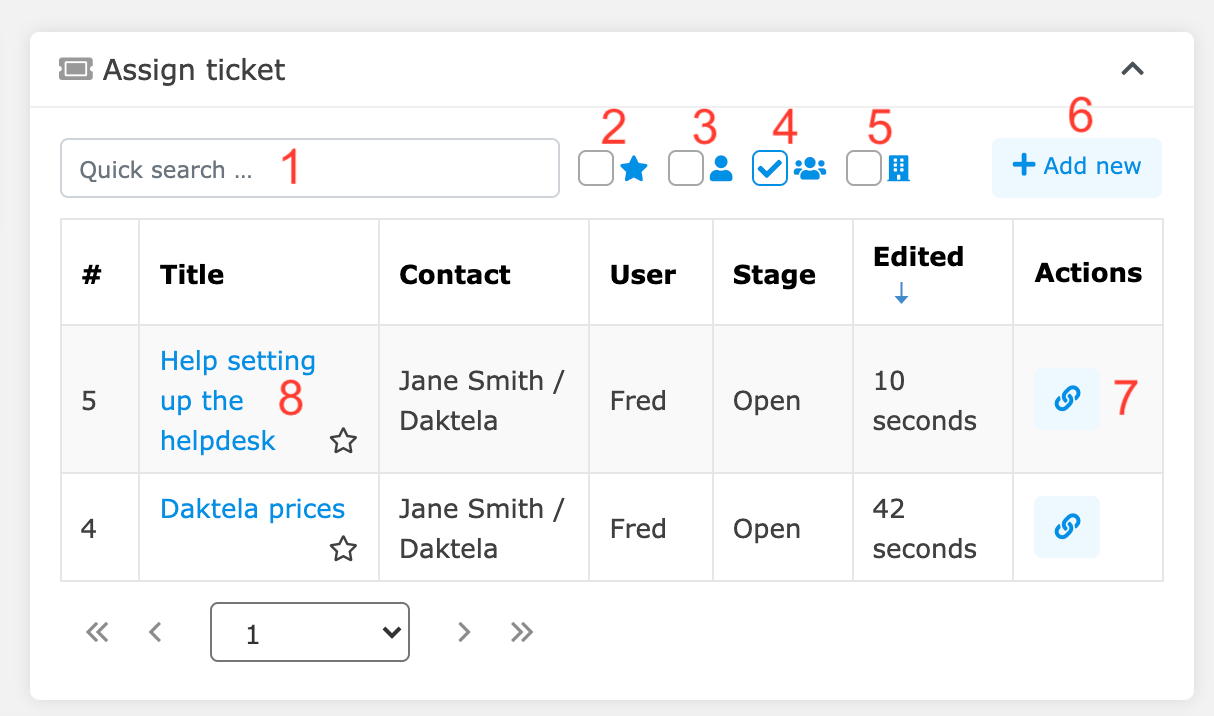
Search for a ticket.
Filter your favourite tickets.
Filter your tickets.
Filter the current contact's tickets.
Filter the current account's tickets.
Create a new ticket.
Assign the call to the ticket.
Open the ticket in the Ticket module. Click the activity tab to return to the call detail screen.
You can apply multiple filters to view only tickets relevant to your call.
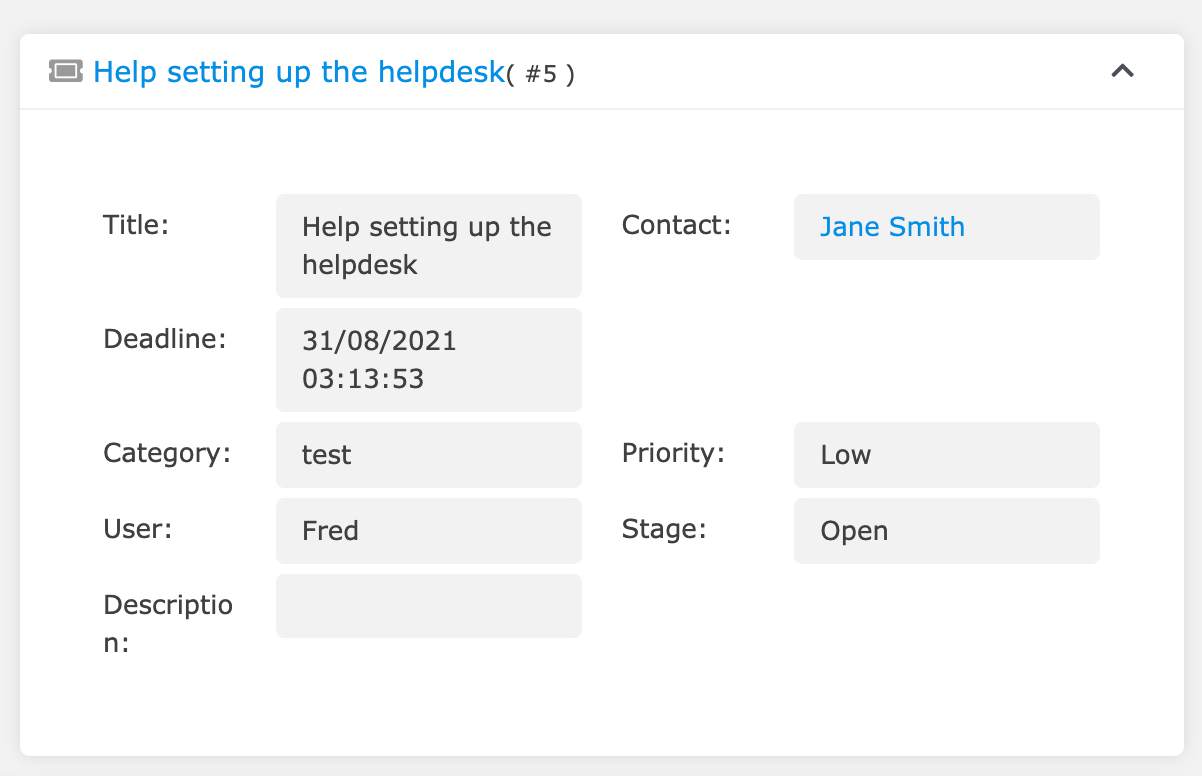
Once you assign a ticket to the call, the widget will display the ticket details.
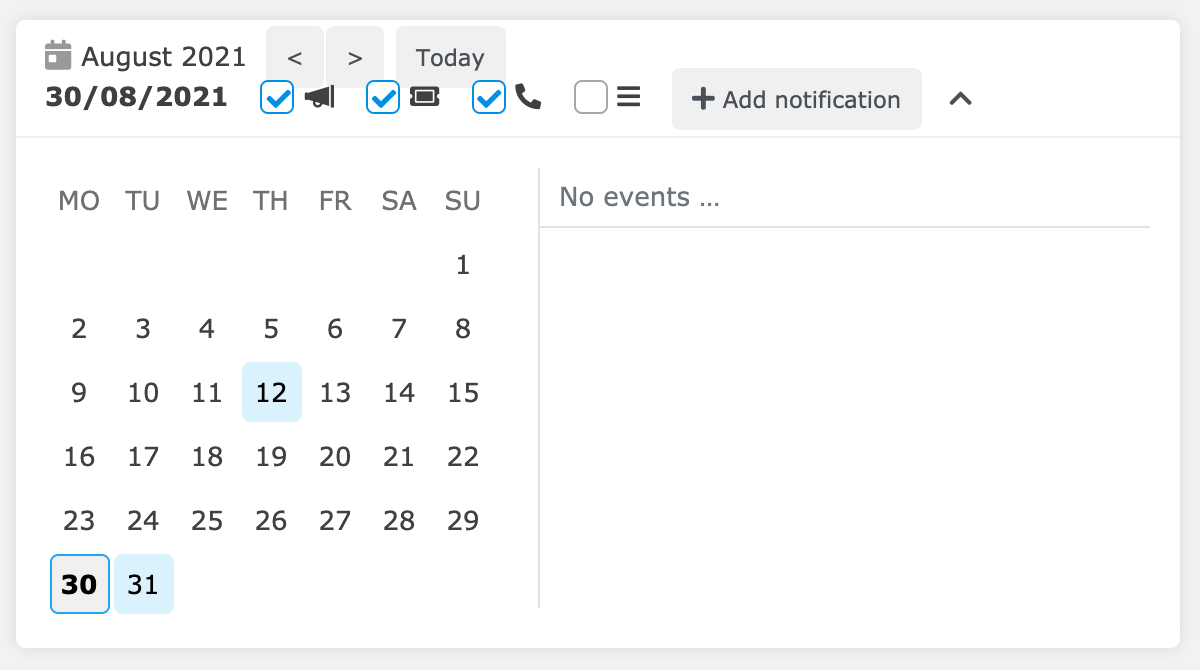
Calendar Widget
The Calendar widget displays your scheduled events. Days coloured blue contain events. The selected day is bold. See Dashboard for more details.
Articles Widget
The Articles widget displays a list of your available articles – these can contain info that can help you in your work.
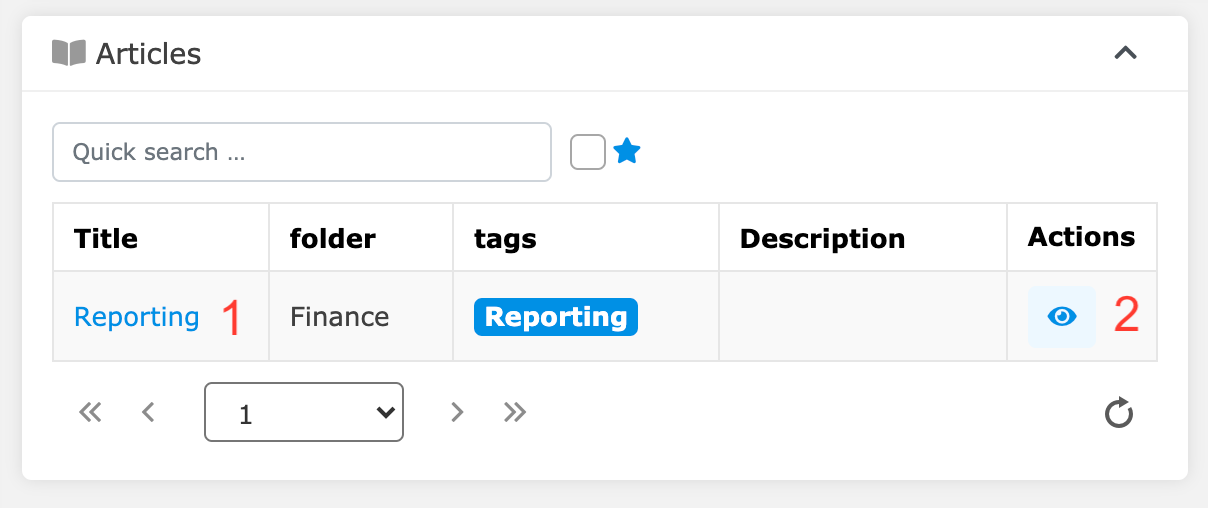
Open the article in the Knowledge Base module.
Read the article in the Articles widget.
This is what an article open in the Articles widget looks like:
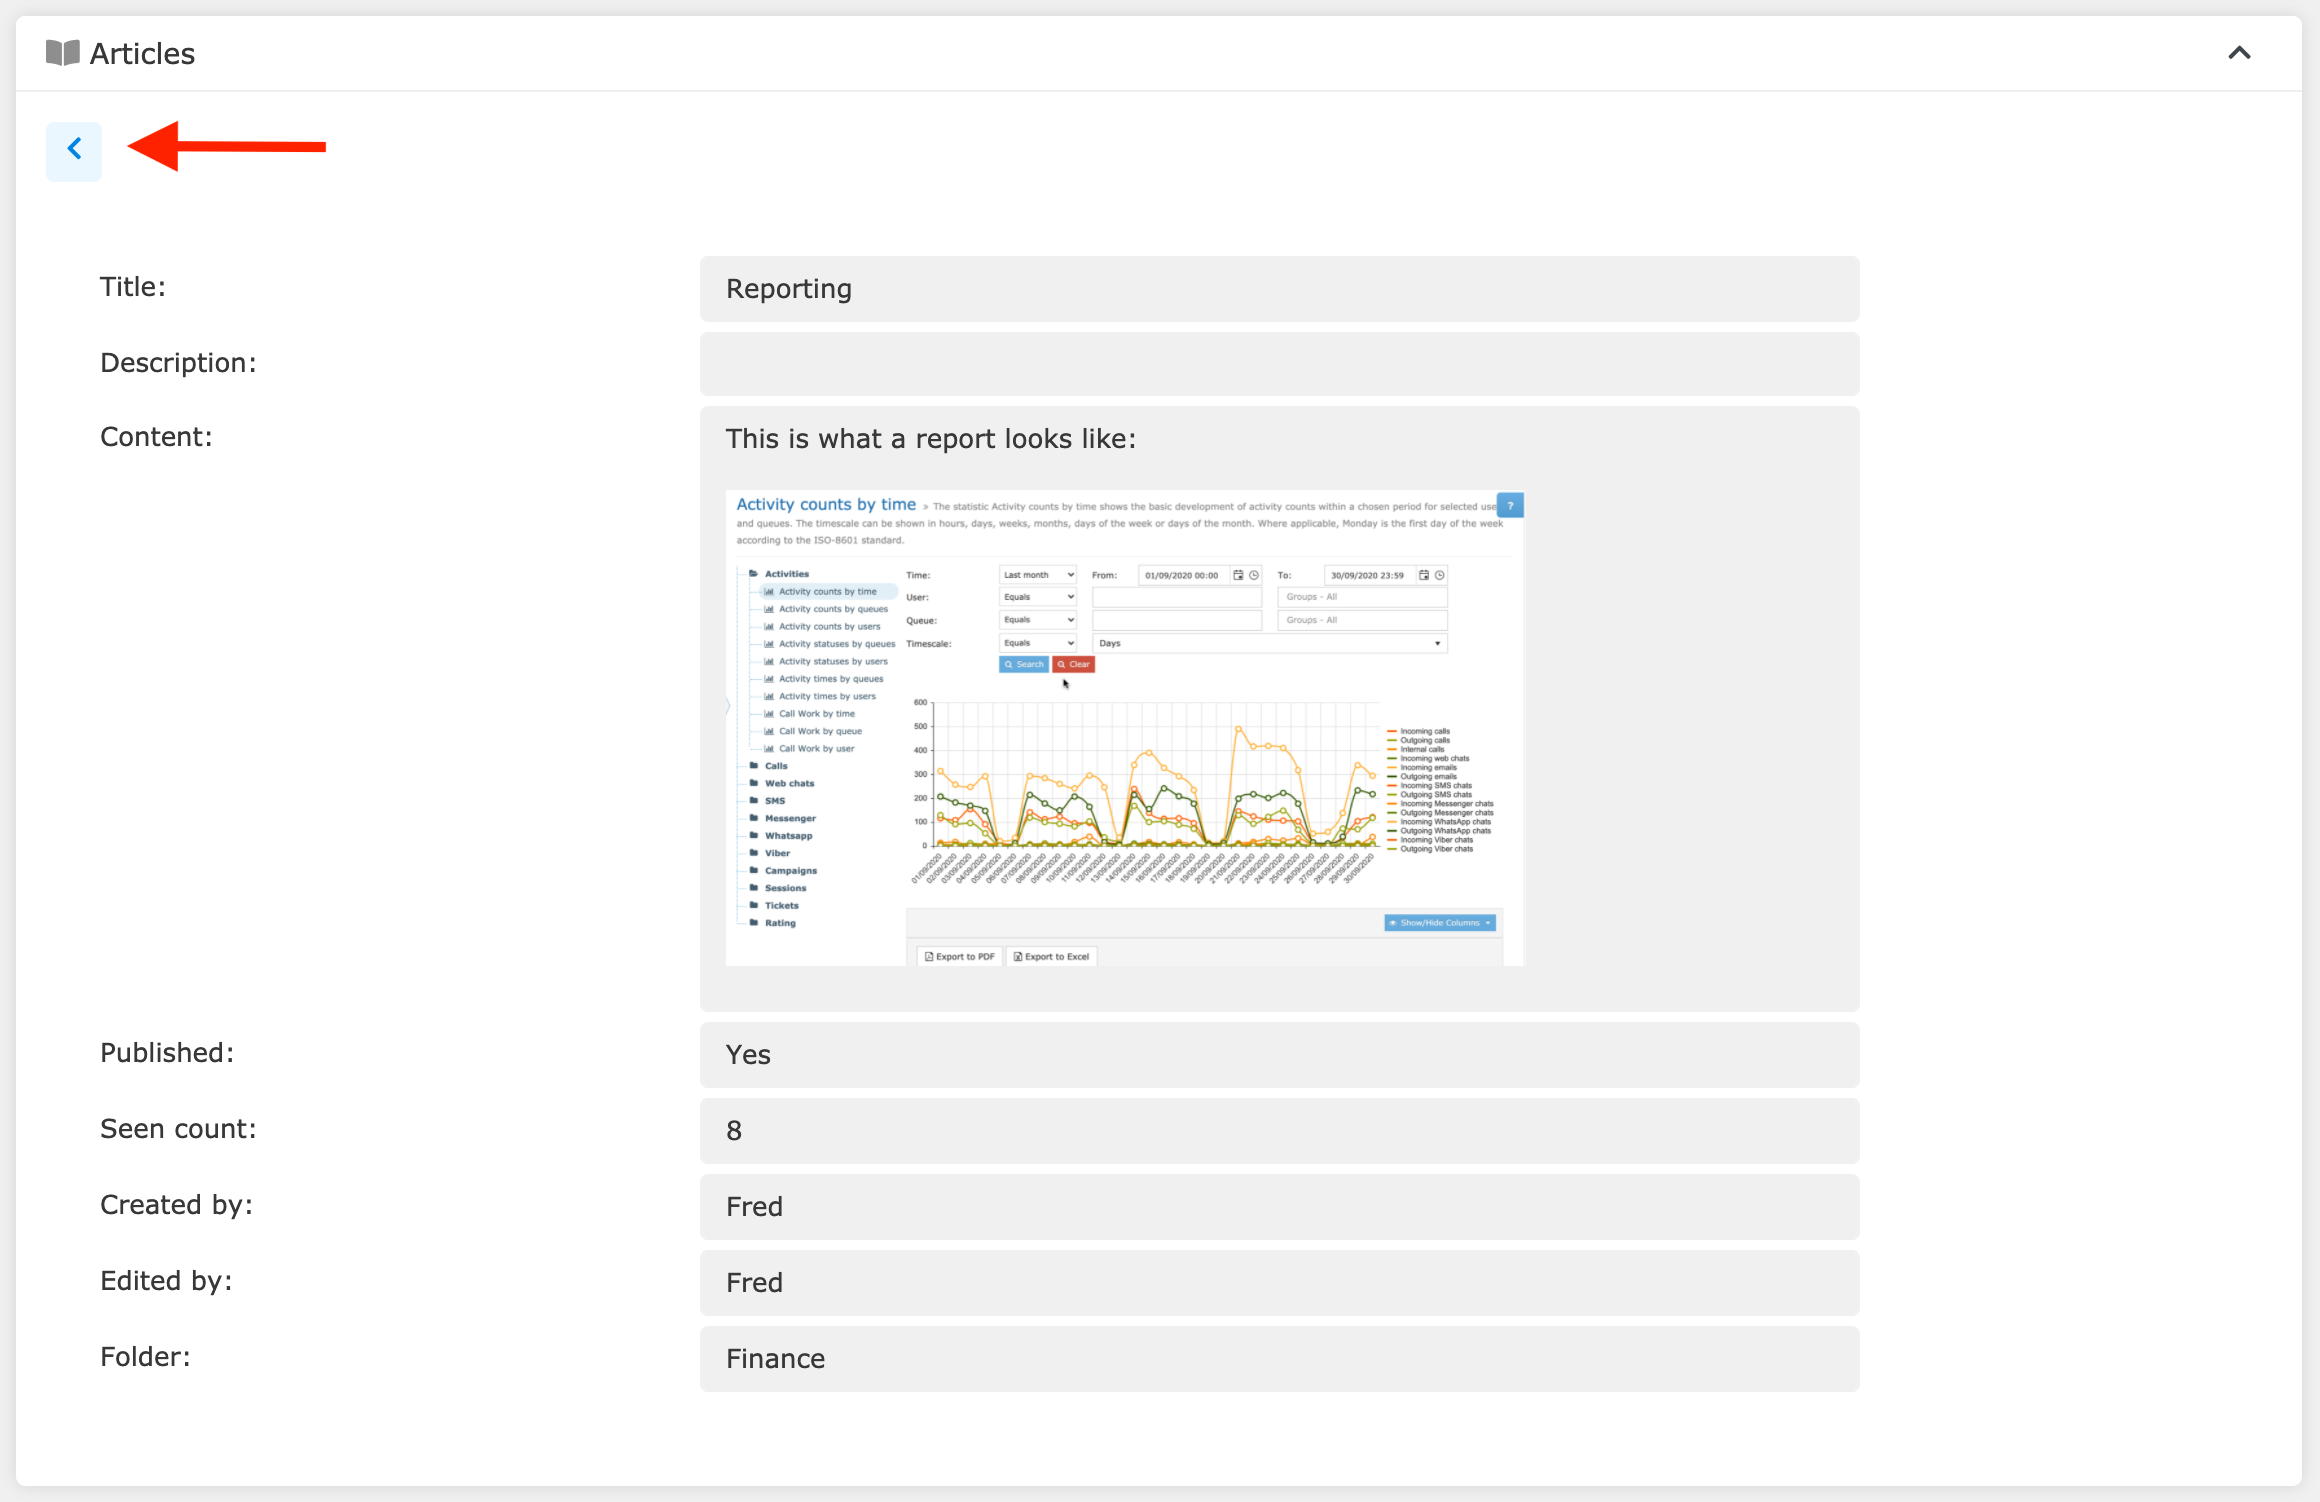
Click the Back button to return to the list of articles.
Page in iframe
The Page in iframe widget displays an external web page. Interact with the page just like you would normally. You can scroll using your mouse wheel or the controls on the right hand side.

Preview Campaign (Manual)
Use a manual campaign to load the next phone number for you to call.
First, log in to a Preview campaign (manual) queue. See Select queues for instructions.
Load your next call in the Campaign records widget on the Dashboard.

Load a record from any of the available queues.
Load a record from this queue.
When you load a call, the Call detail screen will open. You can review the contact's details and history before dialling the call.
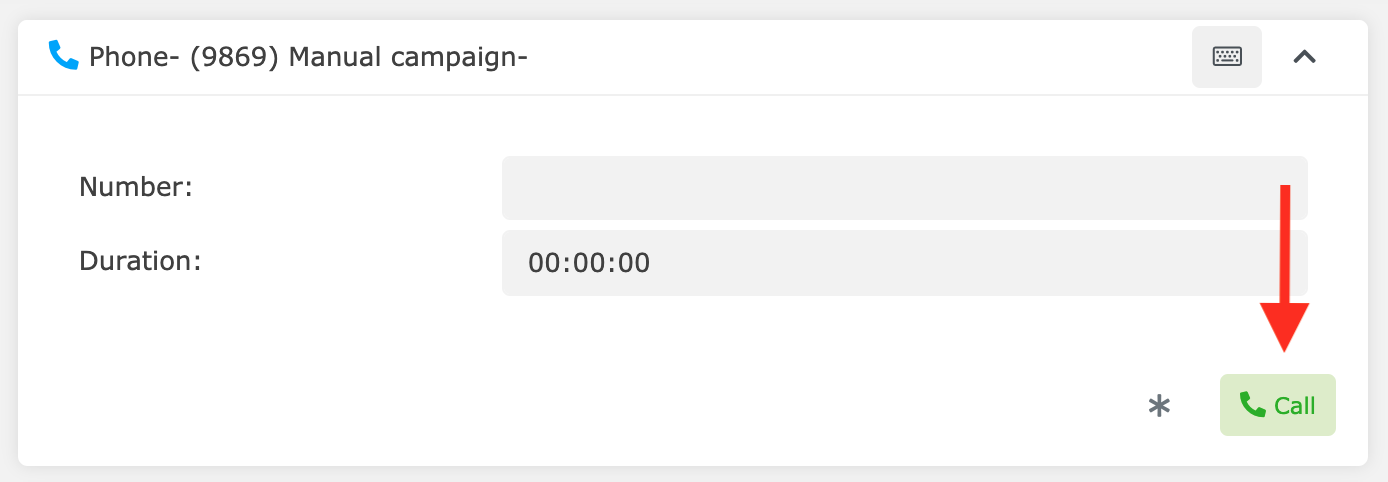
Click the green Call button in the Phone widget to dial the call. See Call details for instructions on how to manage the call.
Your Campaign record form may contain fields you may need to fill out such as Name, Surname, E-mail, Address etc. You will receive instructions on how to do this from your supervisor or team leader.
You may see a blue Skip button next to the Call button. Click it to skip this record.
You may have limited time to load your next call, to go through the customer's history and to fill out the form and update customer's details after the call. If you take longer, you may automatically be put on an unpaid pause.
Progressive Campaign
Use a progressive campaign to automatically load the next phone number for you to call and to automatically dial it.
First, log in to a Progressive campaign queue. See Select queues for instructions.
Once you are logged in to a progressive campaign queue, the Call detail screen of your next call will open automatically in a few seconds. You can review the contact's details and history.

After a certain amount of time (set up by your supervisor), the call will start automatically. If you are ready to dial the call before then, click the green Call button. See Call details for instructions on how to manage the call.
Your Campaign record form may contain fields you may need to fill out such as Name, Surname, E-mail, Address etc. You will receive instructions on how to do this from your supervisor or team leader.
You will not be able to fill out any information in the Campaign record form until the call is connected.
You may have limited time to fill out the form and update customer's details after the call. If you take longer, you may automatically be put on an unpaid pause.
After you have saved the call, the next phone number for you to call will be loaded automatically after an amount of time set by your supervisor passes.
Predictive Campaign (Dialler)
A predictive campaign dials several phone numbers at a time in the background and only connects you with customers that have already answered the call.
First, log in to a Predictive campaign queue. See Select queues for instructions.
As soon as one of the customers answers a call, you will receive a notification that looks like an incoming call.

The notification displays:
the customer's details. Click their name or company to open their CRM details.
the name of the Queue and the amount of Time the customer has been in the queue.
the amount of time since you received the notification.
Click the green Accept button to answer the call. See Call details for instructions on how to manage the call.
You may have limited time to answer the call. If you take longer, you may automatically be put on an unpaid pause.
Voicemail
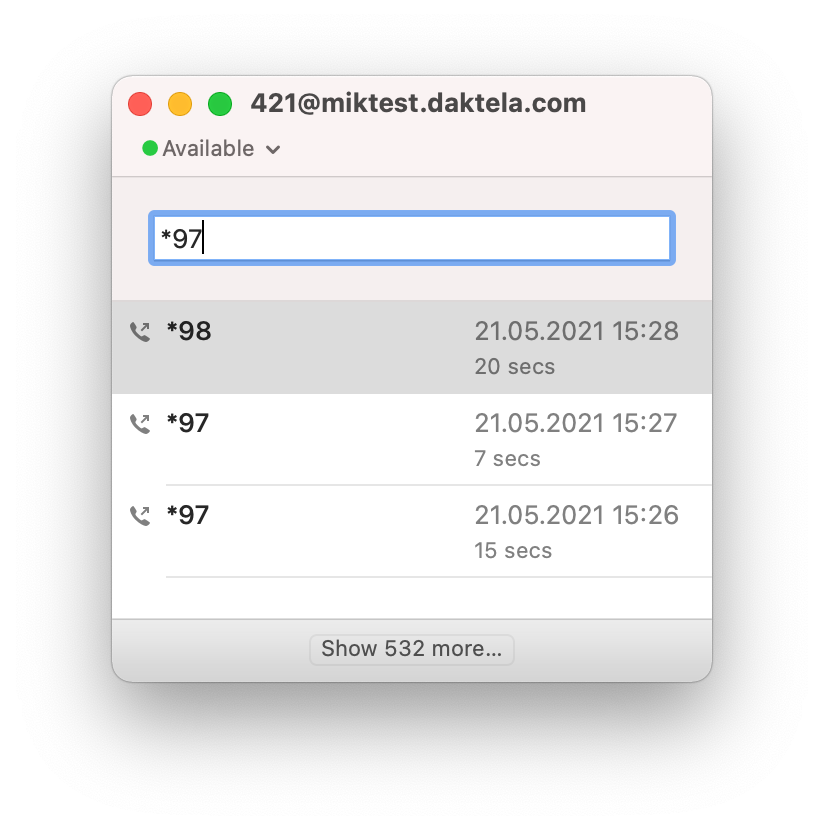
If your SIP device has voicemail enabled, you can play back your messages by dialling a feature code from the SIP device – the default code is *97. You may also need to know your voicemail PIN.
You cannot access your voicemail by dialling the code directly from the Daktela user interface. Below is an example of how you can dial the feature code from the Telephone software phone.
Check with your manager
whether you have voicemail activated on your SIP device.
what your feature code for accessing it is.
what your PIN is, if any.
Messages shorter than 3 seconds are ignored by the voicemail system.
