Work with Chats
New incoming chat notifications appear at the top of the app. Click the green button to accept the chat.
You can also start a new chat from scratch or from the CRM module.
The Chat will open:
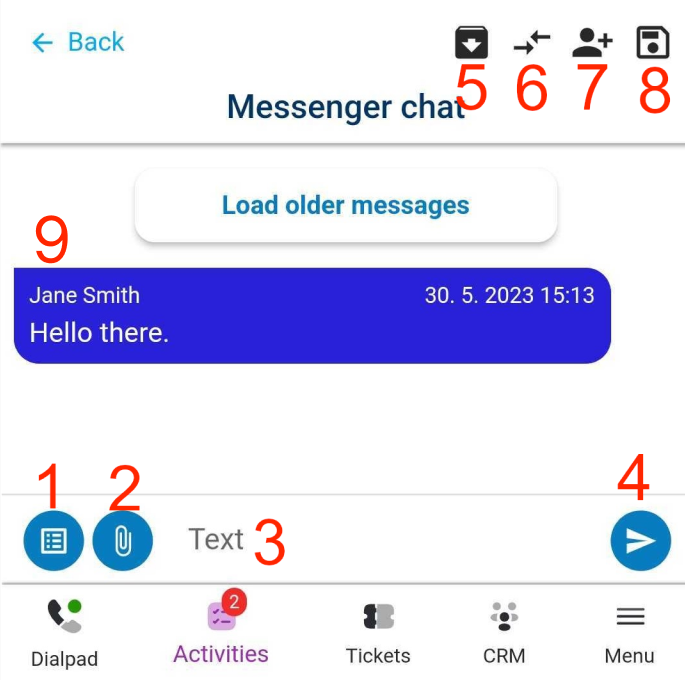
Select a template.
Add an attachment. Tap the Folder to add files stored on your phone, the Camera to take a picture and the Videocamera to shoot a video.
Type your chat message.
Send your message.
Postpone your chat so you can finish it later. You can retrieve it from your Postponed activities.
Transfer activity. Tap the user from the list to transfer the activity to that user.
Invite a user to the activity. Tap the user from the list to invite that user to the activity.
End your chat. Depending on your queue settings, you may need to select status. Select a status and tap Save.
To copy your message, hold it for a while, and it will be duplicated.
Send an SMS/Facebook/WhatsApp/Viber Message/Instagram DM
Follow these instructions to create a new message from scratch. You can also start composing a message from the CRM module and Tickets. Once you get to the Send message screen, the method is the same.
To start composing a new message, tap the New activity button in the bottom right corner of the screen, then tap the button of the message type you want to send.
The Send message screen will open:
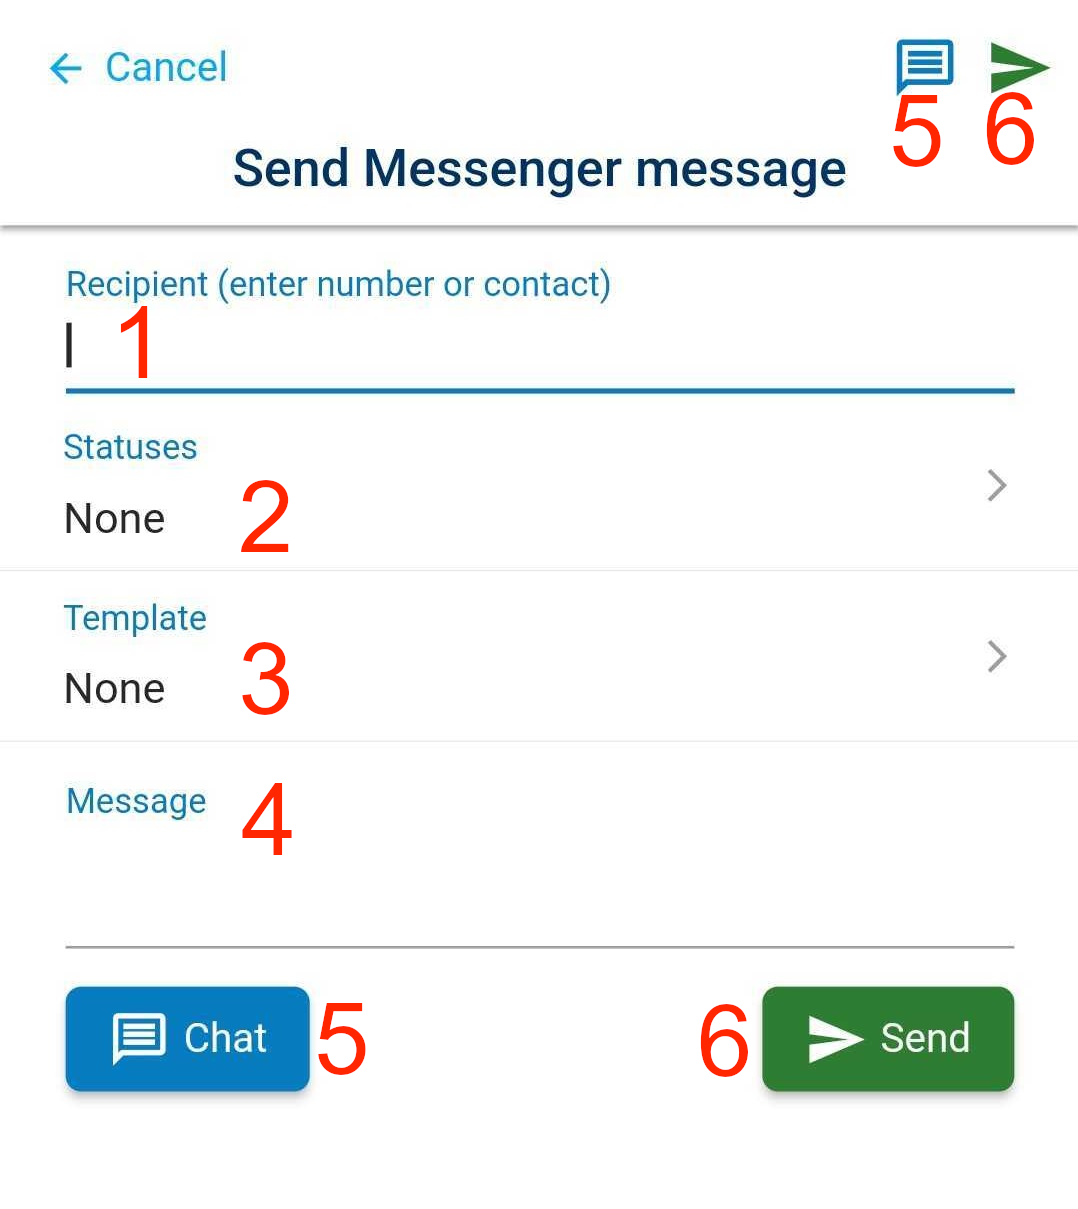
Enter a CRM contact or number.
Select a status.
Select a template.
Enter your message.
Open a new chat with the selected contact.
Send the message. You will return to the screen your were on before you opened the new activity.
Incoming chats
Incoming chats are functional with the mobile app from version 6.25.10.
You can receive an incoming chat in the app by tapping the green button.
Incoming chat can be shown to you via push notification if you have the app minimized or your phone is locked.
You can set up push notifications in Menu → Preferences.
All incoming activities ring the same as an incoming call.
Are notifications not functioning properly for you in the mobile application?
Check that you have enabled notifications for the Daktela mobile app on your device.
Check that you don't have a focus mode or standby mode that is blocking notifications. If you intend to use such a mode, remember to add the Daktela application to exceptions, allowing it to still receive notifications.
Check that you are logged into the mobile app, in the "ready" state, connected to the incoming queue (for calls), and that you have a mobile WebRTC device linked to the app. You can confirm the app's readiness for calls by observing the presence of the number pad on the phone screen without any warnings.
The Chat will open:
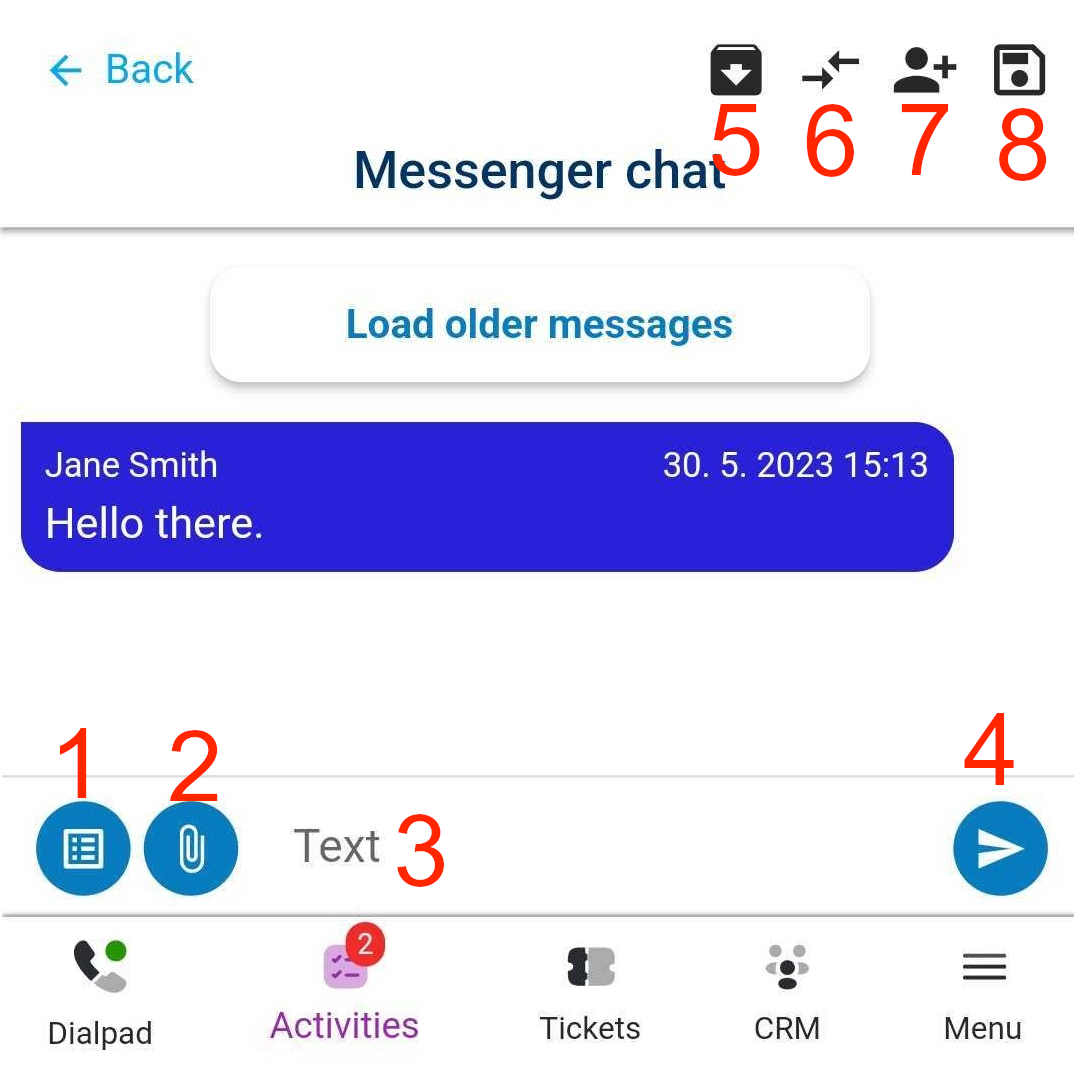
Select a template.
Add an attachment. Tap the Folder to add files stored on your phone, the Camera to take a picture and the Videocamera to shoot a video.
Type your chat message.
Send your message.
Postpone your chat so you can finish it later. You can retrieve it from your Postponed activities.
Transfer activity. Tap the user from the list to transfer the activity to that user.
Invite a user to the activity. Tap the user from the list to invite that user to the activity.
End your chat. Depending on your queue settings, you may need to select status. Select a status and tap Save.