Views
Go to Manage → Tickets → Views to set up your tickets views.
Views work like a predefined ticket filter that makes working with them much easier for agents.
Create a New View/Edit View
Fill out the view's Title and Description, then set up its settings by following the instructions in the sections below:
Filtering
Set up which tickets should be displayed in the view.
Set up your filtering rules. You can add or remove lines using the buttons at the end of each line.
All of these conditions must be met: ticket will only be filtered if all of these are met at the same time.
Or one of the following: ticket will be filtered if at least one of these is met, along with all the conditions set in a. above (if any).
In the first column, select the subject of the condition, e.g. user.
In the middle column, select the comparison operator, e.g. equals.
In the last column, enter the value that will be compared, e.g logged.
The example above will filter tickets that belong to the user that is currently logged in.
Time-based filters offer some preset selections in the last column but you are not limited to those. You can an enter your own time in the last column – enter strings such as "2 months ago", "next Monday", "+1 week", "January 26 2021", "22-05-1988".
For dates in number format, the result depends on the separator:
if you use slash ( / ), the American m/d/y format will be used.
if you use dash ( - ) or dot ( . ), the European d-m-y format will be used.
to avoid any ambiguity, we recommend the yyyy-mm-dd format.
Warning
Setting up complex views can increase loading times and cause performance issues.
Tickets in multiple views
Because views work like filters, it is common that a ticket will be visible in several views at the same time.
Further Examples – Categories and Statuses
A handy way to filter tickets is to set up a category and to use statuses. You can then filter these in your view.
This example filters tickets in the category "Sales UK" with "Order received" status. For example you can set up filters for tickets category. Select Category from dropdown menu, chose option in and select Name of the category.
See Tickets in the Agent section for instructions on how to select a category and status in a ticket.
View List
Assign views to individual rights by dragging them from the Choose view pane on the right hand side and dropping them into the right. You can set the view order in the same way. To set up a subview, drag and drop it onto its parent view.
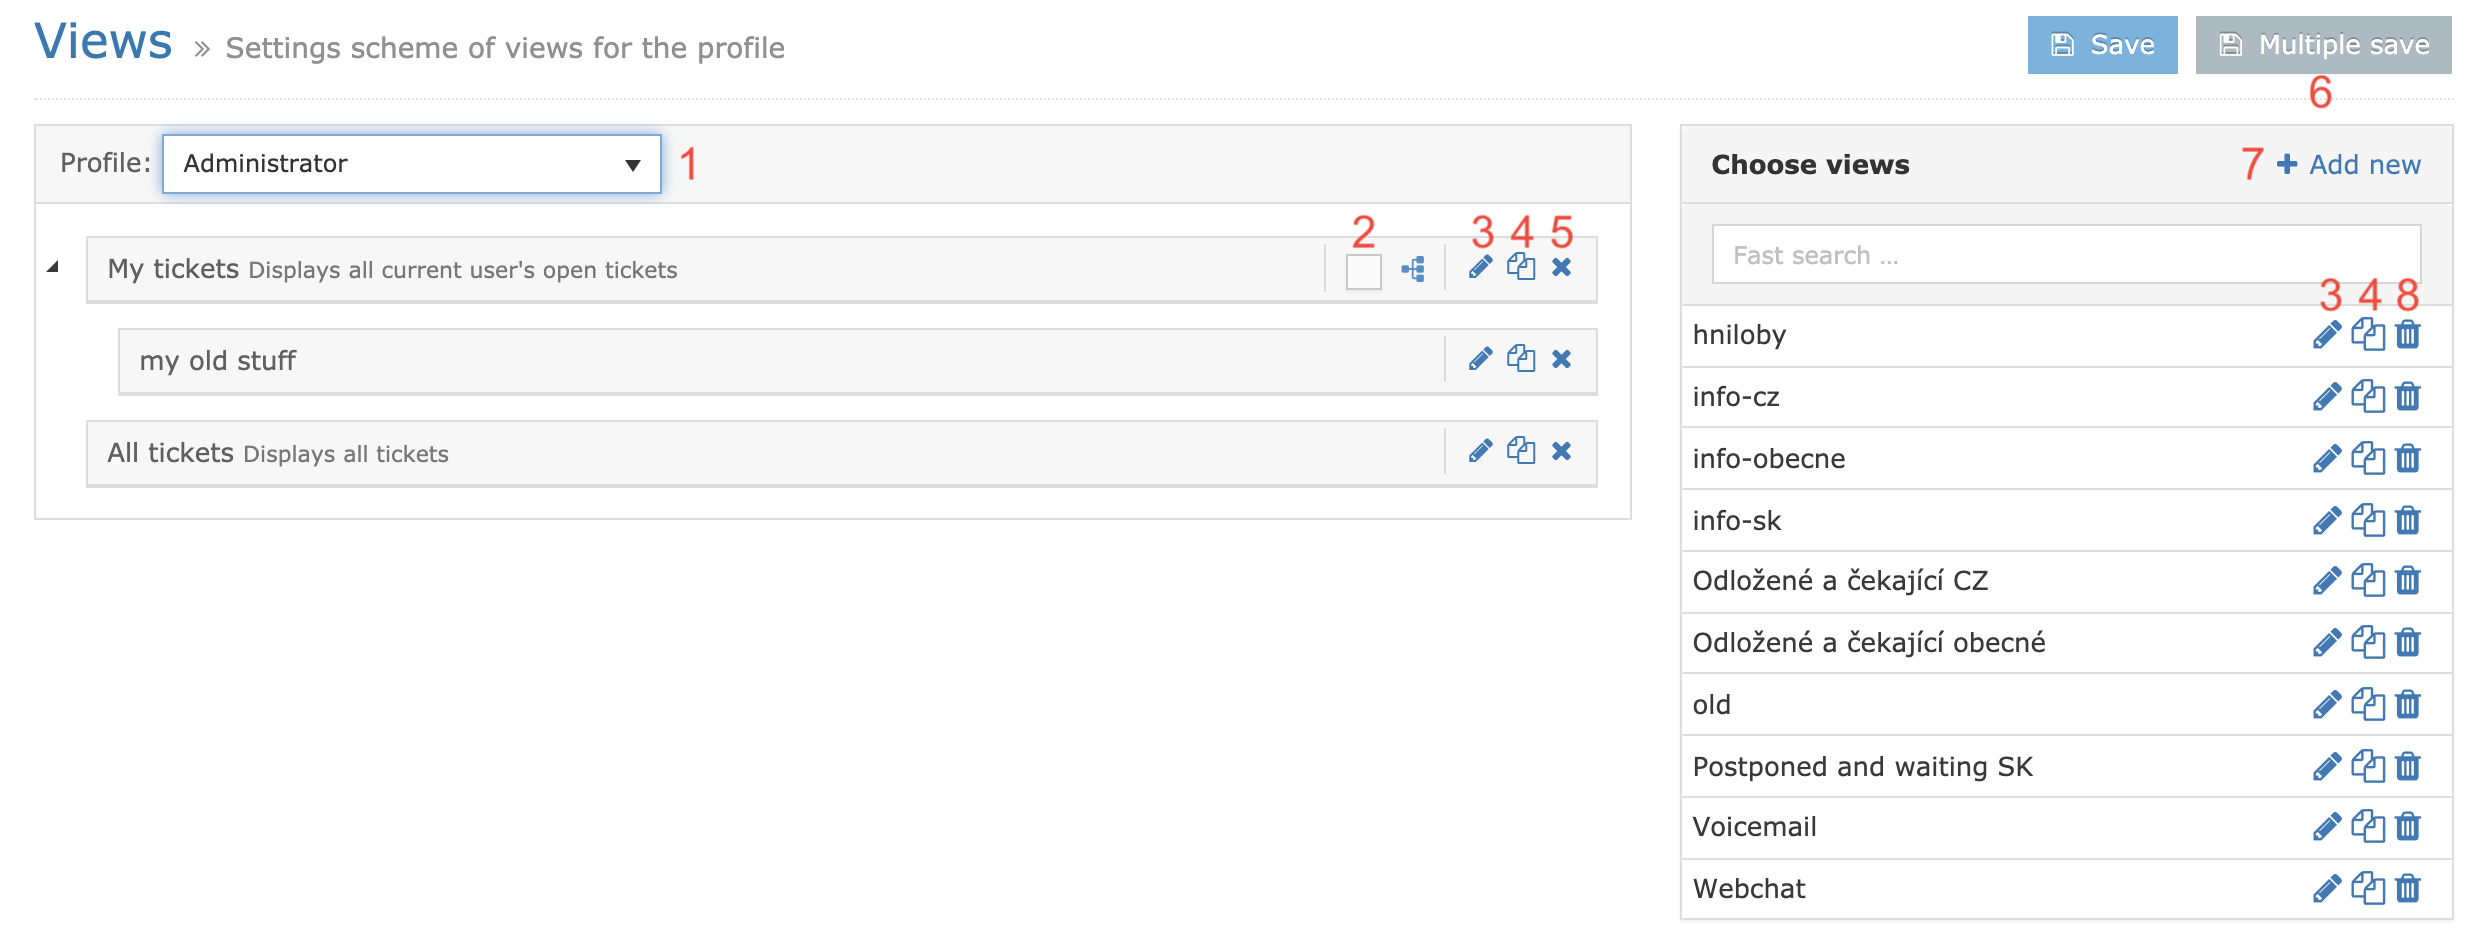
Select the right you want to edit.
If checked, subviews will be expanded by default.
Edit view.
Duplicate view.
Remove view from scheme.
Add current scheme to more rights
Create new view.
Delete view. You must first remove it from all rights.
How Are Views and Categories Linked?
A ticket view is a predefined ticket filter that groups together tickets based on their parameters (either set up in the email queue or email routings, or selected manually in the ticket).
Consequently, a single ticket can be part of several views – e.g. one based on its category, one based on its status and one based on its age since the last activity.
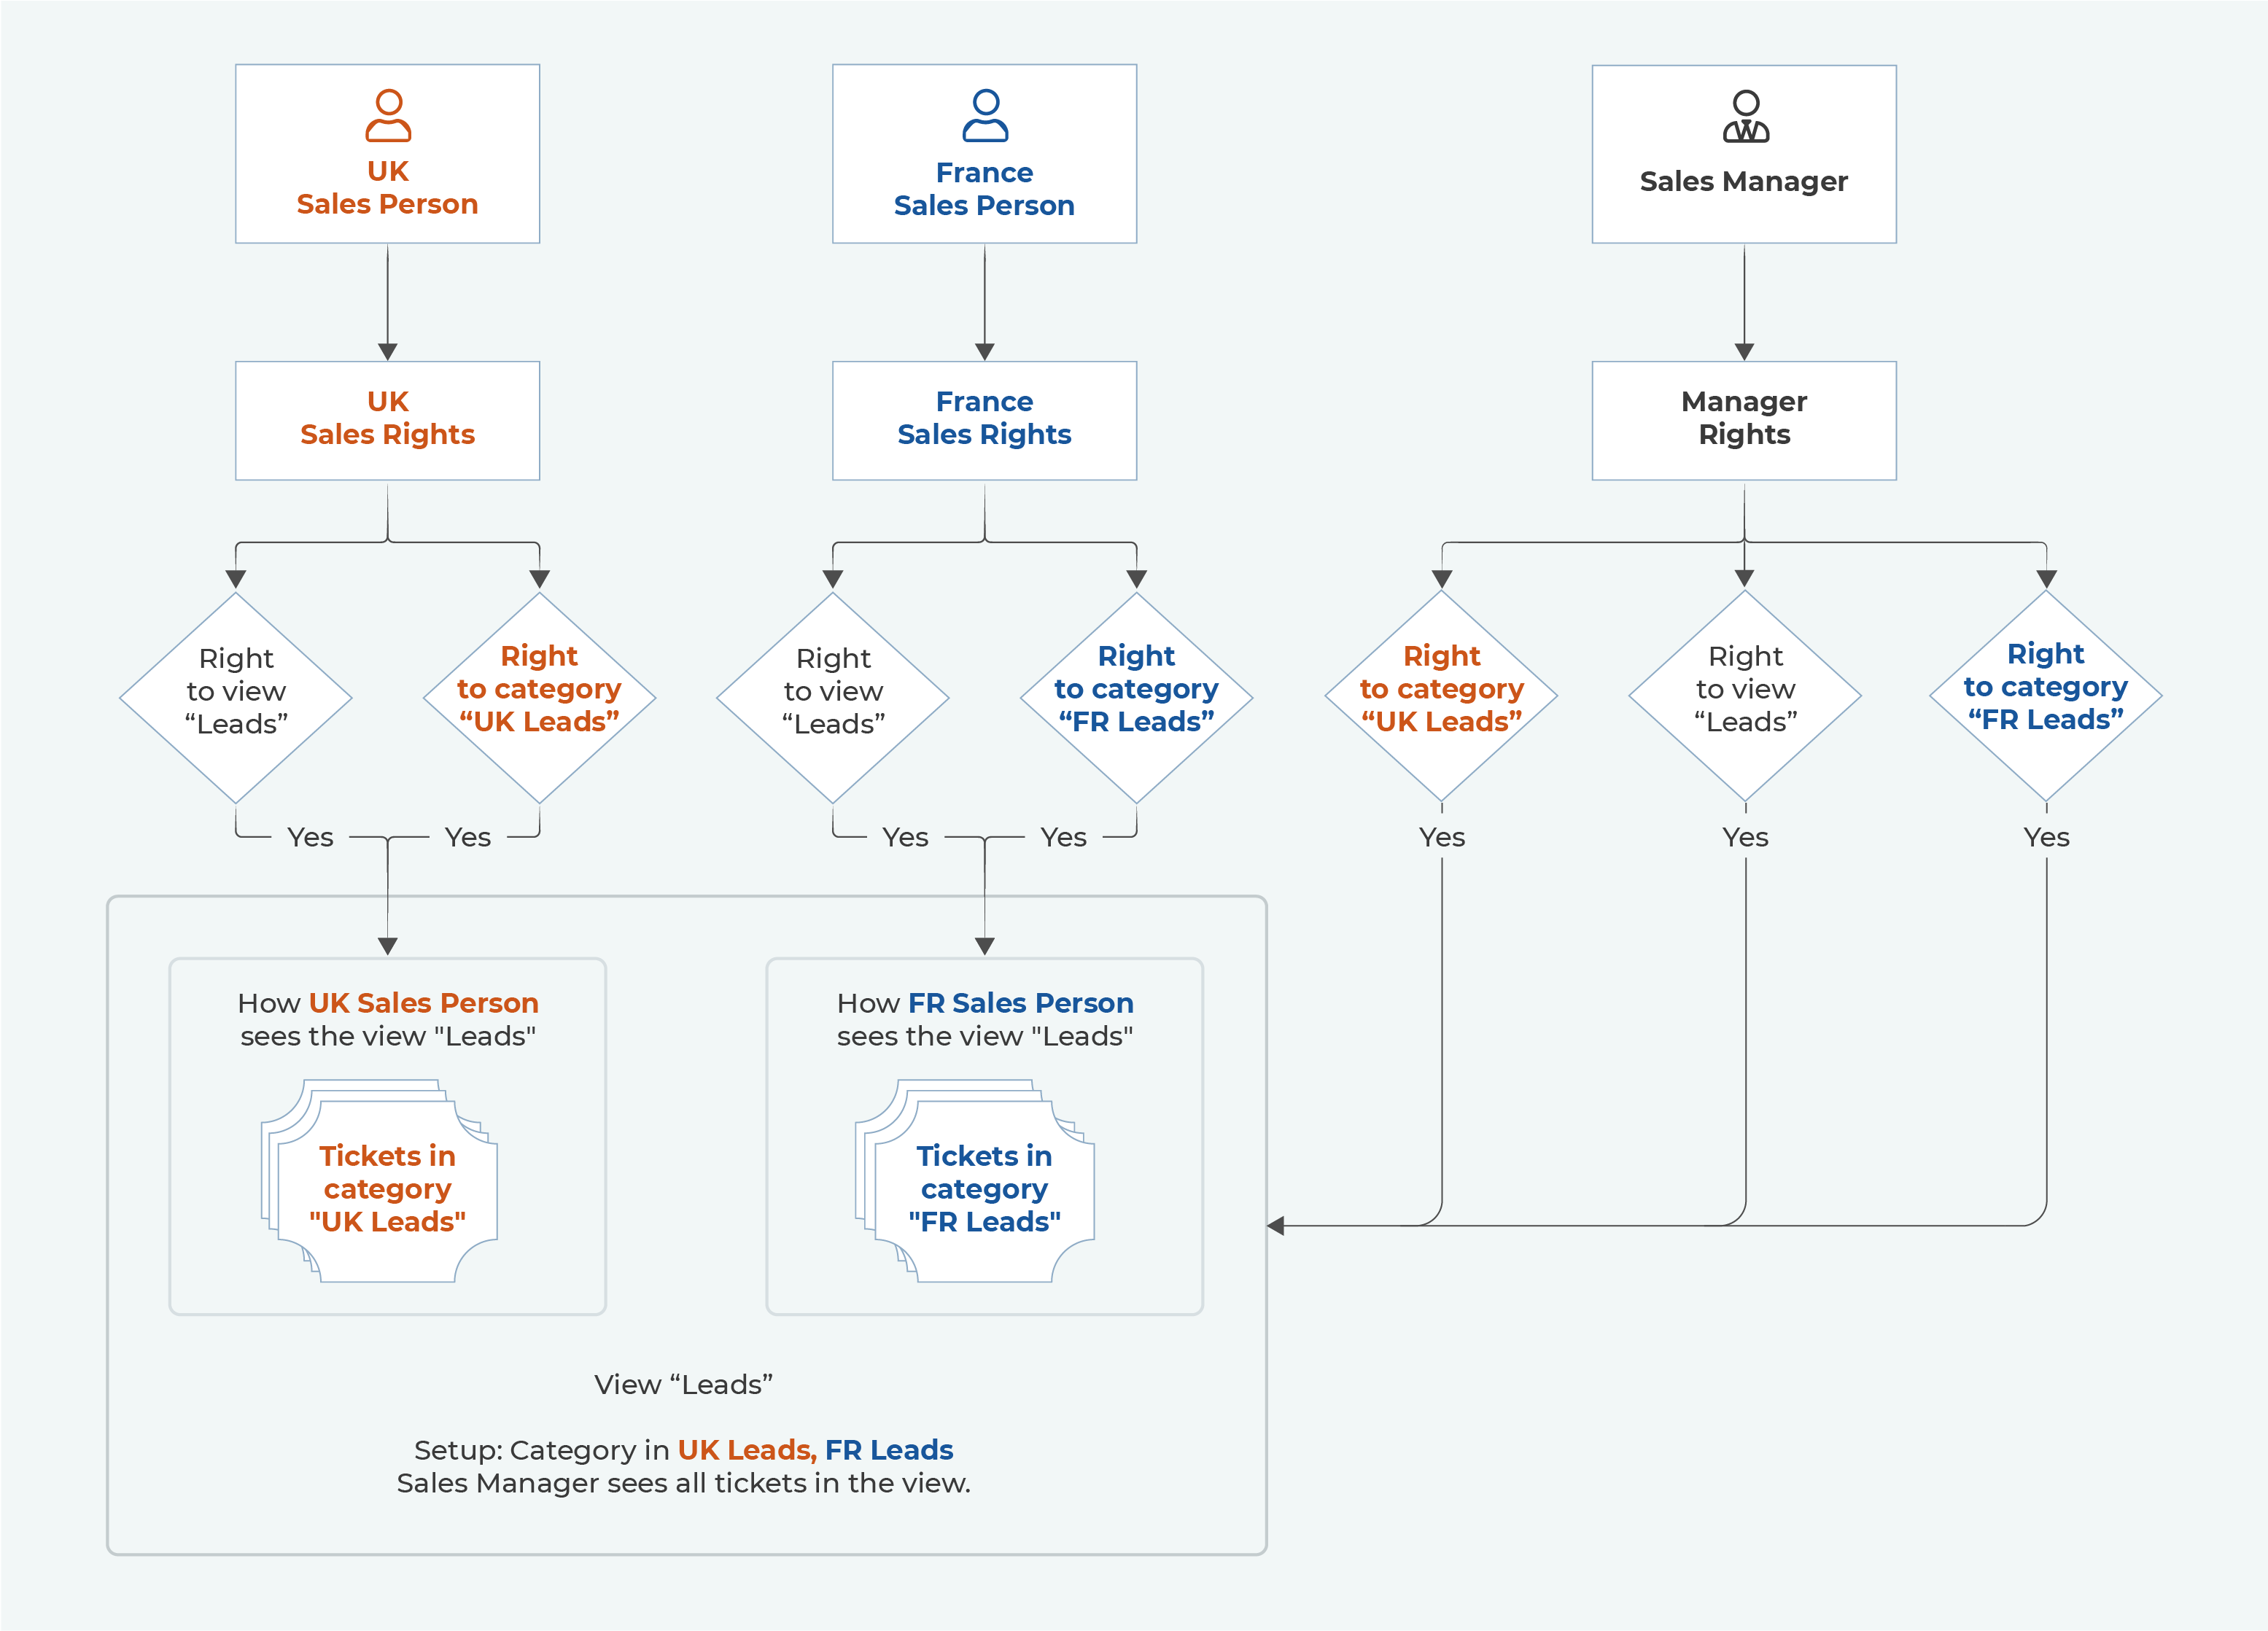
A view is accessible to all users that have rights to it. However, to view the tickets contained in the view, they must still have rights to their categories. This means that different users can see different tickets in the same view.
In the example below, there are 3 users that all have rights to the view "Leads".
UK Sales Person only sees tickets in the "UK Leads" category in the view.
FR Sales Person only sees tickets in the "FR Leads" category in the view.
Sales Manager sees tickets in both categories in the view.