Get Started
Find out how to use the basic controls in Daktela.
Go Ready
If you can see control buttons in the top left corner of your screen and at the top of the screen right after logging in to Daktela, you have static login set up and are in the Ready state automatically. You can skip this step and go directly to Select queues.
After logging in to Daktela, you will see the Dashboard as the default page.
Click the Go Ready button in the top right corner to start processing activities.

Select a Device
Click the Device button in the Static panel to select your devices. The Device button displays the number of devices you are logged in to and is red if you are not logged in to any devices.

Can't see the Queue button?
If you can't see the Queue button, you must first click Go Ready.
Select a device:
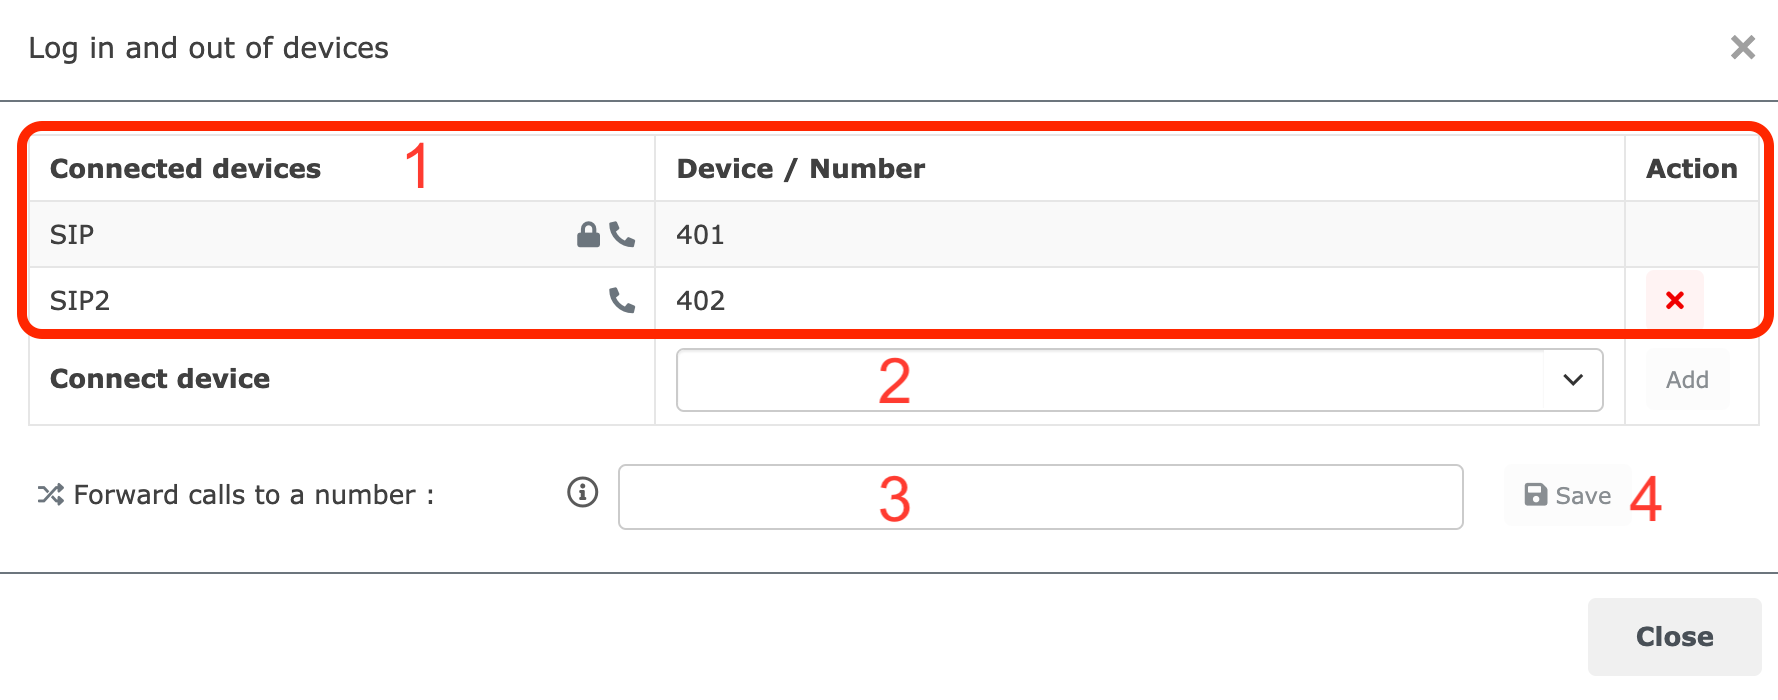
List of your logged in devices. Click the red cross to log out of a device. You can't log out of a device with a lock.
Select a device from the dropdown list or by searching. Click Add to confirm. Repeat the process to select multiple devices.
If you select WebRTC device, the Open phone button will appear on the Static panel :

Enter a call forwarding number. This will affect all of your calls to and from Daktela regardless of the devices selected in 2 above. Calls routed directly to you (not via a queue) will ring at this number even if you are on a pause or logged out of Daktela.
Call forwarding to a public phone number can incur call charges according to your tariff and operator.
Click the Save button to apply the forwarding number. The device button will turn yellow to indicate that call forwarding is active.
When call forwarding is active, the save button (4) will turn into a delete button. Click it to deactivate call forwarding.
After you have selected all desired devices, close the window.
Select Queues
Click the Queue button in the static panel to select your queues. The Queue button displays the number of queues you are logged in to and is red if you are not logged in to any queues.

Can't see the Queue button?
If you can't see the Queue button, you must first click Go Ready.
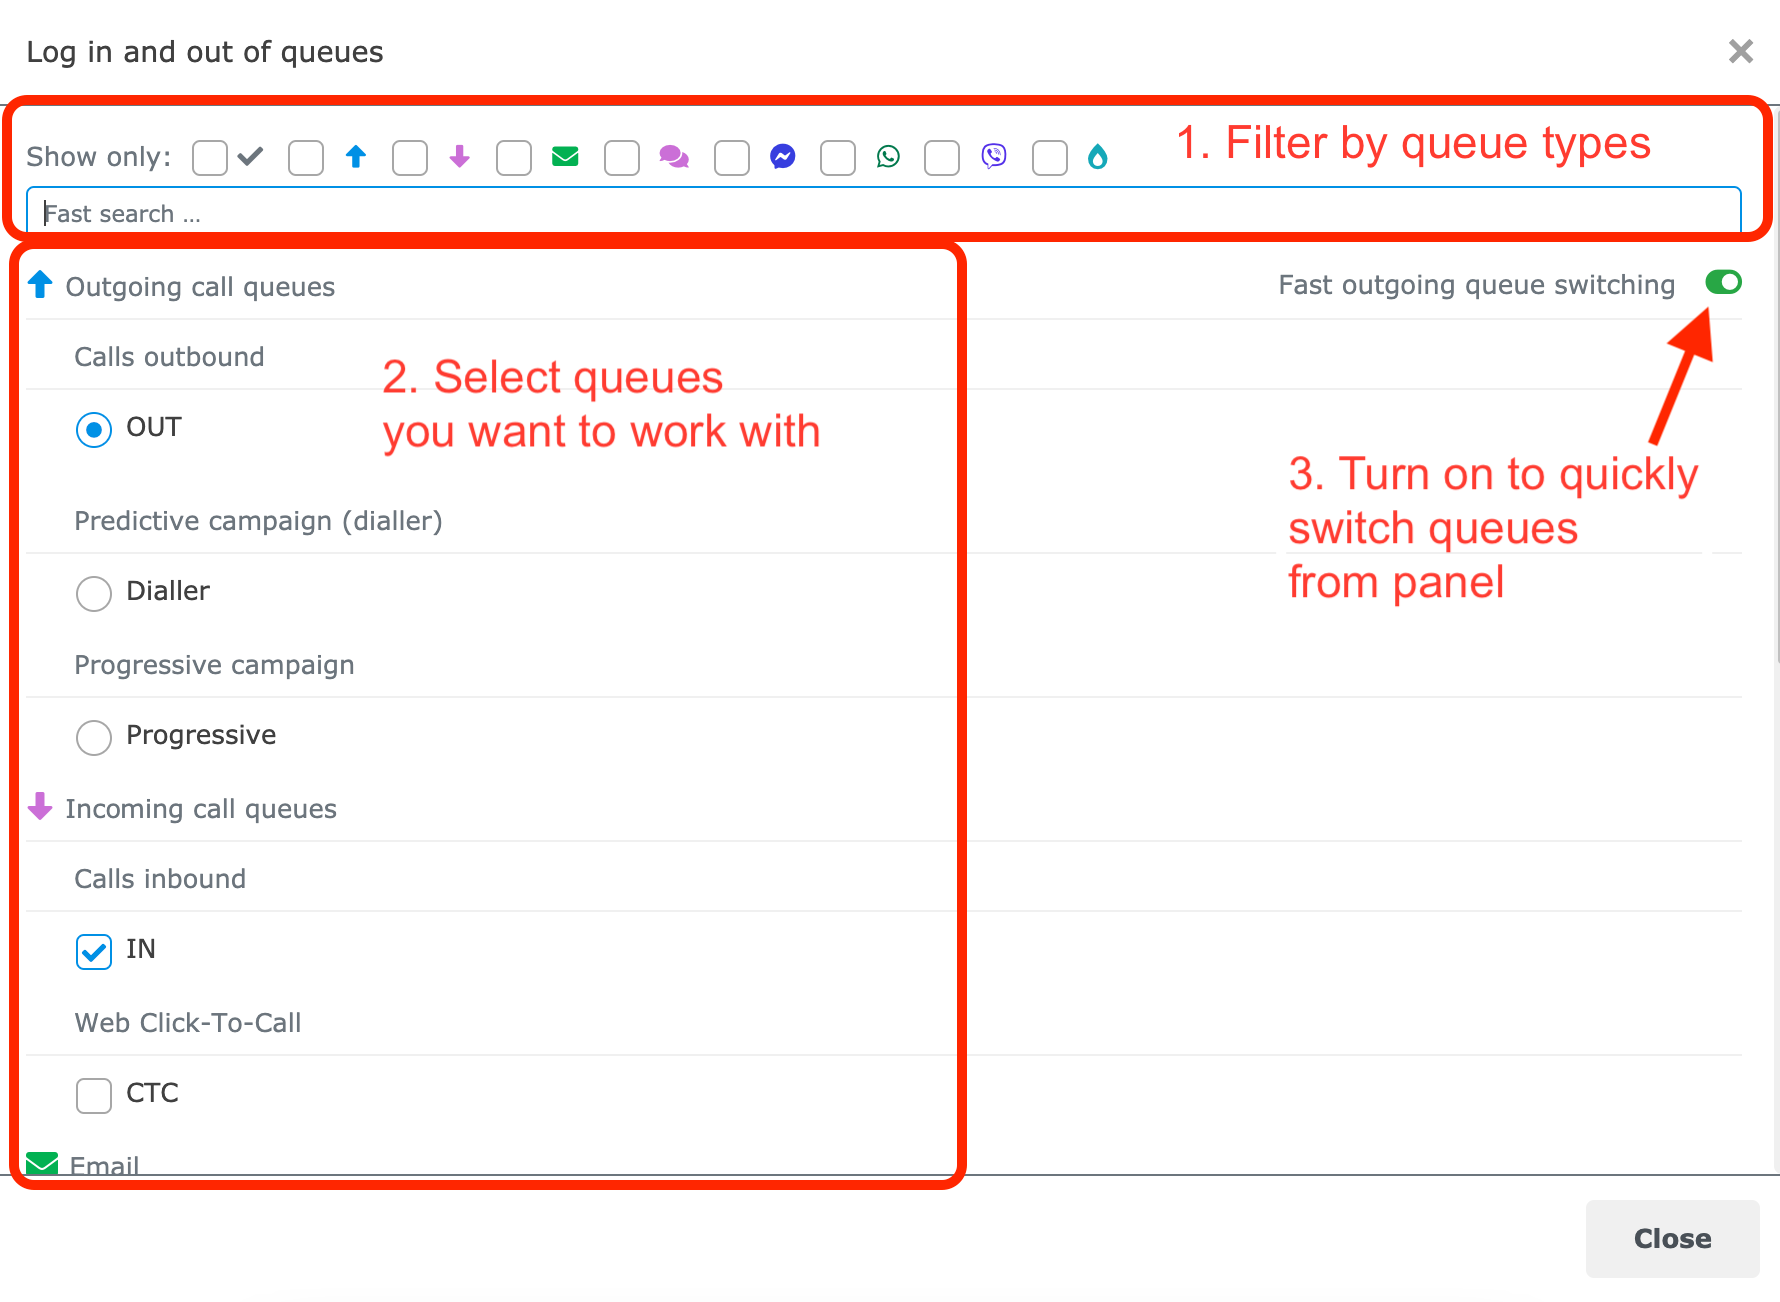
Select your queues:
Filter available queues or search for a specific queue.
Check the queues you want to log in to. You can log in to 1 outbound call queue only.
Turn this feature on if you need to frequently change your outgoing queue. An extra button will appear next to your Queue button. Click it to select your outgoing call queue.
After you have selected all desired queues, close the window.
Ready State – Static Panel Controls
Depending on whether or not you have selected a device, in the Ready state you can:
process non-call activities only – no need to select a device.
process all activities – a device has to be selected.
If you have successfully logged in to the Ready state, your left panel above the main menu will look like this:
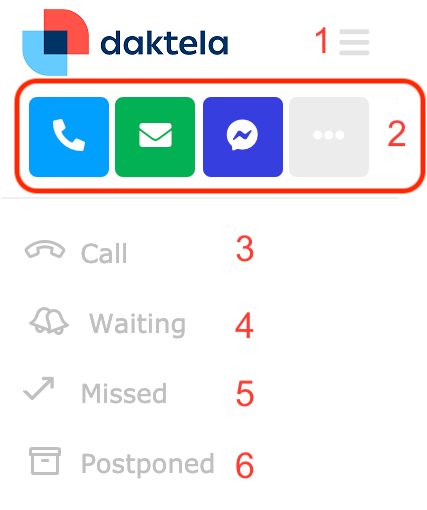
You will only see the buttons corresponding to your devices and queues. E.g. you will not see the email button if you do not have any available email queues.
Minimise the main menu.
Start a new outgoing activity. Hover over the dots to open all your options – outgoing call, new email, SMS message, Facebook/WhatsApp/Viber message/InstagramDM.
Controls for your open calls.
Open a summary of waiting activities. A badge displays their current number.
Open a summary of missed activities. A badge displays their current number.
Open a summary of postponed activities. A badge displays their current number.
Your top panel at the top of the screen will look like this:

Open a Fulltext Search window. See more information here.
Open a summary of your notifications. A badge displays their current unread number.
Quickly select your outgoing call queue. Displays the current outgoing call queue.
Log in or out of queues. Displays the total number of queues you are logged in to.
Log in or out of devices. Displays the total number of devices you are logged in to.
Click to open your WebRTC phone device.
Start or end a pause.
Open My Profile, My Settings or Log out of Daktela.
Answer Incoming Activities
Your incoming activity notifications appear in a black rectangle. You can move notifications around your screen by dragging them. You can also minimise them into Waiting Activities using the arrow in the bottom left corner.
You will also hear a notification sound.
The notification looks the same for all types of incoming activities.

The notification displays:
the contact's details. Click the Contact or Account name to view the details in the CRM module.
the name of the Queue and the amount of Time the customer has been in the queue.
the amount of time since you received the notification.
Accept or Reject the activity by clicking one of the corresponding buttons.
After you click Accept, the activity detail screen will open. See the section of the corresponding activity type for more details.
Pauses
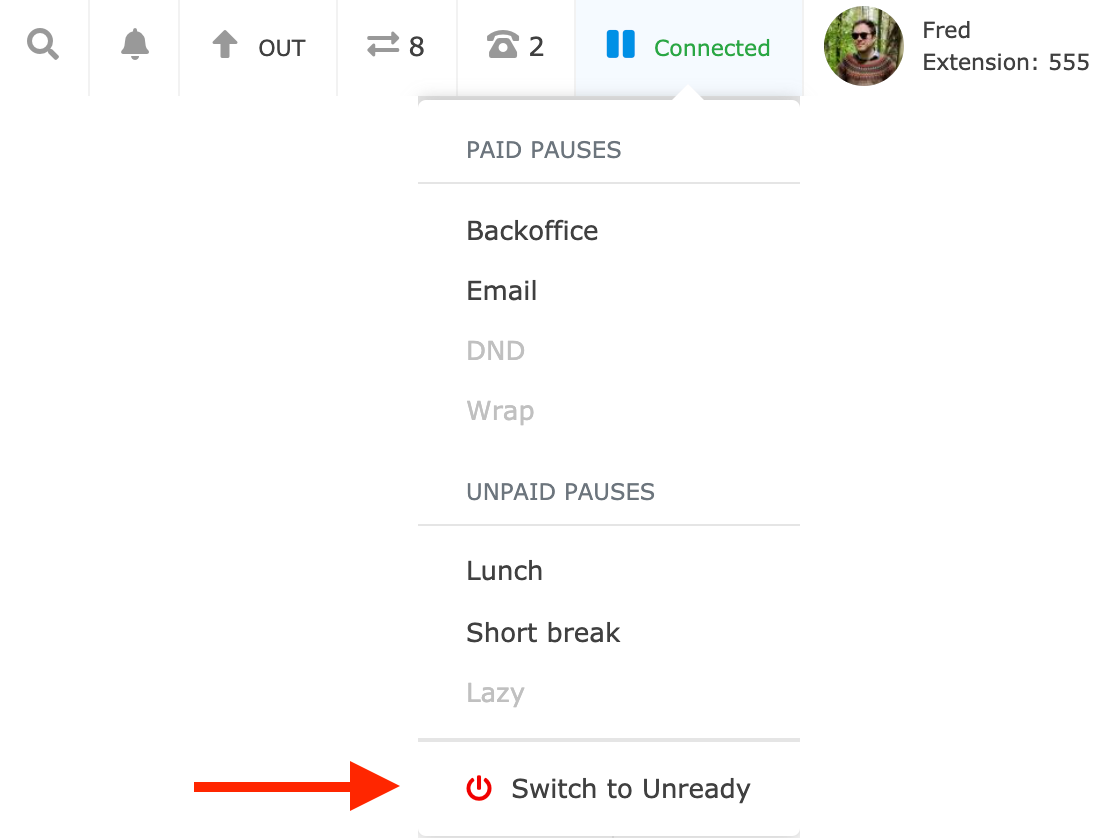
Click the Pause button to show the list of available pauses. Your list may be different to the one below.
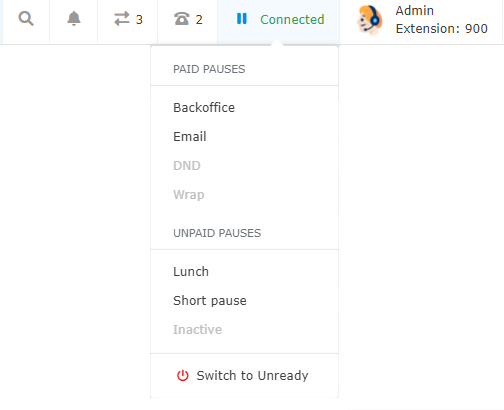
You can select a paid or unpaid pause. Click the pause name to start it.
Some pauses are turned on and off automatically – you can't choose them manually.
Once you select a pause, the pause button will turn red and display the name the pause and either:
its elapsed time, or
if the pause has a time limit, the time till the end of the pause.
If you exceed the length of a pause with a time limit, you may automatically be put on an unpaid pause.
Switch to Unready
Switch to Unready when you no longer want to process activities.
Click the Pause button in the top bar, then click Switch to Unready.
You must close all your open activities before you can switch to unready.
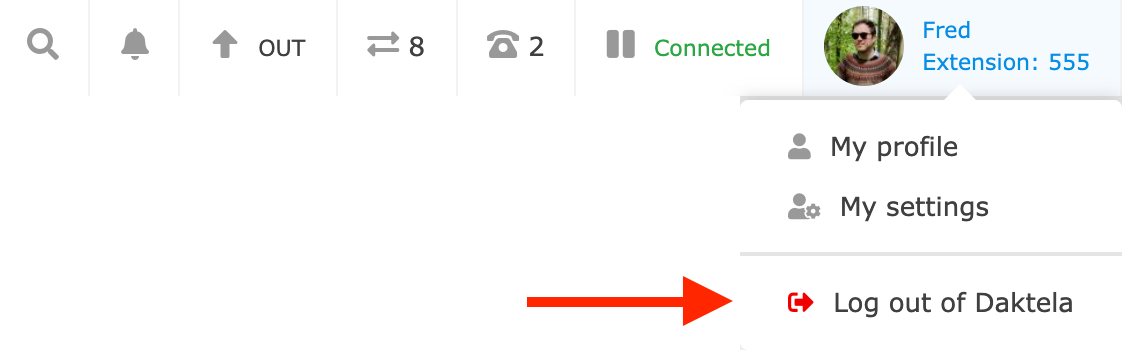
Log Out of Daktela
Click your profile picture or user name in the top right corner of the screen and click Log out of Daktela.
You must close all your open activities before you can log out.