Queues
Go to Manage → Queues to view a list of your queues, to edit existing and add new queues, to work with Agents' accesses to queues, set up Queue Relations and Widget Schemes and to enable/disable certain queue types.
Enable/disable queues
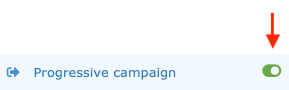
To quickly enable or disable a queue, use the toggle switch next to the queue name:
When disabled:
Call queues will stop dialling new calls. Already dialled calls will not be interrupted.
Email queues will stop receiving emails. Outgoing emails will not be impacted.
You can only enable and disable the following queue types:
Click-To-Call
Progressive campaign
Predictive campaign (dialler)
Robocaller
Email
Agents
Select which User rights can log in to the queue and how.
Click Change in the Agents column of the queue that you want to change.
Check (tick) the User rights that you want to have access to the queue.
Enable or disable Call pickup. Rights that have this option turned on can accept activities which are already ringing at another agent using Waiting Activities (except if Login type – None is selected).
Select a Priority for the User rights from the drop down list (0 – highest priority, 10 – lowest priority). This will determine in what order agents will receive activities in the queue depending on the Distribution Strategy.
Select the type of log in the User rights will have:
Login type | Description |
|---|---|
None | The user can't be active in the queue but can see the queue's activities, e.g. Missed calls or Statistics. |
Manual | The user can be active in the queue and can log in and out manually. If call pickup is enabled, agents can accept activities even if they are not logged in to the queue. |
Automatic | The user will be automatically activated in the queue after going ready and can log in and out manually. |
Fixed | The user will be automatically activated in the queue and can't log out manually. |
Each User rights can have a max. of 1 outgoing queue (outbound and campaign) with Automatic/Fixed login.
Click Save to return to the Queue list.
Form
Select which Forms should be used for campaign records.
Click Form in the Relations column to open a list of your Forms.
Select the record form you wish to use with this queue or create a new Record type and form. If you select multiple forms, they will automatically be rotated. See Record Types for more details.
Click Save to return to the Queue list.
In incoming and outgoing (non-campaign) call queues, don't forget to enable the form in the queue settings.
Widget scheme settings
Click Change in the Widget settings column to open the settings of the widgets available in an open activity created using the queue.
Drag fields from the Widgets list on the right hand side and drop them into your widget scheme on the left.
Click the Split button to set up multiple columns and adjust their width using the plus and minus signs.
Repeat the process to set up all desired widgets.
Click the Settings button in each Widget to open its settings – see Widget Overview below.
Save your Widget scheme settings. If you want to use the current settings in more queues, click Multiple save, then select the queues where you want to use the same widget scheme and click Save.
Widget overview
Widget | Description | Settings |
|---|---|---|
Phone | Basic phone widget with call transfer capabilities. Displays phone number and call duration. | Select if you want to automatically open the keypad. Can't be removed. |
Widget for editing emails. | Can't be removed. | |
SMS Chat | Basic widget for SMS Chat with transfer capabilities. | Can't be removed. |
Messenger | Basic widget for Facebook Messenger with transfer capabilities. | Can't be removed. |
Basic widget for WhatsApp with transfer capabilities. | Can't be removed. | |
Viber | Basic widget for Viber with transfer capabilities. | Can't be removed. |
Web Chat | Basic widget for Web Chat with transfer capabilities. | Can't be removed. |
Accounts | Displays the CRM account data of the current activity. If it doesn’t exist, users can create a new CRM account. Supports full-text search. | Select the custom fields that you want to display in the widget. |
Articles | Displays a list of articles from certain folders with the ability to read them. | Select the Knowledge Base folders that you want to display in the widget. |
Calendar | The Calendar widget displays your busy / free slots and scheduled activities (e.g. phone calls). You can create new reminders. | Set the height of the calendar widget. |
Co-browsing | Allows agents to video chat or view the customer's screen. | If you want to record your co-browsing calls, call our Support Team on +420 226 211 245 or email us at daktela@daktela.com. You can find your recordings in your Twilio account. |
Contacts | Displays the CRM contact card of the current activity. If it doesn’t exist, users can create a new CRM contact. Supports full-text search. | Select the custom fields that you want to display in the widget. |
Page in iFrame | The iFrame widget opens the given URL in an iFrame. You can pass many variables from the activity to an external application. The external page must use the HTTPS protocol and must not use the X-Frame-Options header for view blocking on third-party sites. | Enter the URL (including any variables) and widget height. In the Allow attribute, you can control the Feature Policy, allowing the iFrame to access fullscreen, microphone, camera and geolocation. Enter e.g. |
Record form | Basic widget for campaign records. Displays the details of the given campaign record, users can edit it, choose a call status and re-schedule if necessary. | |
Ticket details | Displays the latest tickets for the given CRM contact or CRM account. Users can easily assign the current activity to the existing ticket or create new one. | |
Transcripts | Call steering widget which displays the transcript and the confidence level. | |
AI agent (olny for webchats) | Displays the Daktela AI agent chatbot transcript and metadata | Drag and drop contexts to set their order. Deactivate a context to hide it from the widget in an open activity. Click the remove button to remove a context from the widget. Enter a URL to create a link from the context. You can use any of the contexts in the widget as placeholders in the format {{context}}. |