
Email queues handle communication between an email server and Daktela.
Email Queue Details
Fill out the Unique queue number, Title and Description (optional), then sign in to your email server and set up your queue.
Queue Number Auto-Suggestion
Daktela will automatically suggest the next available number based on previous numbers of the same queue type (including deleted ones).
For your email queue to send and receive email, you need to set up Incoming mail server and Outgoing mail SMTP server at the bottom of the queue settings.
Save your queue.
Don't forget to set up:
-
which Agents can use the queue.
-
the queue's relations.
-
the queue's widget scheme.
See Queues for instructions.
How to Authorise Gmail For Use With Daktela
How to Authorise Gmail For Use With Daktela
Incoming email
-
Under Incoming mail server, select the Google OAuth2 Protocol.
-
Enter your email address into the Name field.
-
Click the G button to authorise Gmail.
-
A new tab will open. Sign in to your Google Account.
-
Grant Daktela permission to access your Google Account. Make sure to check Read, compose and send emails from your Gmail account. Click Continue.
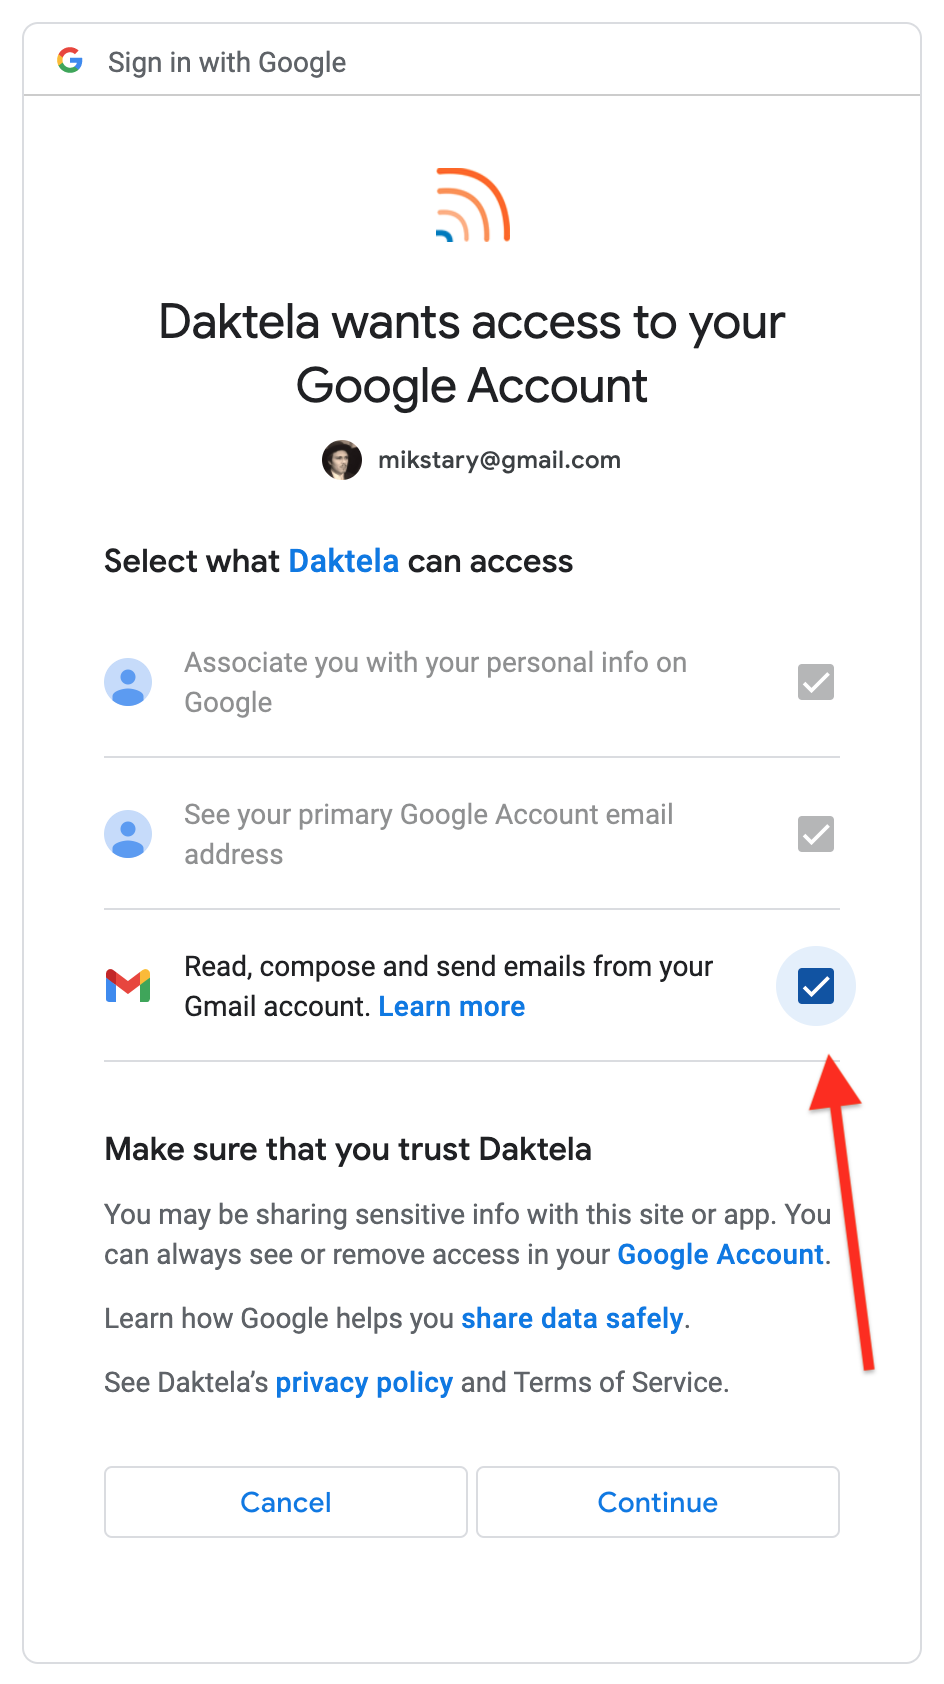
-
Outgoing email
Fill out the following under Outgoing mail SMTP server:
|
Field |
Description |
|---|---|
|
Server |
smtp.gmail.com |
|
Name |
Enter your email address. |
|
Port |
Select 465 (Encrypted connection SSL). |
How to Authorise Microsoft Office 365 For Use With Daktela
How to Authorise Microsoft Office 365 For Use With Daktela
Incoming email
-
In the Incoming mail server section, select AzureAD GraphAPI + SSO in the Protocol field.
-
Enter your email address into the Name field.
-
Click the MS window button to authorise your MS Account.
a. A new tab will open. Enter your email address and click Next to continue.%20-%20Copy.png?cb=0d3814be4f04c76dae4a0698c1545fd4)
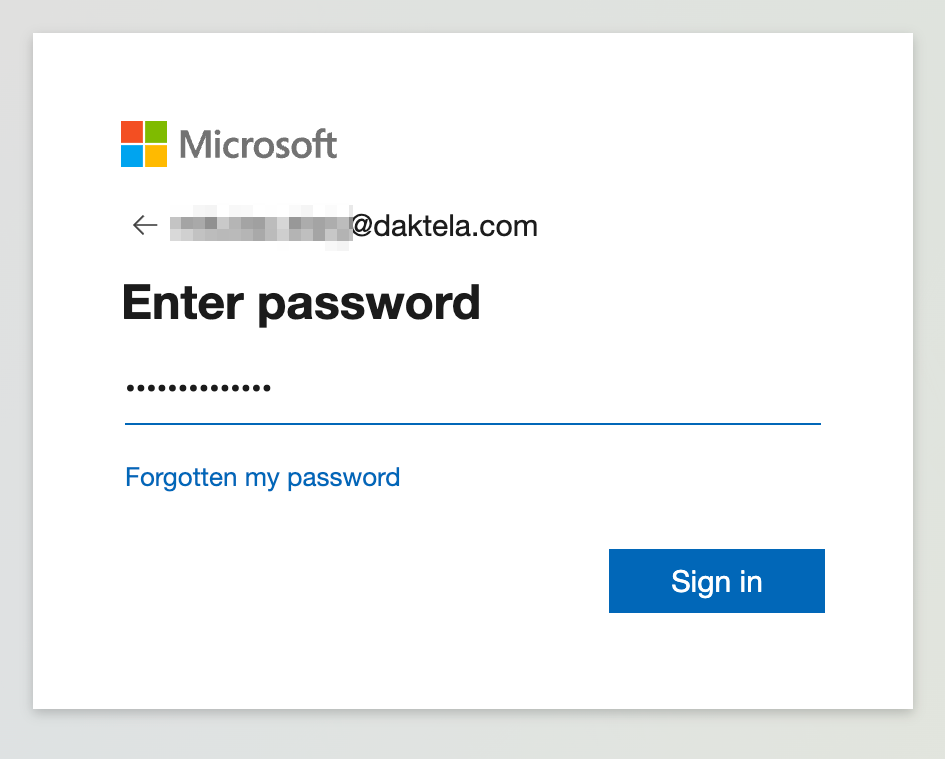
b. Enter your password and click Sign in.
c. Click Yes to continue.
%20-%20Copy.png?cb=8c327fd9b8da947f810eba58efac81f2)
d. Finish the authorisation by click the Yes button.
%20-%20Copy.png?cb=2b24dd48d73904be6197372ca998a24c)
-
After successful authorisation the MS Windows button will change colour to green.
Outgoing email
Fill out the fields in the Outgoing mail SMTP server section.
|
Field |
Description |
|---|---|
|
Server |
smtp.office365.com |
|
Name |
Enter you email address. |
|
Password |
Enter your password. For two-step verification you need to generate the App Password. Generate one and enter it here. |
|
Port |
587 |
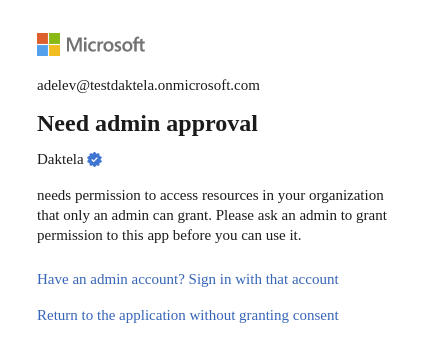
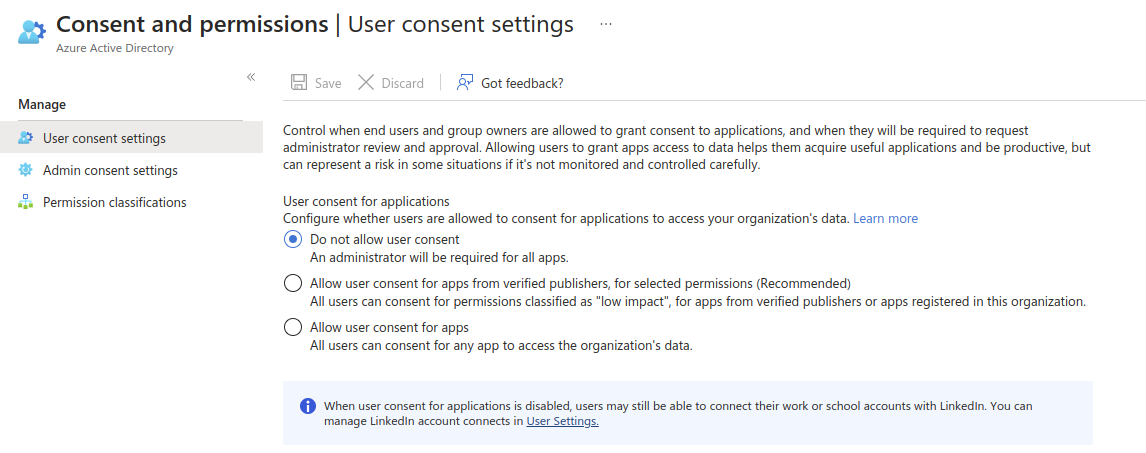
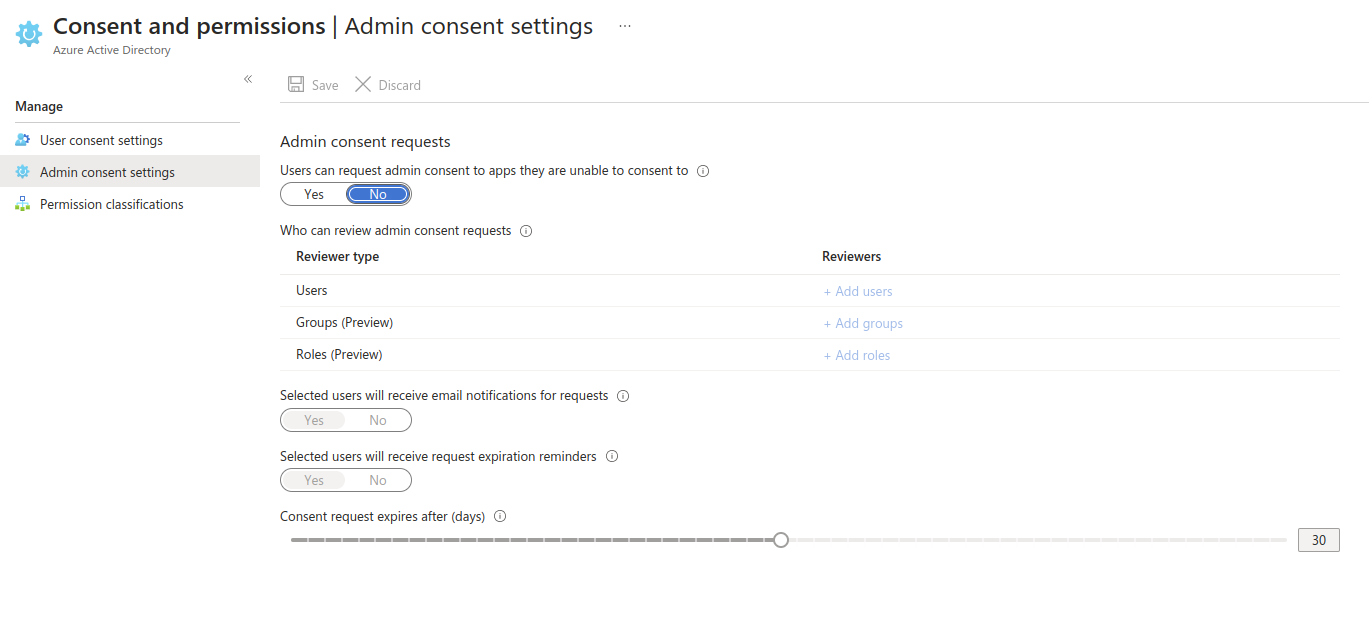
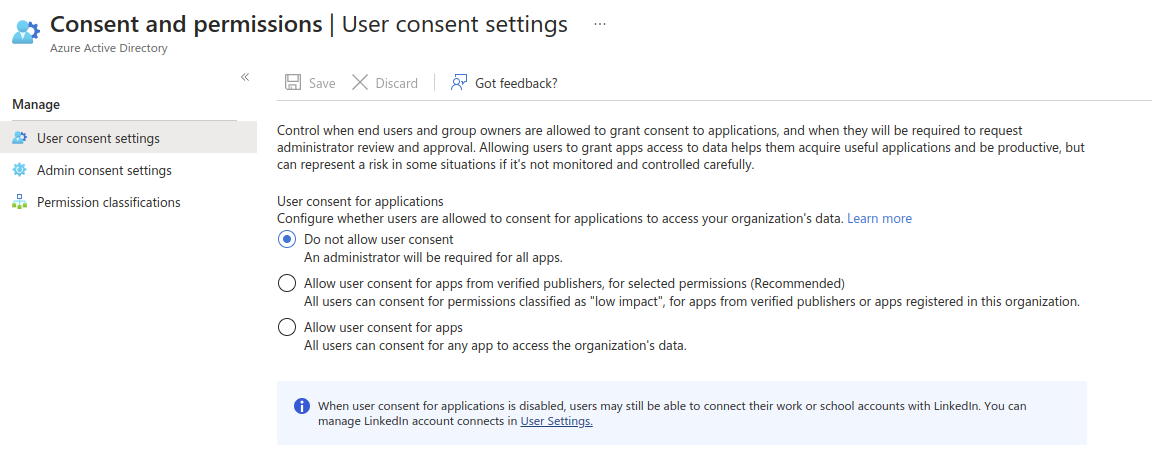
Azure Security Setting for Microsoft Office 365
Azure Security Setting for Microsoft Office 365
Scenario 01
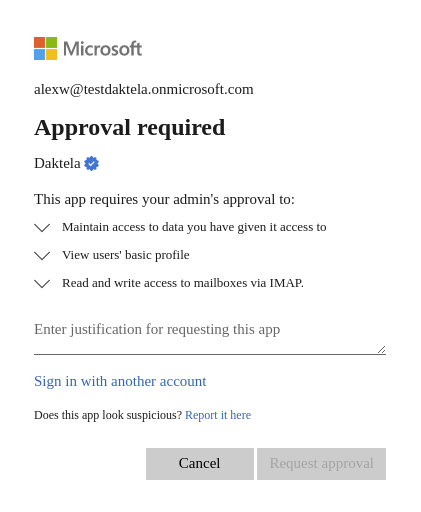
Screen 01
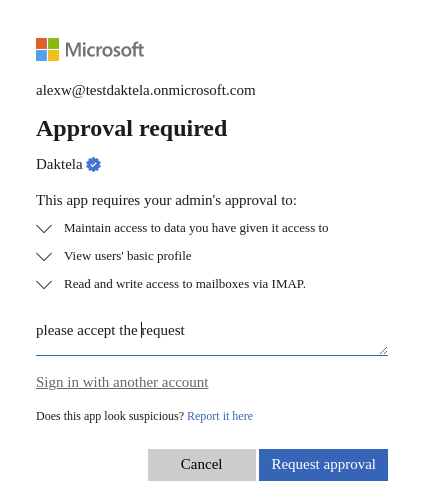
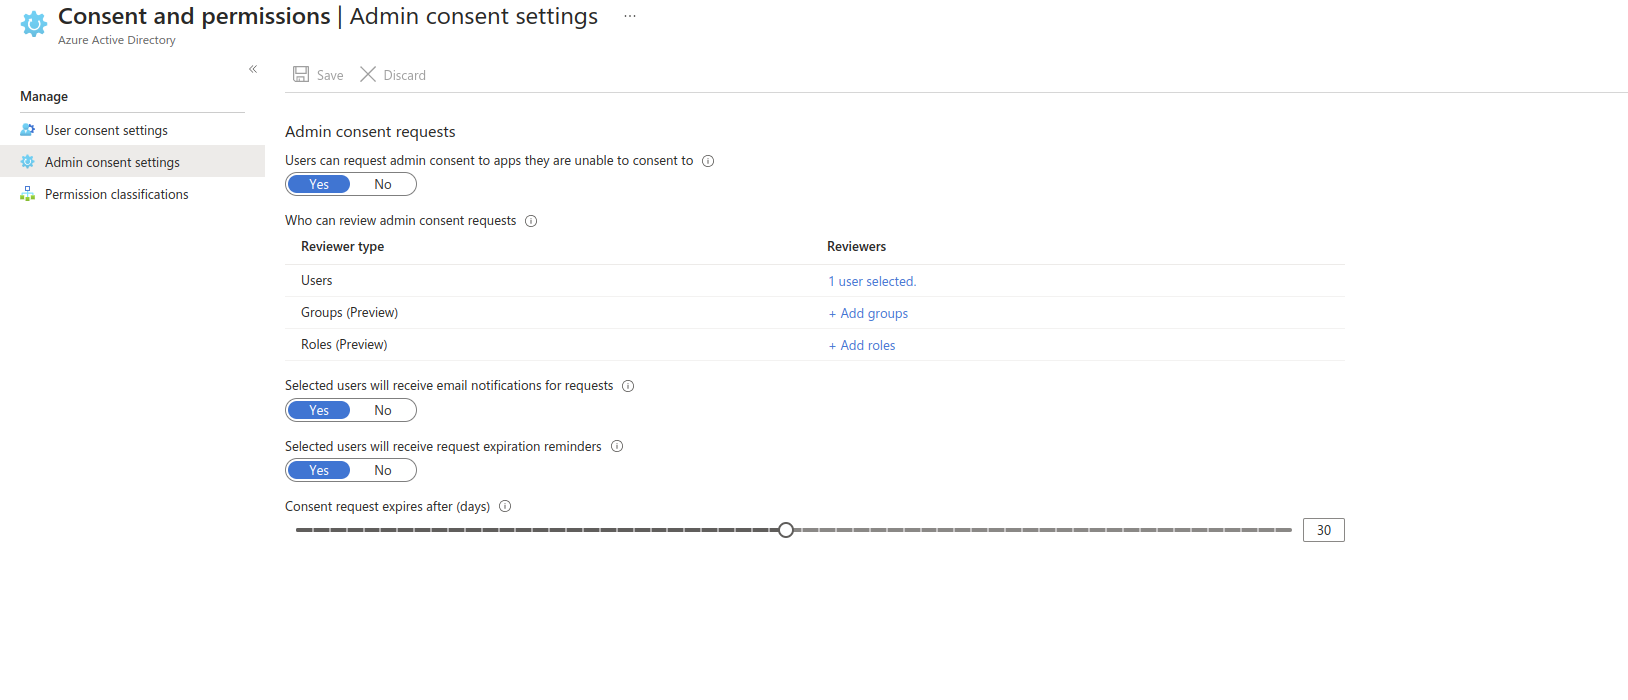
Screen 02
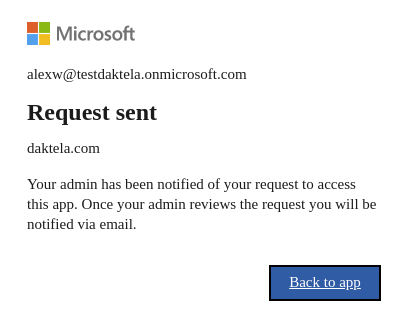
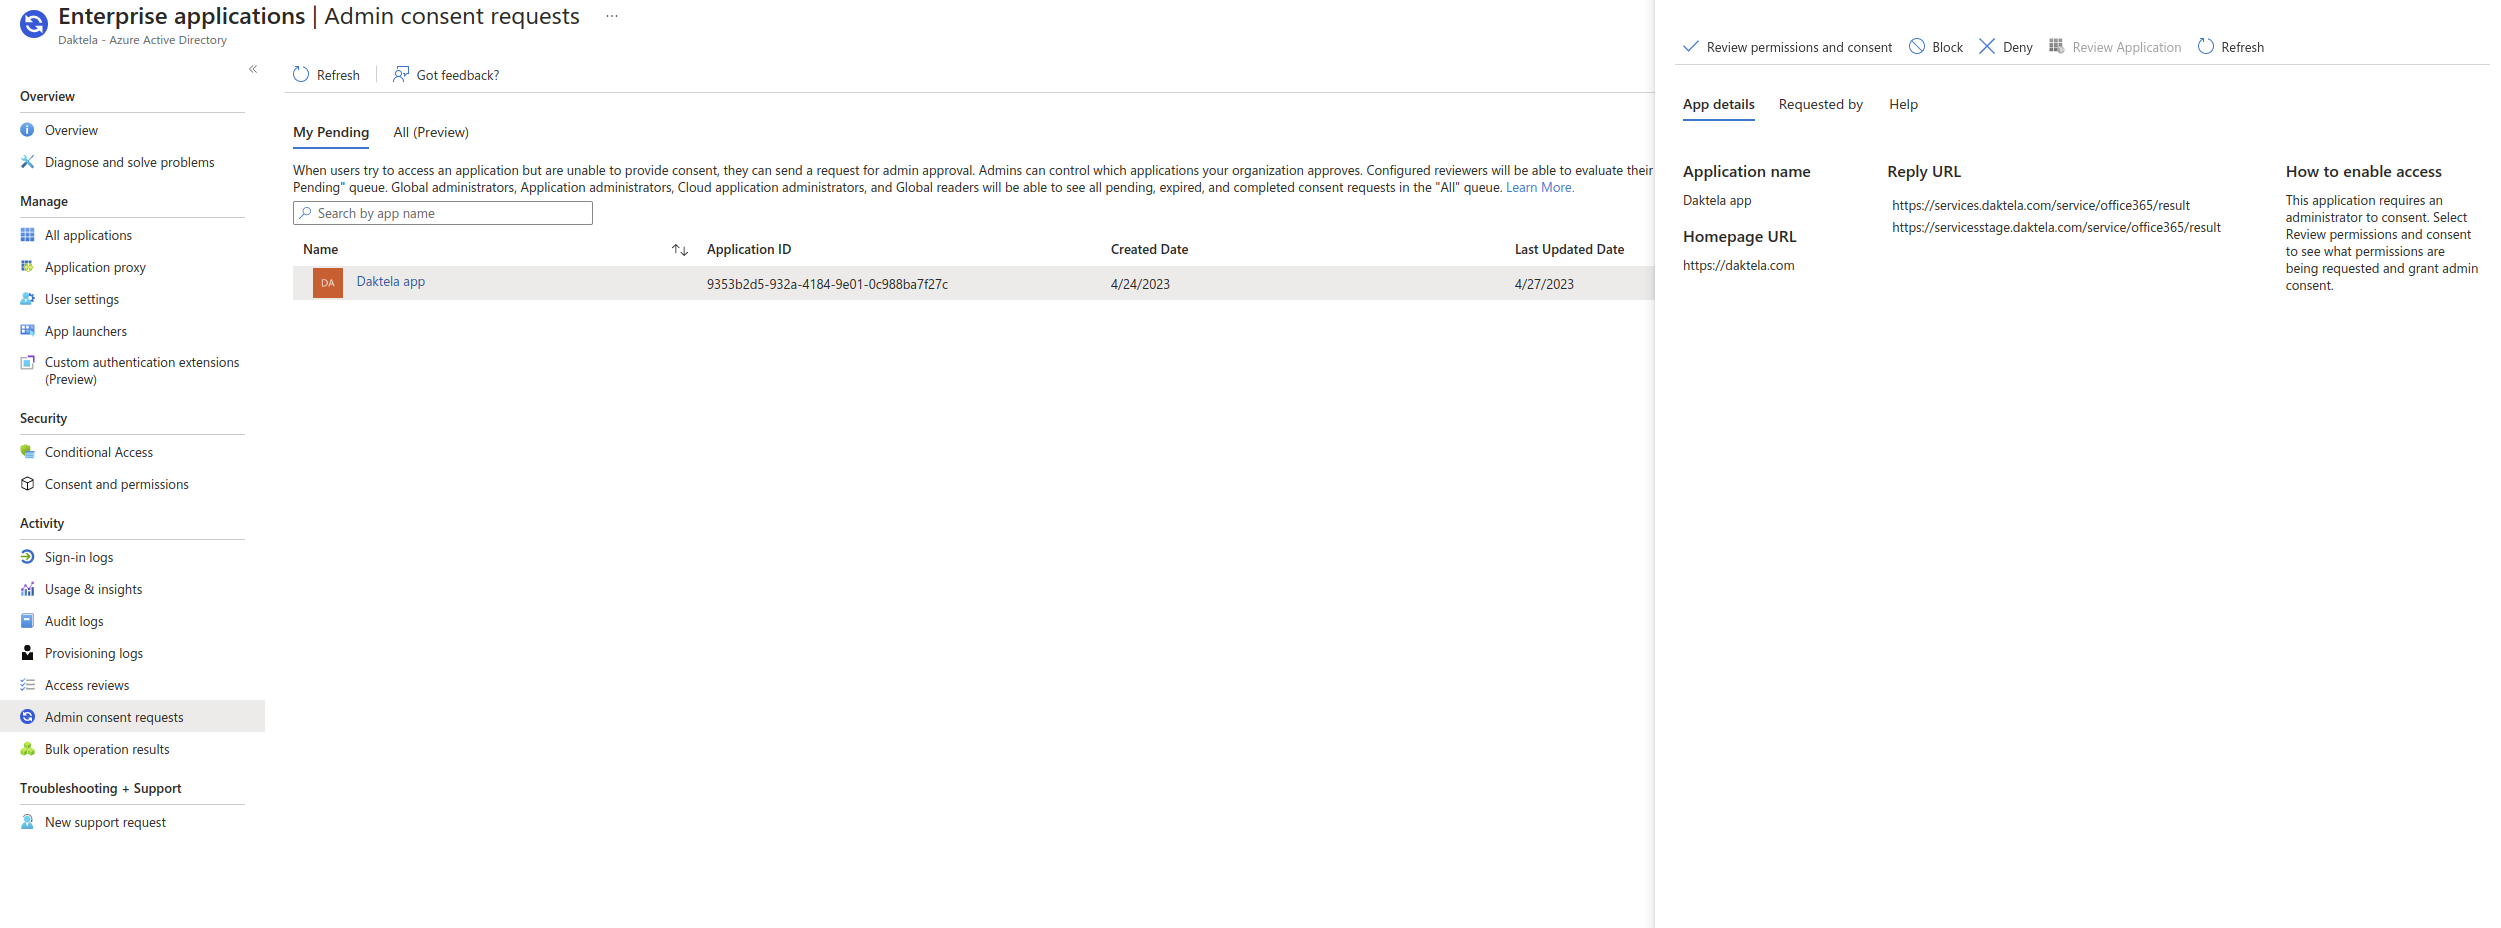
Screen 03
Scenario 2
Screen 01

screen 02
screen 03
screen 04
Screen 05
screen 06
screen 07
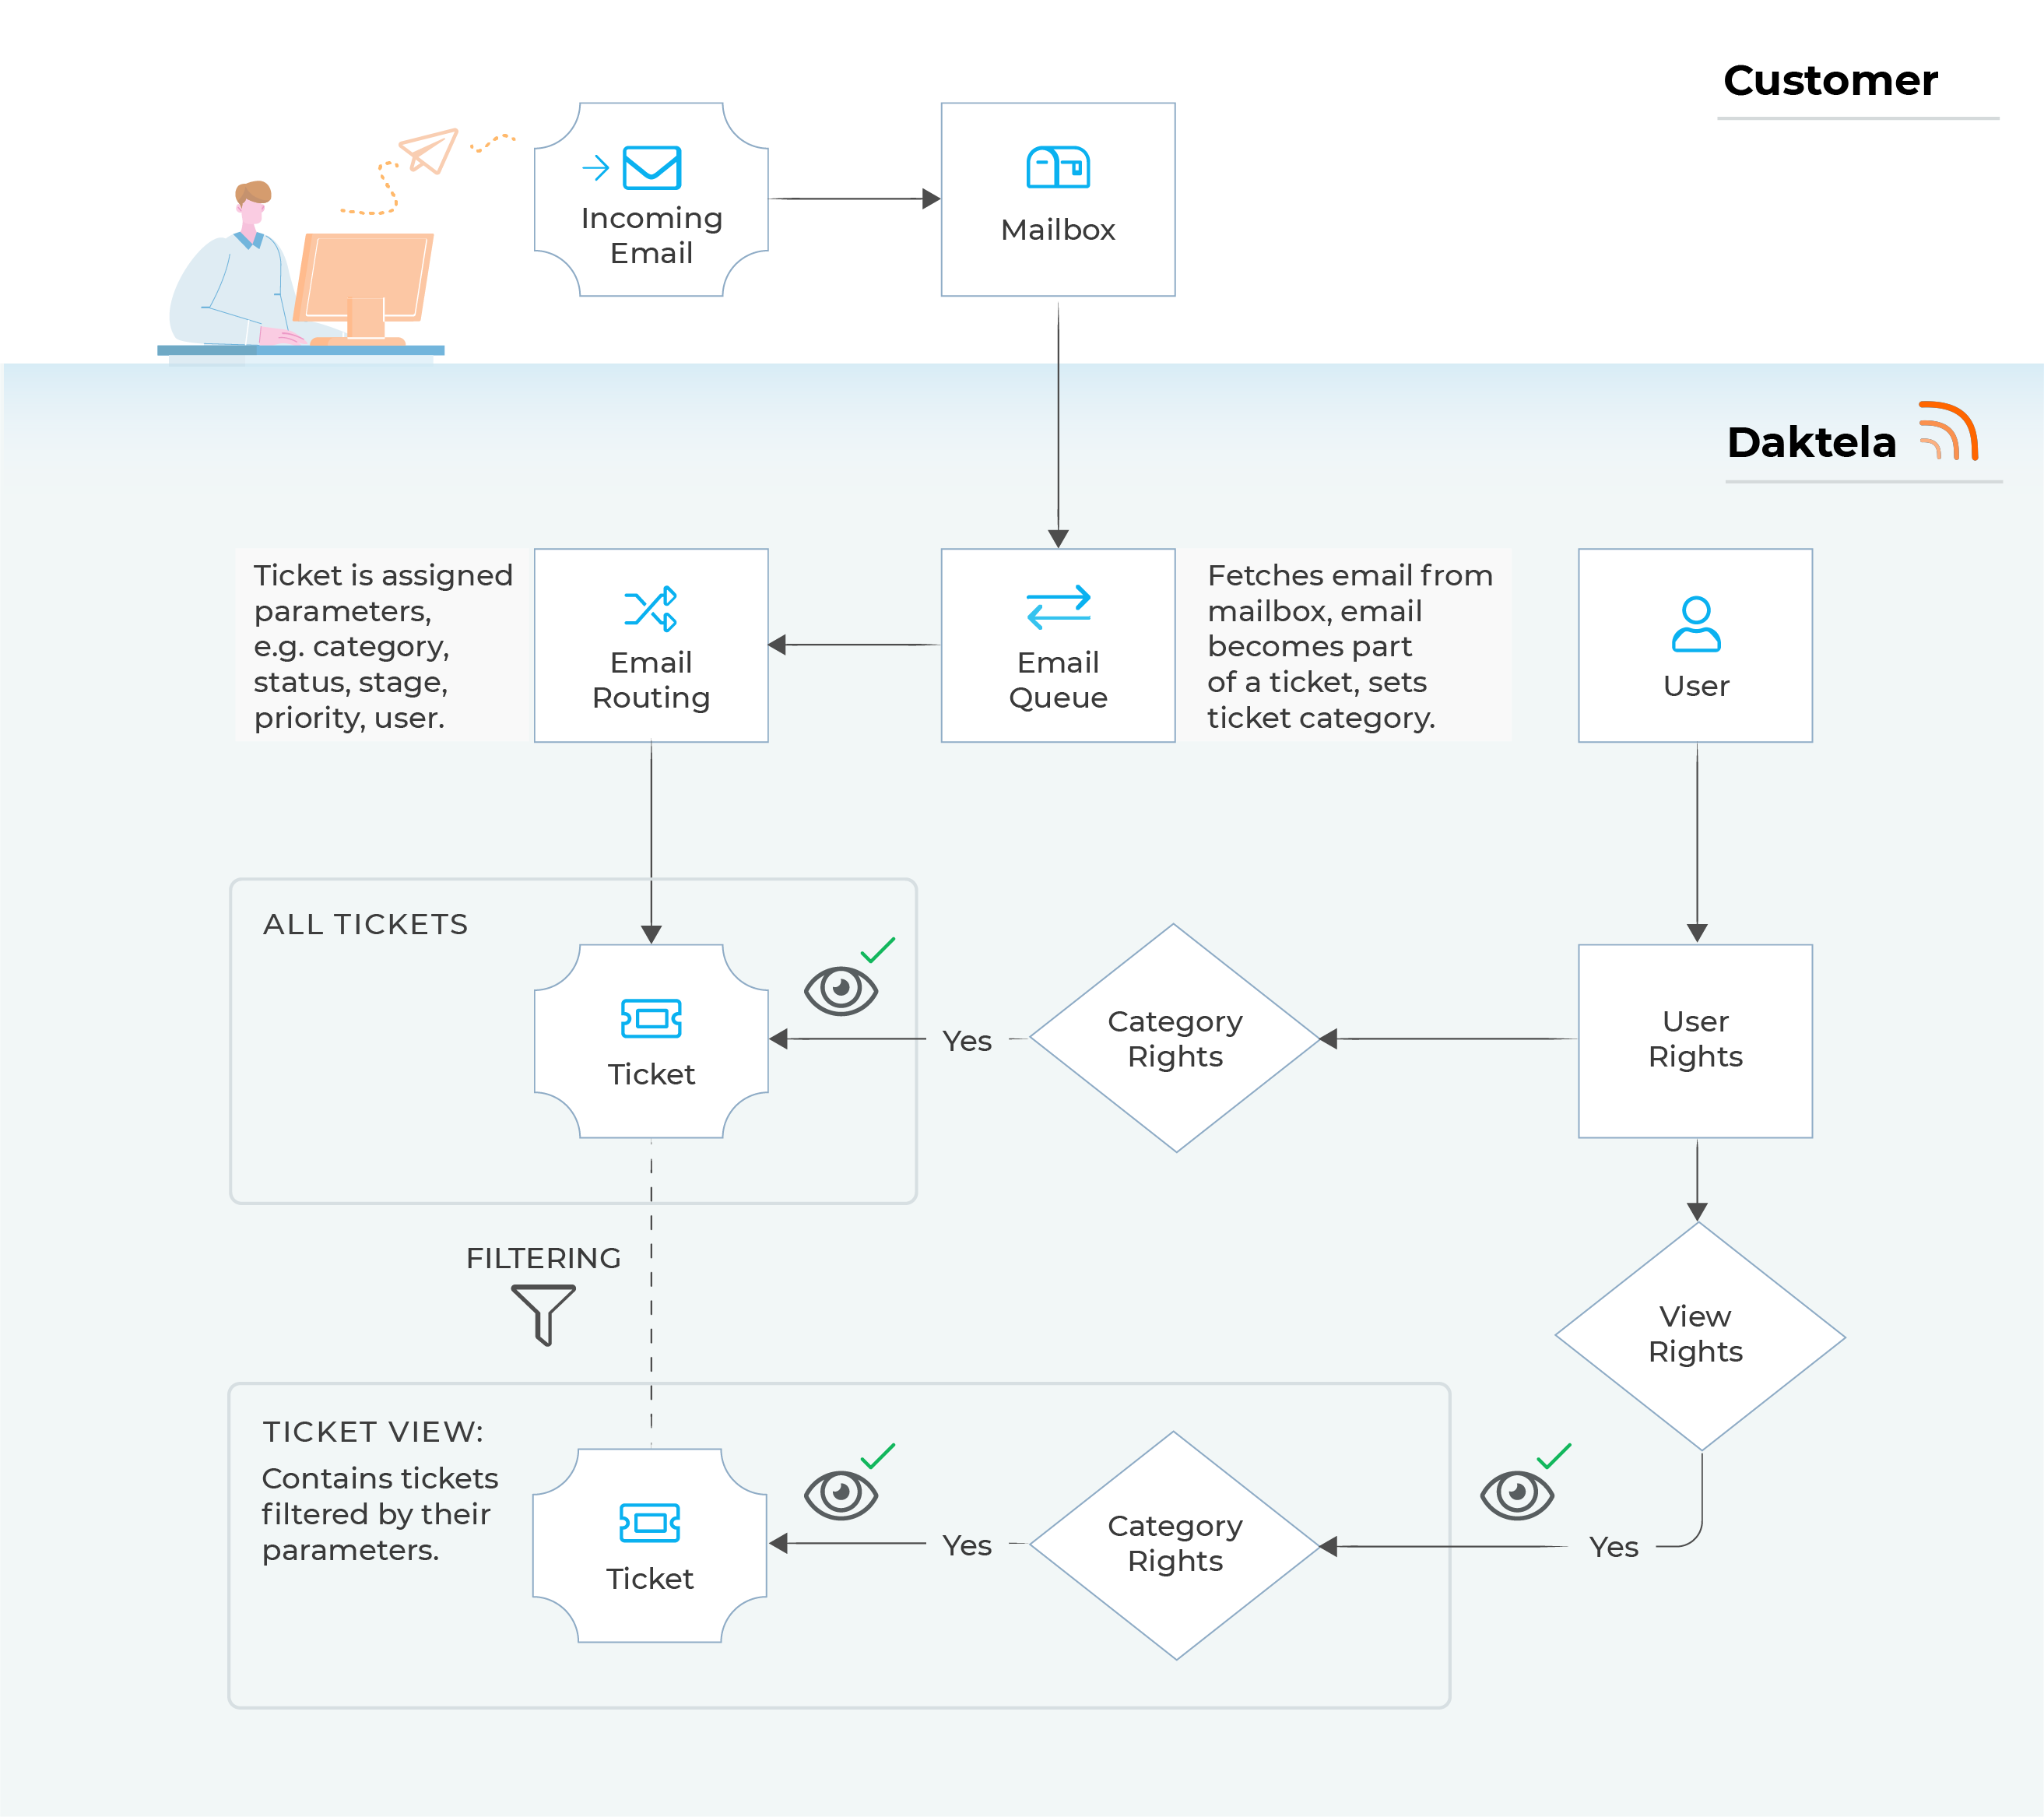
Incoming Email Process
Incoming Email Process
Incoming emails, email routings, tickets, categories, views – how are they all connected?
When you receive an email at an address that you have linked with Daktela, it will be routed according to the chart below:
|
Step |
Description |
|---|---|
|
Incoming email and Mailbox |
You receive an email on your mail server. |
|
Email queue |
The mail server is synchronised with Daktela via an email queue. The incoming email becomes a part of a ticket (a new ticket if it is a new email or an existing ticket it the email is a reply). The queue sets the ticket category. |
|
Email routing |
In email routings, you can define conditions under which further ticket parameters will be set. If none of the conditions are met, new tickets will only have a category set and the rest of the parameters will be blank. The category set in email routings will overwrite the category set in the email queue. |
|
Ticket in All Tickets |
The ticket is visible in All tickets to users that have rights to the ticket's category. |
|
Ticket in another Ticket View |
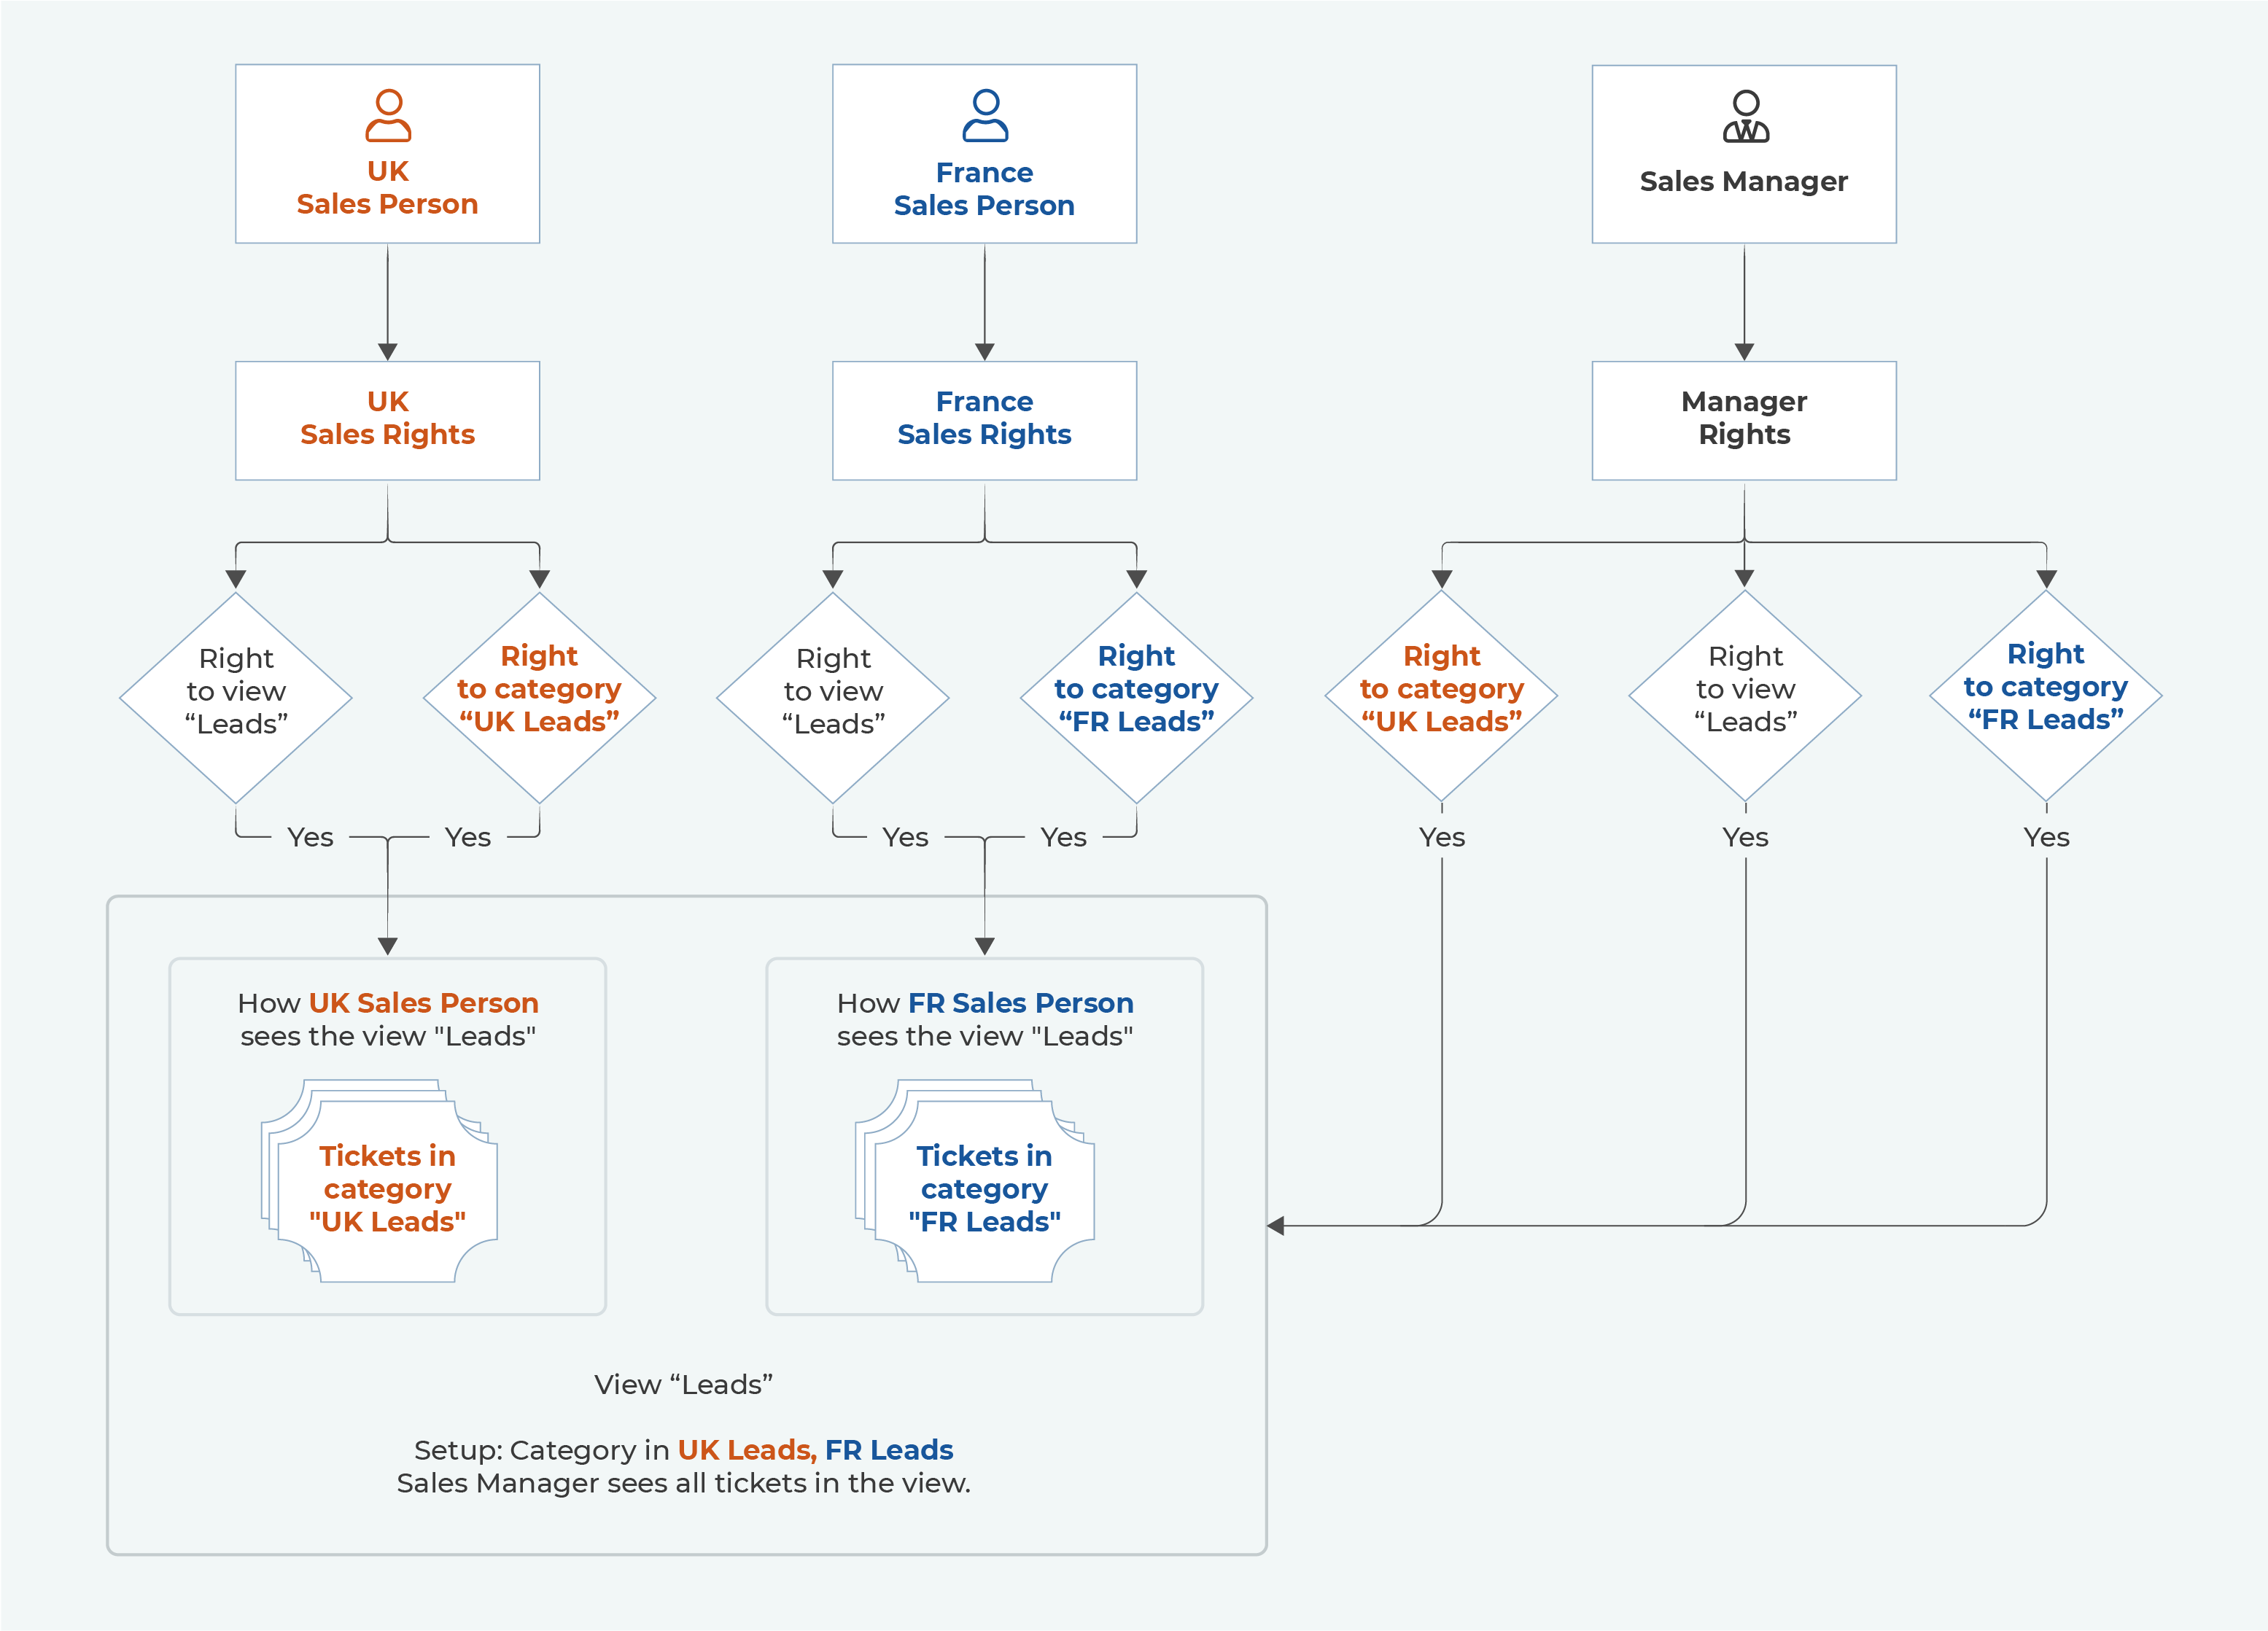
A ticket view is a predefined ticket filter that groups together tickets based on their parameters (either set up in the email queue or email routings, or selected manually in the ticket). Consequently, a single ticket can be part of several views – e.g. one based on its category, one based on its status and one based on its age since the last activity. A view is accessible to all users that have rights to it. However, to view the tickets contained in the view, they must still have rights to their categories. This means that different users can see different tickets in the same view. In the example below, there are 3 users that all have rights to the view "Leads".
|