Deploy Your Widget
Migrating from the Old Widget
This guide also covers migrating from the old chat window — migration-specific steps are called out separately.
- Open your chat instance and go to the Widget section in the sidebar.
-
Click Add to create a new widget.

-
In the Create new window dialog, give the widget a name under Configuration name, then click Add.
Migrating from the Old Widget
There's a Migrate settings from the old window checkbox here to copy over your existing configuration and design.

-
Configure the widget's settings to your needs.
Migrating from the Old Widget
Even after migrating your settings, it's worth going through the rest of the widget's functions and design settings — a lot has been added since the old widget, so the result can end up looking and working better than just the migrated defaults.
-
Publish it and add it to your website — see below.
Publishing your widget
Find your embed code in the CODE tab of the publish panel, next to the widget settings.
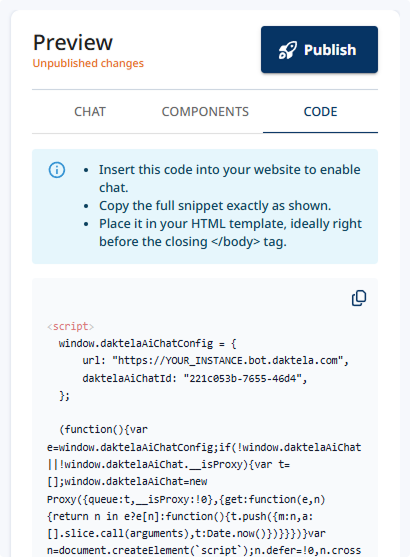
Copy it into your website.
Info
Changes you make to a widget's settings are only visible to you in the preview until you publish them. Use Save to keep your progress and test it in the preview panel on the right — nothing goes live until you click Publish. Once published, the changes apply wherever the widget's embed code is included.
What's Next?
Need to control the widget from your own page's scripts — open/close it, pass visitor identity, set context, register tools? See Widget API.