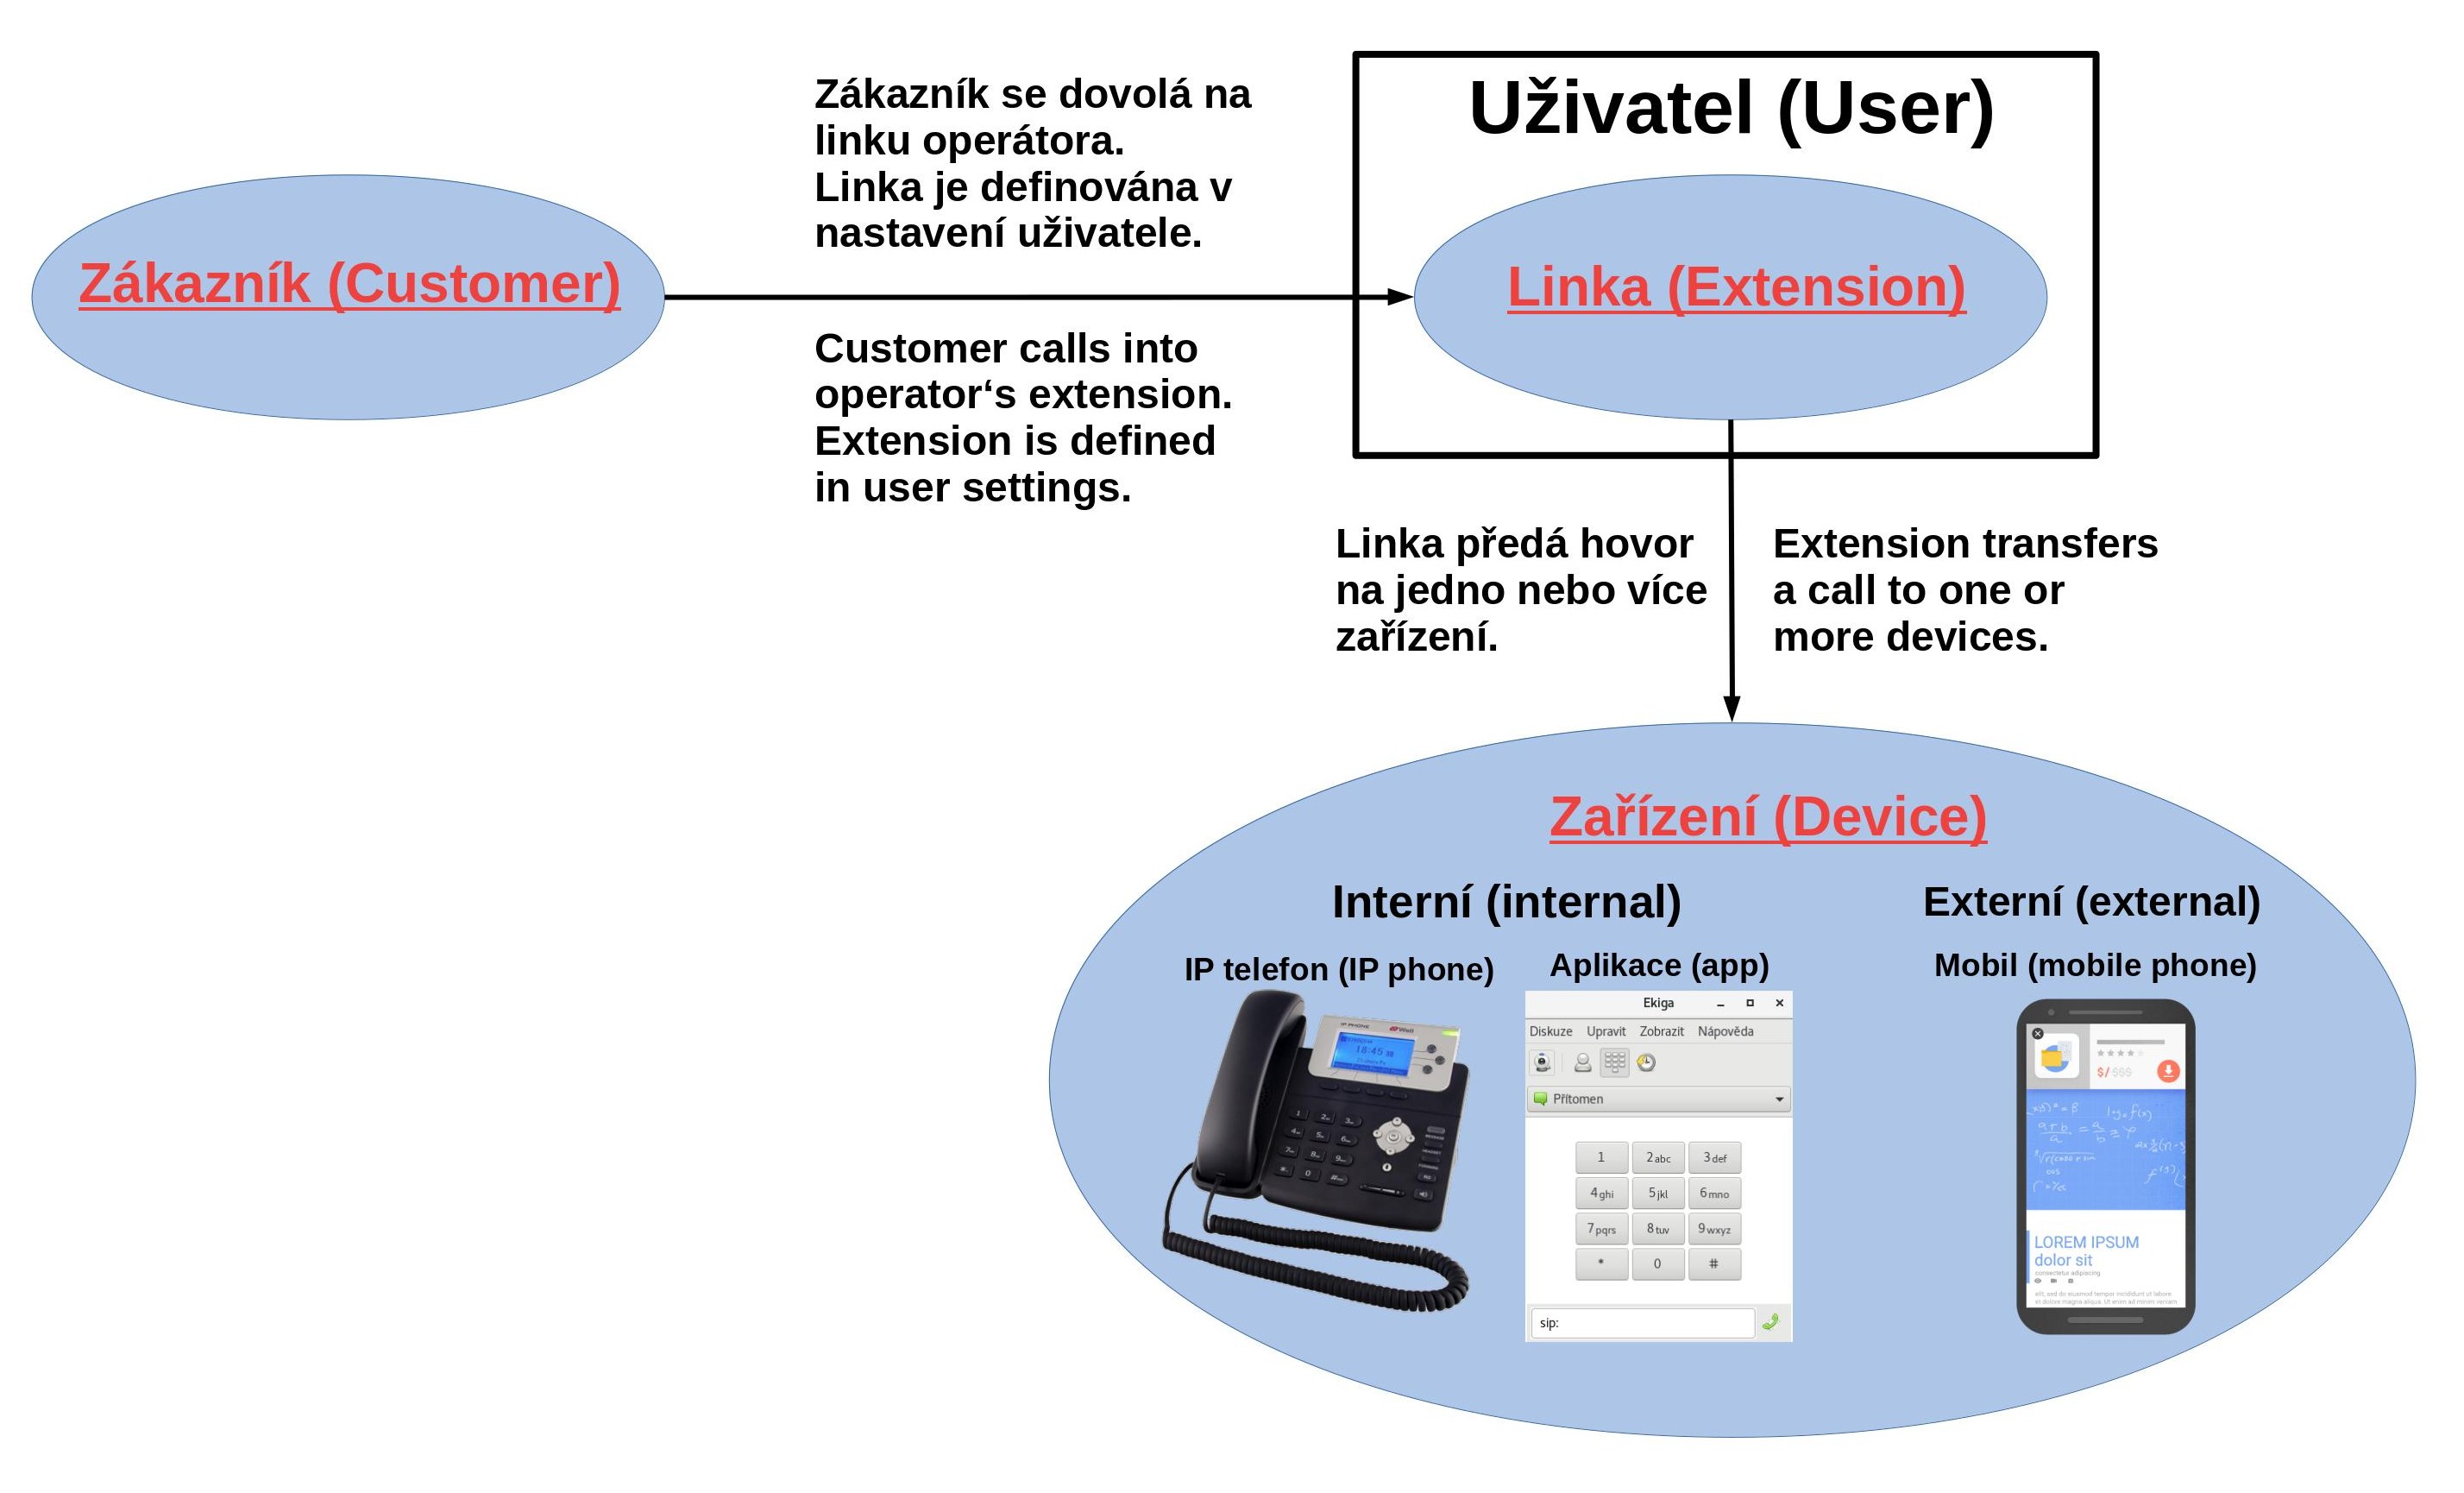
A SIP device is a device that handles a call to an extension. Go to Manage → Devices → SIP devices to manage your SIP devices.
What Is the Difference Between an Extension and a Device?
What Is the Difference Between an Extension and a Device?
An extension is a unique user identification in Daktela – a number that is mandatory for every user. It can only be changed when the user is logged out.
A device is what takes care of the technical side of calls. It can be an:
-
internal hardware SIP phone – e.g. Yealink phones, Gigaset.
-
internal software SIP phone – Daktela SW Phone, Zoiper 5, MicroSIP, WebRTC.
-
external phone – a mobile phone or other phone number.
A device is not reachable – only an extension is. The extension number can be the same as the device number. A user can have several devices assigned to them at once (e.g. a hardware SIP phone in the office and a mobile phone) and can specify how long a call will ring on each of them.

Example
When agent Jane's user profile is created, she receives the extension 510. Jane has several devices – a hardware SIP phone in the office (device 330), a software SIP phone in her laptop (device 821) and a mobile phone (external device 01444 123456). Her unique ID – her extension – is always 510. When her colleagues want to call Jane, they dial 510 and all her devices will ring either at once or in the sequence set up in her user detail.
If a user doesn't have a device permanently assigned, they can choose a device dynamically after logging in to Daktela.
Create a New SIP Device/Edit a SIP Device
Create a New SIP Device/Edit a SIP Device
To create a new SIP device from scratch, click Add new.
To use an existing SIP device as a template for your new one, click Clone in the Actions column.
To edit an existing SIP device, click its title.
The SIP device details will open
Device Details
Device Details
To use your SIP device, set up the following important settings.
|
Setting |
Description |
|---|---|
|
Device / Number |
Enter a number. The device number must be unique and cannot be changed later. You will need it to sign in to your hardware or software phone. |
|
Title |
Enter a title. The device's title will be displayed in your device list. |
|
Password |
Enter a password. You will need to enter the password in your hardware or software phone settings. |
|
Transport |
Select the protocol used to transmit communication. We recommend using the default udp protocol for most hardware and software phone use and wss protocol for WebRTC. |
|
Language |
Select the language of PBX voice messages. |
Optionally, you can also set up the following:
|
Setting |
Description |
|---|---|
|
Description |
Enter a description that will help you identify the device in future. |
|
Pickup member |
Enter the number (0 - 63) of the device group the can perform a General call pickup (default feature code *8) on this device. See the example on the line below. |
|
Pickup allow |
Enter the number (0 - 63) of the device group on which this device can perform a General call pickup (default feature code *8). Call pickup example
In the device details of devices SIP1 and SIP2, enter "15" into the Pickup member field. In the device details of device SIP3, enter "15" into the Pickup allow and the Pickup member fields The device SIP3 will be able to answer a call that is ringing on either of the devices SIP1 and SIP2. Devices SIP1 and SIP2 cannot answer calls ringing on any other devices. |
|
Voicemail enable |
Turn on to activate voicemail on the SIP device. You can access it using a feature code (the default code for accessing your own voicemail is *97. To access other devices' voicemail, use *98 ). Messages shorter than 3 seconds are ignored by the voicemail system. |
|
Voicemail PIN |
Enter a PIN to access your voicemail. |
|
Voicemail email |
Enter an email address where a notification email will be sent when you receive a new voicemail message. |
|
Voicemail attachment |
Turn on if you want to receive the voicemail recording as an attachment to the email notification. An email address must be set in Voicemail email. |
|
Delete voicemail after send |
Turn on if you want to automatically delete the voicemail message after an email with the recording is sent out. |
|
How long is voicemail stored |
Select for how long you want your voice mail to be stored. |
|
Available for dynamic selection |
Turn on to make this device available for agents to select dynamically from the navbar. Turn off to only make it possible to assign the device from Manage – Users – List of Users. |
|
SIP headers template |
Example: {"X-UserId": "${HASH(call,activity.user.id)}", "X-UserName": "${HASH(call,activity.user.name)}", "X-UserExtension": "${HASH(call,activity.user.extension)}", "X-Extension": "${HASH(call,activity.endpoint)}", "X-CallName": "${HASH(call,activity.call.name)}", "X-CallDid": "${HASH(call,activity.call.did)}", "X-CallClid": "${HASH(call,activity.call.clid)}", "X-CallOptions": "${HASH(call,activity.call.options)}", "X-ActivityName": "${HASH(call,activity.name)}", "X-QueueId": "${HASH(call,activity.queue.id)}", "X-QueueName": "${HASH(call,activity.queue.name)}"} . Parameters "QueueId" and "QueueName" are displayed if there is a queue. |
|
Username R-URI |
Leave empty - expert setting. |
Save your device.
Working With Devices
Working With Devices
When you have set up your device, you can:
-
assign it to a user in Manage → Users → List of users, or
-
select it dynamically in the static panel for the current user to use it.
