Templates
Go to Manage → Settings → Templates to set up texts that you use often, such as confirmations, signatures and NPS surveys. You can then insert them into your emails and chats.
Create a New Template/Edit a Template
Go to Manage → Settings → Templates to see a list of your templates. To create a new template from scratch, click Add new. To use an existing template as a template for your new one, click Clone in the Actions column. To edit an existing template , click its title. The template details will open. Fill out the Title and Description (optional). Select the template Type and follow the instructions below according to the type of Template you are setting up. If you select a user, the template will be visible only to them. Select None for the template to be visible to all users. The user can only be selected during template creation and can't be changed later.
Tip
From version 6.20, you can also create a template from a sent email. Simply open the ticket that contains your email, open the options drop down list and click Create template . The template details will open with the Email type selected – you can change the type of template if you wish – and the subject, body and attachments filled out.
SMS, Chat, Facebook Messenger, WhatsApp, Viber
- If you want the Template to be visible to one user only, select them under User . Select None for the template to be visible to all users.
- If you want to use external data in your Template, enter the URL where your data is stored under External URL . You can use variables the activity in your URL. The response must be in json format.
- Enter your Template in the Content field. You can use {{activity.property}} to insert a defined property of the current user (e.g. {{activity.title}}), or
to insert content from a child template. You can use the variable {{externalData}} to enter responses from your external URL. See How to use variables below. - Save your Template.
- Select the Queues where you want to use your Template. Load your Template using the Insert template button in an open activity.
Active WhatsApp Messages
To get started, all you need is a Meta-approved template, where you can set up variables such as names or order numbers. Daktela can then automatically populate them with data from your contact information, or you can enter them manually before you send out a new message.
To enable the sending of active WhatsApp messages, the following is needed:
- WhatsApp management must be migrated to Facebook, as it does not work via WhatsApp Business.
- You need to have a payment method specified on Facebook. https://faq.whatsapp.com/167763192262914
- You need to create a WhatsApp template in Business Manager. Create message templates for your WhatsApp Business account.
Warning
While creating a template, it is important to choose English as a template language.
After it is created, wait until Meta approves it.
Warning
The template must have Approved status in Meta before it can be used for sending messages in Daktela.

- Create a new WhatsApp Outgoing template in Daktela. Go to Manage - Settings - Templates and create a new template with WhatsApp outgoing type.
Create a new template in Daktela:
| Field | Description |
|---|---|
| WhatsApp template ID | Enter the ID of your Meta approved template. That is the unique title you chose during template creation.  |
| Title | Enter a title. |
| Description | Enter a description. |
| Type | Select the template type on WhatsApp outgoing. |
| User | If you select a user, the template will be visible only to them. Select None for the template to be visible to all users. The user can only be selected during template creation and can't be changed later. |
| Paste your WhatsApp approved template here: | Copy your WhatsApp approved template and paste it into the space below. You can then use the Daktela templating language to dynamically set up your variables so that they are pre-filled when you send an outgoing message. You can also leave your variables blank and fill them out when you send a message. Note: The template text entered here is only used so agents can preview the resulting message once they enter variables. Altering the template here will not affect the template in Meta or the message that is sent out. |
Working with Variables
To use dynamic values, insert Meta variables (e.g. {{1}}, {{2}}) directly into the template text in Meta when creating the template. Once you paste the template into Daktela, an input field for each variable will appear automatically.
Info
Variables must be used sequentially — {{1}}, {{2}}, {{3}}, and so on. You cannot skip a number in the sequence.
In each variable field in Daktela, you can enter either a static text value or a Daktela variable (e.g. {{contact.lastname}}), which will be filled in automatically when sending the message.
Warning
A template can only be used with a WhatsApp number (connector) that is connected to the same Meta Business Account (WABA) where the template was created. Using a template across different WABA accounts is not supported.
- Next, link the template to the desired queue in the relations.
- You can then send outgoing messages (using the approved template) to any number.
Warning
If a WhatsApp user has sent you a message — whether it’s a reply to one of your outbound messages, or they have initiated communication themselves — your application has a 24-hour window (sometimes called a “24-hour session”) to send that user messages that don’t need to use a template. When you send a message to a WhatsApp user outside a 24-hour session, the message must use an approved template .
Social Media
Info
This template type can only be used for the Social Media queue type (Facebook/Instagram post comments).
- If you want the Template to be visible to one user only, select them under User . Select None for the template to be visible to all users.
- If you want to use external data in your Template, enter the URL where your data is stored under External URL . You can use variables the activity in your URL. The response must be in json format.
- Enter your Template in the Content field. You can use {{activity.property}} to insert a defined property of the current user (e.g. {{activity.title}}), or
to insert content from a child template. You can use the variable {{externalData}} to enter responses from your external URL. See How to use variables below. - Save your Template.
- Select the Queues where you want to use your Template. Load your Template using the Insert template button in an open activity.
Email
- If you want the Template to be visible to one user only, select them under User . Select None for the template to be visible to all users.
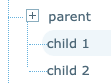
- Select a Parent template to make the template you are currently editing its Child template. Use parent templates to group together similar templates. When you add the current template to your email, the Parent template will be added too. You can't add Parent templates to your emails without adding Child templates – structure your template tree accordingly. By default, Child templates are added to the end of the Parent template. To place a Child template elsewhere in the Parent template, use the placeholder #child_template#.
 3. Enter the Subject of your email.
4. If you want to use external data in your Template, enter the URL where your data is stored under External URL . Enter the full URL even if you are loading data stored in Daktela. You can use variables from the activity in your URL. The response must be in json format.
5. Select your Template Format – Plain or Rich.
6. Enter your Template in the Content field. You can use {{activity.property}} or {{user.property}} to insert a defined property of the current activity or user (e.g. {{activity.title}}, {{user.title}}), or
3. Enter the Subject of your email.
4. If you want to use external data in your Template, enter the URL where your data is stored under External URL . Enter the full URL even if you are loading data stored in Daktela. You can use variables from the activity in your URL. The response must be in json format.
5. Select your Template Format – Plain or Rich.
6. Enter your Template in the Content field. You can use {{activity.property}} or {{user.property}} to insert a defined property of the current activity or user (e.g. {{activity.title}}, {{user.title}}), or
Email Template Tips
- Use the HTML
element to create the email structure.
- To create columns and more complex structures, use nested HTML tables.
- Use HTML element attributes such as cellpadding, valign and width to set table dimensions.
- Use inline CSS, avoid the